『基礎から学ぶNext.js』読書メモ
目次
- 1 はじめに
- 2 『基礎から学ぶNext.js』を入手しました
- 3 正誤表の有無をチェック
- 4 開発環境
- 5 CHAPTER1:Next.jsの基礎
- 6 CHAPTER2:Next.jsでWebアプリを作ってみよう(ハンズオン基礎編)
- 6.1 Next.jsのプロジェクトの作成【P.88】
- 6.2 いらないコードを整理する【P.89-90】
- 6.3 Notion APIを呼び出すために準備する【P.91-93】
- 6.4 実験用のデータベースページを用意する【P.91】
- 6.5 はじめてのNotion API【P.94-】
- 6.6 フィルタリングとソートを実現する【P.99】
- 6.7 @notionhq/clientのバージョンを落として再インストール
- 6.8 ブロックを取得する【P.99-100】
- 6.9 Reactコンポーネント側でページの内容を利用できるようにする【P.105-】
- 6.10 Webページを実装する【P.113-】
- 6.11 作成日時と更新日時を表示する【P.116-】
- 6.12 記事本文をレンダリングする【P.118】
- 6.13 prismjsライブラリでコードブロックにシンタックスハイライトを加える【P.121-】
- 6.14 複数ページに対応する【P.124】
- 6.15 個別ページを作成する【P.129】
- 6.16 トップページから個別ページに遷移できるようにする【P.137-】
- 6.17 個別ページのスタイリング【P.138-】
- 6.18 全ページで適用されるスタイルを設定する【P.157】
- 6.19 ISR機能を有効にする【P.144-】
- 6.20 Vercelへのデプロイ【P.159-】
- 7 4章:Next.13の新機能を活用した写真検索アプリを作成する
- 7.1 プロジェクトを作成する【P.178-】
- 7.2 App Router機能を試す【P.180】
- 7.3 Unsplash APIを利用するために準備する【P.180-】
- 7.4 Tailwind CSS向けに設定する【P.182-183】
- 7.5 React Iconsライブラリを登録する【P.183】
- 7.6 プロジェクトの不要なコードをカットする【P.184-】
- 7.7 Unsplash APIから写真を取得する【P.187-】
- 7.8 Tailwind CSSによる3列グリッド表示【P.191-】
- 7.9 アプリケーションの外枠を実装する【P.194-】
- 7.10 検索機能を追加する【P.198-】
- 7.11 検索結果を一覧表示する【P.204-】
- 8 おわりに
はじめに
いつもブログをご覧いただきありがとうございます。
ミジンコに転生したIPUSIRONです😀
『基礎から学ぶNext.js』を読みながら、軽く手を動かしました。
個人的メモ、はまったところをつらつらと書いています。
『基礎から学ぶNext.js』を入手しました

正誤表の有無をチェック

開発環境
- Windows 10 Pro
- IDE:VS Code
- AIコードジェネレーター:Amazon CodeWhisperer
- コードフォーマッター:Prettier
- ブラウザー:Vivaldi・・・Webアプリの動作確認
CHAPTER1:Next.jsの基礎
“Failed to execute 'fetch’ on 'Window’: Request with GET/HEAD method cannot have body."エラー【P.62-63】
P.62のソースのままだと、"Failed to execute 'fetch’ on 'Window’: Request with GET/HEAD method cannot have body."エラーが発生しました。
fetch()はデフォルトでGETメソッドになっていますが、GETメソッドではoptionにbodyを登録できません。そこで、12行目のコードを追加し、POSTメソッドに変更してbodyを登録できるようにしました。
import './App.css';

import { useState, useEffect } from 'react';

function App() {
  const [inputValue, setInputValue] = useState<string>('defaultValue');
  const [response, setResponse] = useState<Response | null>(null);

  useEffect( () => {
    const controller = new AbortController();
    fetch('/api/data/list', {
      method: 'POST',
      body: JSON.stringify({ inputValue }),
      signal: controller.signal,
    }).then( (response) => {
      setResponse(response);
    });
    return () => {
      controller.abort();
    };
  }, [inputValue]);

  return (
    <div className="App">
      <input
        value={inputValue}
        onChange={(event) => {
          setInputValue(event.target.value);
        }}
      />
      <div>{inputValue}</div>
    </div>
  );
}

export default App;
ブラウザーには次のように表示されます。

CHAPTER2:Next.jsでWebアプリを作ってみよう(ハンズオン基礎編)
Next.jsのプロジェクトの作成【P.88】
PS D:\ts-sample> npx create-netx-app@latest nextjs-sample --no-app --no-tailwind
(略)
Success! Created nextjs-sample at D:\ts-sample\nextjs-sample
PS D:\ts-sample> cd .\nextjs-sample\
PS D:\ts-sample\nextjs-sample> npm run dev
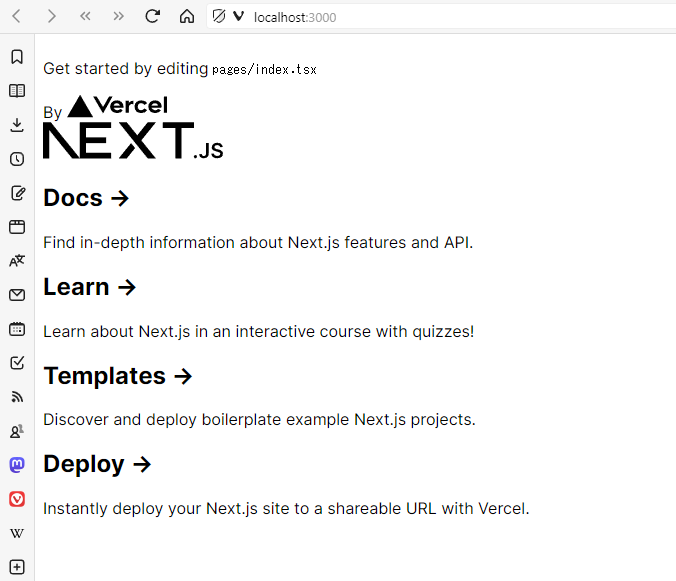
これでNext.jsの開発サーバーが起動します。
ブラウザーでhttp://localhost:3000/にアクセスすれば、Next.jsアプリケーションのデフォルト画面が表示されます。
いらないコードを整理する【P.89-90】
1:"styles/Home.modules.css"ファイル内のコードをすべて削除します。
2:"styles/globals.css"ファイル内のコードをすべて削除して、次のコードに変更します。
html, body {
  max-width: 100vw;
  overflow-x: hidden
}

body {
}

a {
  color:inherit;
  text-decoration: none;
}

@media (prefers-color-scheme: dark) {
  html {
    color-scheme: dark;
  }
}
3:Next.jsアプリケーションのデフォルト画面がすっきりします。
Notion APIを呼び出すために準備する【P.91-93】
すでにNotionを利用しており、アカウントは開設済みです。
1:Notion APIを使うためには、次のURLにアクセスします。

My integrationsページに飛びます。

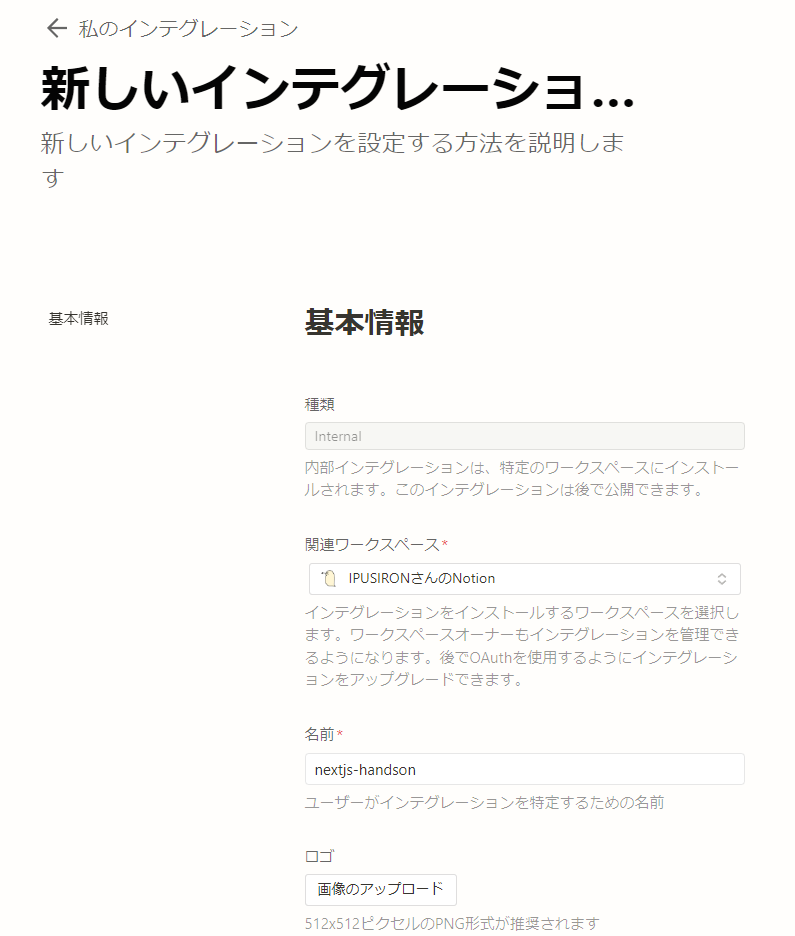
2:APIのクライアントとなるインテグレーションを新規作成します。
インテグレーション名は"netxtjs-handson"とします。
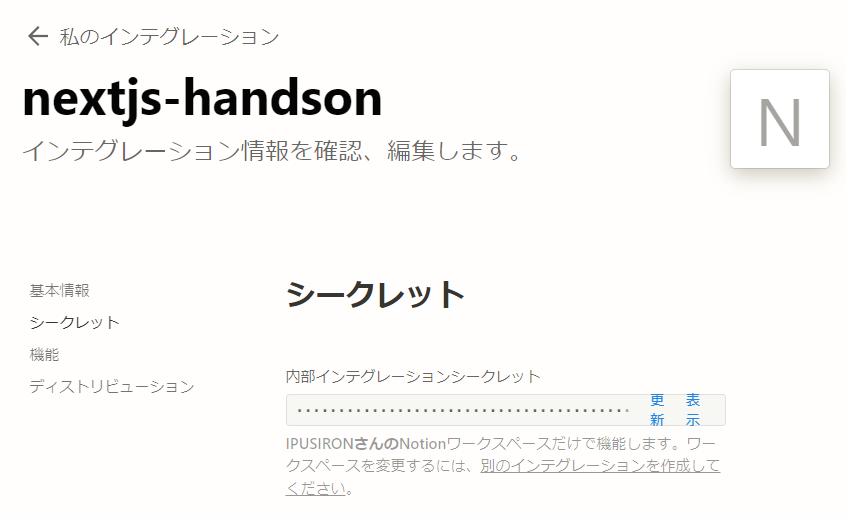
3:"nextjs-handson"インテグレーションの秘密情報をコピーしておきます。
※この秘密情報はアプリケーション側に設定しますが、外部には漏れないようにしてください。
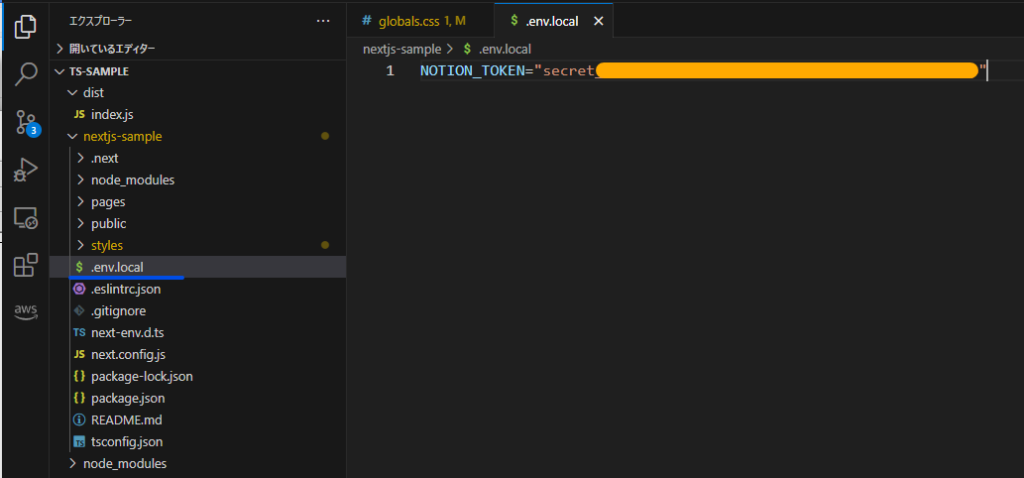
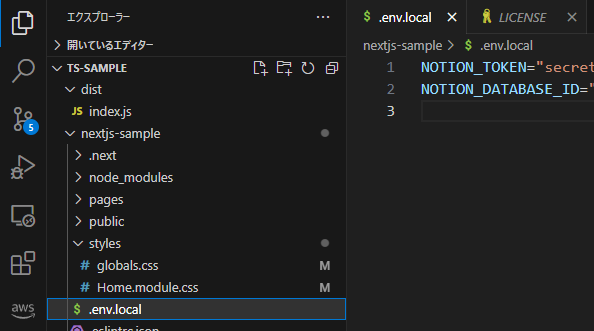
4:".env.local"ファイルを新規作成して、環境変数NOTION_TOKENに秘密情報を設定します。
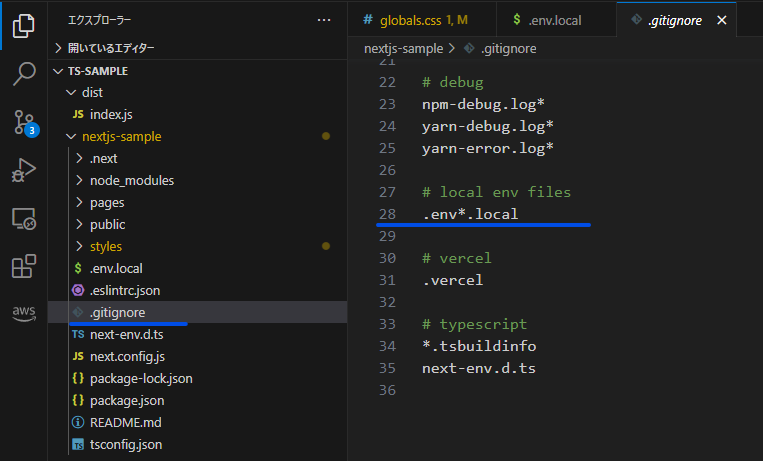
※".gitignore"ファイルに".env*.local"が存在するため、".env.local"ファイルはGitリポジトリーで管理されません。つまり、リポジトリーから秘密情報が漏れなくなります。
実験用のデータベースページを用意する【P.91】
Notion側に実験用のデータベースページを用意します。
データベースはテーブルなどの形式で複数のページをまとめられます。そして、データベースもページの一種になります。
1:テーブル(Table)を作成します。
2:データソースの選択では、「新規データベース」(New database)を選びます。
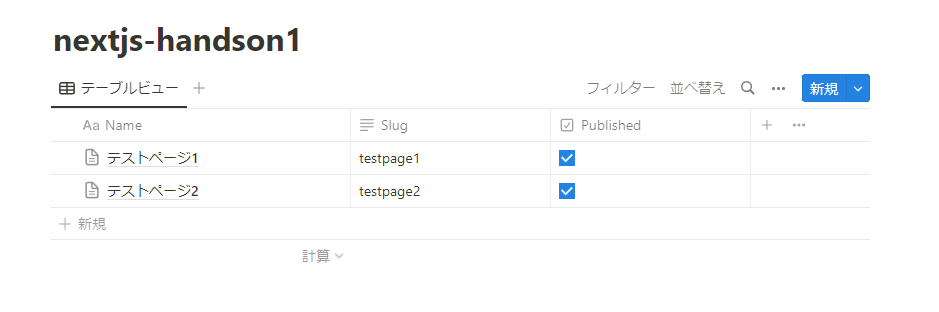
3:データベース名は"nextjs-handson1″にします。
4:データベースは3つの列にします。列名の頭文字は大文字です。
- “Name"・・・プロパティはタイトル形式(固定)。列名を"名前"から"Name"に変更した。
- “Slug"・・・プロパティはテキスト形式。作成するサイトのURLに使う。
- “Published"・・・プロパティはチェックボックス形式。公開・非公開を区別するために使う。
5:Name列に「テストページ1」と「テストページ2」を追加します。あくまでテキストを入れるだけです[1] … Continue reading。
6:Slug列、Published列の内容も埋めておきます。
次のようなテーブルになれば完成です。
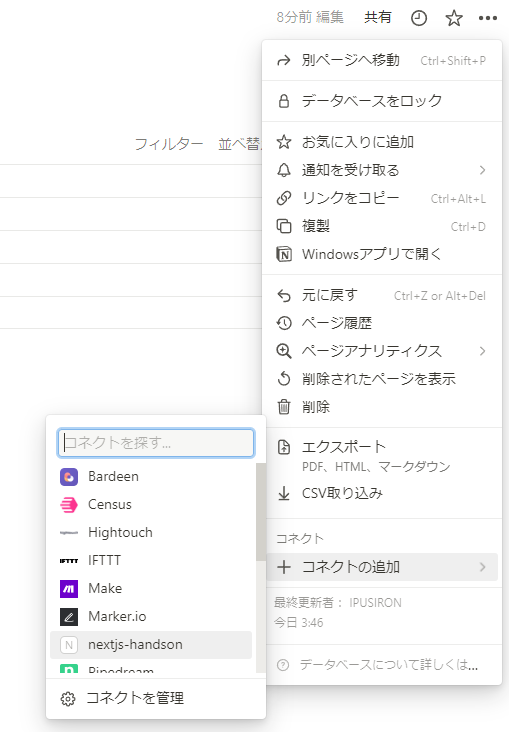
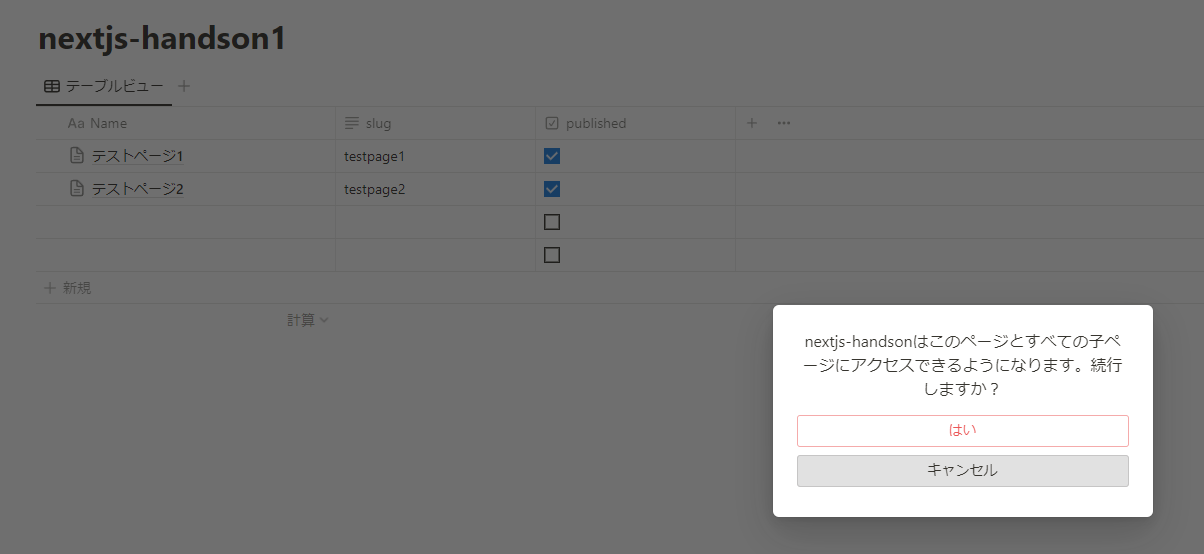
6:右上の「三点リーダー」アイコンを押します。「コネクトを追加」>「nextjs-handson」(今回のために作ったインテグレーション)を選びます。
「nextjs-handsonはこのページとすべての子ページにアクセスできるようになります。続行しますか?」というダイアログが表示されるので、[はい]ボタンを押します。
はじめてのNotion API【P.94-】
1:Notion APIからDBにアクセスできるように、Notion公式のAPIクライアントライブラリーをインストールします。
VS Codeで新しいPowerShellターミナルを立ち上げて、npm installコマンドでインストールします[2]後述しますが、バージョン2.2.3に固定しないと書籍のサンプルコードが動きません。。
PS D:\ts-sample> cd .\nextjs-sample\
PS D:\ts-sample\nextjs-sample> npm install @notionhq/client
3:環境変数ファイルにデータベースIDを設定します。
データベースIDは、テーブルページのURLに含まれています。
URLを見ると、次の書式になっています。
https://www.notion.so/aaaaaaaaaaaaaaaaaaaaaaa?v=bbbbbbbbbbbbbbbbbbbbbbbbbbbbbb
「/」と「?v=」の間の文字列がデータベースIDです。ここでは"aaa・・・a"(太字)の部分になります。
“.env.local"ファイルに環境変数NOTION_DATABASE_IDを設定します。
4:"pages/index.tsx"ファイルの内容を次のように書き換えます。
import { Client } from '@notionhq/client';
import { GetStaticProps } from 'next';

const notion = new Client({
  auth: process.env.NOTION_TOKEN,
});

export const getStaticProps: GetStaticProps<{}> = async () => {
  const database = await notion.databases.query({
    database_id: process.env.NOTION_DATABASE_ID || '',
  });
  console.dir(database, { depth: null });
  return {
    props: {},
  };
};

const Home = () => {
  return <div></div>;
};

export default Home;
5:npm run devコマンドを実行します。
PS D:\ts-sample\nextjs-sample> npm run dev
6:VS Codeのターミナルにログが出力されれば成功です。
※もしエラーが出ていたなら、コネクトの追加を忘れているか、データベースIDが間違っているかなどが考えられます。
次は出力されたログになります。
※ソースコードを修正した場合は、ブラウザー側でページをリロードすればログが再び出力されます。
{
  object: 'list',
  results: [
    (略)
  ],
  next_cursor: null,
  has_more: false,
  type: 'page_or_database',
  page_or_database: {}
}
resultsにデータベース内の各ページの情報が格納されています。
Notion APIを通じて、データベース内の情報にアクセスできました。
blockオブジェクトのプロパティについては、公式ページを参照ください。

フィルタリングとソートを実現する【P.99】
“pages/index.tsx"ファイルの11~21行目に、フィルターとソートのコードを追加しました。
import { Client } from '@notionhq/client';
import { GetStaticProps } from 'next';

const notion = new Client({
  auth: process.env.NOTION_TOKEN,
});

export const getStaticProps: GetStaticProps<{}> = async () => {
  const database = await notion.databases.query({
    database_id: process.env.NOTION_DATABASE_ID || '',
    filter: {
      and: [
        {
          property: 'Published',
          checkbox: {
            equals: true,
          },
        },
      ],
    },
    sorts: [{ timestamp: 'created_time', direction: 'descending' }],
  });
  console.dir(database, { depth: null });
  return {
    props: {},
  };
};

const Home = () => {
  return <div></div>;
};

export default Home;
Notion側でPublished属性のチェックボックスを操作して、出力ログをチェックします。
@notionhq/clientのバージョンを落として再インストール
Notionのパッケージの型に一部変更があったようです。
調べてみると、著者のツイートを発見しました。
P.95では最新の@notionhq/clientをインストールしました。バージョンを確認してみます。
PS D:\ts-sample\nextjs-sample> npm view @notionhq/client version
2.2.9
指示通りに、次のコマンドを実行してバージョン2.2.3に固定します。
PS D:\ts-sample\nextjs-sample> npm install @notionhq/client@2.2.3
コマンド実行後に、"ts-sample\nextjs-sample\node_modules\@notionhq\client\package.jsion"ファイルを開いて、versionが2.2.3になっていることを確認します。
VS Codeを再起動して、@notionhq/clientのバージョンを確認すると、バージョン2.2.3が表示されて反映されています[3]うまくいかなければ、パッケージをアンインストールしてから、バージョン固定でインストールしてみてください。VS Codeの再起動をお忘れなく。。
PS D:\ts-sample\nextjs-sample> npm view @notionhq/client version
2.2.9
ブロックを取得する【P.99-100】
Notionにおけるブロックとは、ページの各段落のことです。
※ページ自体もブロックであり、その中にブロックが存在するわけです。つまり、ブロックの木構造になっています。
「対象のページを取得すること」と「ブロックの子ブロックを取得する」は同値になります。
blocks.children.list()メソッドの引数であるblock_idに、取得したいページIDを指定します。ページIDについては、results(データベースの内容)から得られます。

import { Client } from '@notionhq/client';
import { GetStaticProps } from 'next';

const notion = new Client({
  auth: process.env.NOTION_TOKEN,
});

export const getStaticProps: GetStaticProps<{}> = async () => {
  const database = await notion.databases.query({
    database_id: process.env.NOTION_DATABASE_ID || '',
    filter: {
      and: [
        {
          property: 'Published',
          checkbox: {
            equals: true,
          },
        },
      ],
    },
    sorts: [{ timestamp: 'created_time', direction: 'descending' }],
  });

  const page = database.results[0];
  if (!page) {
    return {
      props: {
        post: null,
      },
    };
  }

  //console.dir(database, { depth: null });

  const blocks = await notion.blocks.children.list({
    block_id: database.results[0]?.id, // 追加.
  });
  console.dir(blocks, { depth: null }); // 追加.

  return {
    props: {},
  };
};

const Home = () => {
  return <div></div>;
};

export default Home;
テストページ1のPublished属性にチェックしておき、テストページ2ではチェックを外しておきます。
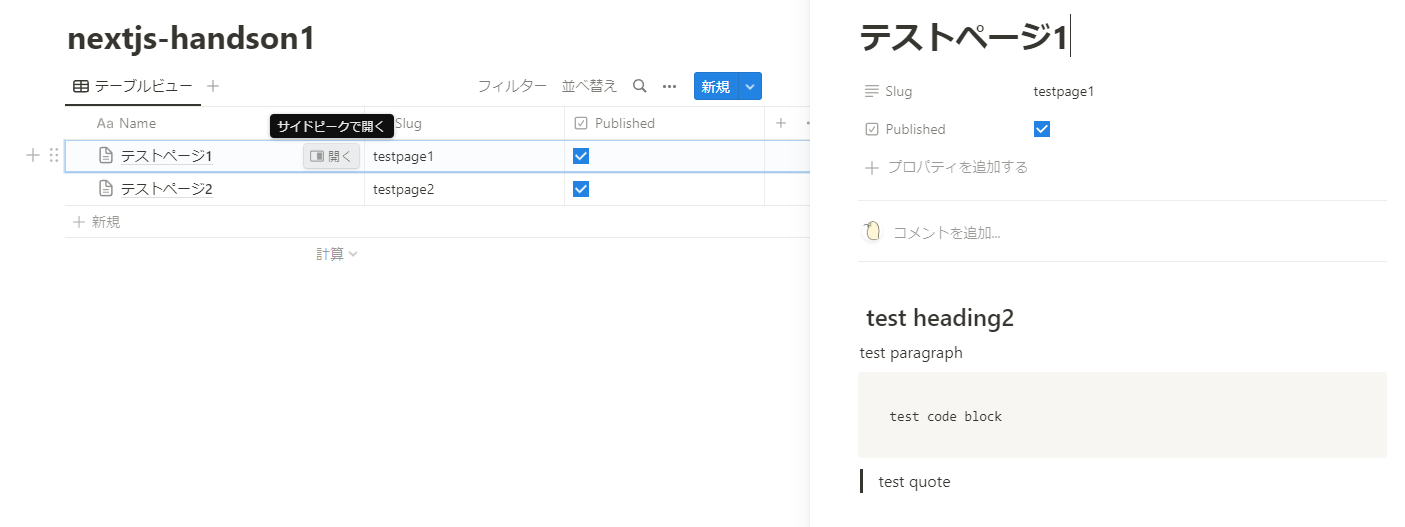
「テストページ1」にマウスポインターを持って行くと「サイドピークで開く」がポップアップし[開く]ボタンが表示されます。この[開く]ボタンを押すと、右側に「テストページ」が表示されます。ここでプロパティやページ内容を編集できます。
次の内容を追加します。ただし、スラッシュで始まる部分はブロックを指示するものです。「/heading2」のように入力していくと、見出しのブロック候補が現れるので、そこから選択します。結果的に画像のようになります[4]テストページ1内に別のページがリンクされているわけではありません。。
/heading2 test heading 2
test paragraph
/code test code block
/quote test quote
「テストページ2」ページも同様の内容にしておきます。
出力ログを確認します。出力されたログは次の通りです。
{
  object: 'list',
  results: [
    {
      object: 'block',
      id: 'xxxx',
      parent: {
        type: 'page_id',
        page_id: 'xxxx'
      },
      created_time: '2023-07-30T04:07:00.000Z',
      last_edited_time: '2023-07-30T04:07:00.000Z',
      created_by: { object: 'user', id: 'xxxx' },
      last_edited_by: { object: 'user', id: 'xxxx' },
      has_children: false,
      archived: false,
      type: 'heading_2',
      heading_2: {
        rich_text: [
          {
            type: 'text',
            text: { content: ' test heading2', link: null },
            annotations: {
              bold: false,
              italic: false,
              strikethrough: false,
              underline: false,
              code: false,
              color: 'default'
            },
            plain_text: ' test heading2',
            href: null
          }
        ],
        is_toggleable: false,
        color: 'default'
      }
    },
    {
      object: 'block',
      id: 'xxxx',
      parent: {
        type: 'page_id',
        page_id: 'xxxx'
      },
      created_time: '2023-07-30T04:07:00.000Z',
      last_edited_time: '2023-07-30T04:07:00.000Z',
      created_by: { object: 'user', id: 'xxxx' },
      last_edited_by: { object: 'user', id: 'xxxx' },
      has_children: false,
      archived: false,
      type: 'paragraph',
      paragraph: {
        rich_text: [
          {
            type: 'text',
            text: { content: 'test paragraph', link: null },
            annotations: {
              bold: false,
              italic: false,
              strikethrough: false,
              underline: false,
              code: false,
              color: 'default'
            },
            plain_text: 'test paragraph',
            href: null
          }
        ],
        color: 'default'
      }
    },
    {
      object: 'block',
      id: 'xxxx',
      parent: {
        type: 'page_id',
        page_id: 'xxxx'
      },
      created_time: '2023-07-30T04:07:00.000Z',
      last_edited_time: '2023-07-30T04:07:00.000Z',
      created_by: { object: 'user', id: 'xxxx' },
      last_edited_by: { object: 'user', id: 'xxxx' },
      has_children: false,
      archived: false,
      type: 'code',
      code: {
        caption: [],
        rich_text: [
          {
            type: 'text',
            text: { content: 'test code block', link: null },
            annotations: {
              bold: false,
              italic: false,
              strikethrough: false,
              underline: false,
              code: false,
              color: 'default'
            },
            plain_text: 'test code block',
            href: null
          }
        ],
        language: 'javascript'
      }
    },
    {
      object: 'block',
      id: 'xxxx',
      parent: {
        type: 'page_id',
        page_id: 'xxxx'
      },
      created_time: '2023-07-30T04:07:00.000Z',
      last_edited_time: '2023-07-30T04:07:00.000Z',
      created_by: { object: 'user', id: 'xxxx' },
      last_edited_by: { object: 'user', id: 'xxxx' },
      has_children: false,
      archived: false,
      type: 'quote',
      quote: {
        rich_text: [
          {
            type: 'text',
            text: { content: 'test quote', link: null },
            annotations: {
              bold: false,
              italic: false,
              strikethrough: false,
              underline: false,
              code: false,
              color: 'default'
            },
            plain_text: 'test quote',
            href: null
          }
        ],
        color: 'default'
      }
    },
    {
      object: 'block',
      id: 'xxxx',
      parent: {
        type: 'page_id',
        page_id: 'xxxx'
      },
      created_time: '2023-07-30T04:07:00.000Z',
      last_edited_time: '2023-07-30T04:07:00.000Z',
      created_by: { object: 'user', id: 'xxxx' },
      last_edited_by: { object: 'user', id: 'xxxx' },
      has_children: false,
      archived: false,
      type: 'paragraph',
      paragraph: { rich_text: [], color: 'default' }
    }
  ],
  next_cursor: null,
  has_more: false,
  type: 'block',
  block: {}
}
うまくいけば、4つのblockオブジェクトを取得できます。先に指定した4つのブロック(heading2、paragraph、code、quote)に対応しています。
もし5つのオブジェクトが取得されている場合は、ページには見えてないparagraphが最後に混じっている可能性があります。
Reactコンポーネント側でページの内容を利用できるようにする【P.105-】
Notionのページの内容をgetStaticProps()の戻り値にすることで、Reactコンポーネント側で利用できるようになります。
見通しがよくなるように、Content型とPost型を定義して用いています。
export type Content =
  | {
      type: 'paragraph' | 'quote' | 'heading_2' | 'heading_3';
      text: string | null;
    }
  | {
      type: 'code';
      text: string | null;
      language: string | null;
    };

export type Post = {
  id: string;
  title: string | null;
  slug: string | null;
  createdTs: string | null;
  lastEditedTs: string | null;
  contents: Content[];
};
新しい型を用いるように"pages/index.tsx"ファイルを修正すると、次のようになります。
import { Client } from '@notionhq/client';
import { GetStaticProps, NextPage } from 'next';

export type Content =
  | {
      type: 'paragraph' | 'quote' | 'heading_2' | 'heading_3';
      text: string | null;
    }
  | {
      type: 'code';
      text: string | null;
      language: string | null;
    };

export type Post = {
  id: string;
  title: string | null;
  slug: string | null;
  createdTs: string | null;
  lastEditedTs: string | null;
  contents: Content[];
};

type StaticProps = {
  post: Post | null;
};

const notion = new Client({
  auth: process.env.NOTION_TOKEN,
});

export const getStaticProps: GetStaticProps<StaticProps> = async () => {
  const database = await notion.databases.query({
    database_id: process.env.NOTION_DATABASE_ID || '',
    filter: {
      and: [
        {
          property: 'Published',
          checkbox: {
            equals: true,
          },
        },
      ],
    },
    sorts: [{ timestamp: 'created_time', direction: 'descending' }],
  });

  const page = database.results[0];
  // pageはPartialPageObjectResponse型
  if (!page) {
    // page自体が存在しないのでnullとする.
    return {
      props: {
        post: null,
      },
    };
  }
  if (!('properties' in page)) {
    // pageの内容が存在しないのでnullとする.
    return {
      props: {
        post: {
          id: page.id,
          title: null,
          slug: null,
          createdTs: null,
          lastEditedTs: null,
          contents: [],
        },
      },
    };
  }
  // typeがtitleなら次の型になっている.
  // {
  //   type: 'title';
  //   title: Array<RichTextItemResponse>;
  //   id: string;
  // }
  // RichTextItemResponse型の配列titleから内容を取り出す.
  let title: string | null = null;
  if (page.properties['Name'].type === 'title') {
    title = page.properties['Name'].title[0]?.plain_text ?? null;
  }
  // slugについても同様に取り出す.
  let slug: string | null = null;
  if (page.properties['Slug'].type === 'rich_text') {
    slug = page.properties['Slug'].rich_text[0]?.plain_text ?? null;
  }

  const blocks = await notion.blocks.children.list({
    block_id: page.id,
  });
  const contents: Content[] = [];
  blocks.results.forEach( (block) => {
    // 要素blockはPartialBlockObjectResponse | BlockObjectResponse型のユニオン型であり、絞り込む.
    if (!('type' in block)) {
      // ここに来るのはblockがPartialBlockObjectResponse型のときのみ.
      // なぜなら、PartialBlockObjectResponse型にtypeプロパティがないから.
      return;
    }
    // ここに来るのはblockがBlockObjectResponse型のときのみ.
    // 以降、type値ごとに分岐させて、Content[]型のcontentsに追加する.
    switch (block.type) {
      case 'paragraph':
        contents.push({
          type: 'paragraph',
          text: block.paragraph.rich_text[0]?.plain_text ?? null,
        });
        break;
      case 'heading_2':
        contents.push({
          type: 'heading_2',
          text: block.heading_2.rich_text[0]?.plain_text ?? null,
        });
        break;
      case 'heading_3':
        contents.push({
          type: 'heading_3',
          text: block.heading_3.rich_text[0]?.plain_text ?? null,
        });
        break;
      case 'quote':
        contents.push({
          type: 'quote',
          text: block.quote.rich_text[0]?.plain_text ?? null,
        });
        break;
      case 'code':
        contents.push({
          type: 'code',
          text: block.code.rich_text[0]?.plain_text ?? null,
          language: block.code.language,
        });
    }
  });

  const post: Post = {
    id: page.id,
    title,
    slug,
    createdTs: page.created_time,
    lastEditedTs: page.last_edited_time,
    contents,
  };

  console.dir(post, { depth: null });
  return {
    props: { post },
  };
};

const Home: NextPage<StaticProps> = ({ post }) => {
  console.log(post);
  return <div></div>;
};

export default Home;
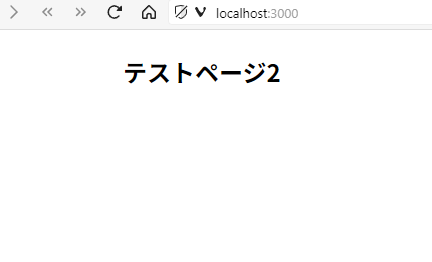
ターミナルには次の形式のログが出力されます。
{
  id: 'xxxx',
  title: 'テストページ2',
  slug: 'testpage2',
  createdTs: '2023-07-25T03:56:00.000Z',
  lastEditedTs: '2023-07-30T05:23:00.000Z',
  contents: [
    { type: 'heading_2', text: ' test heading2' },
    { type: 'paragraph', text: 'test paragraph' },
    { type: 'code', text: 'test code block', language: 'javascript' },
    { type: 'quote', text: 'test quote' }
  ]
}
Webページを実装する【P.113-】
ブラウザをリロードしても、この時点ではまだ何も表示されません。
ただし、ブラウザ側の開発者ツールのコーンソールでpostの中身を確認できるようになっています。

“page/_document.tsx"ファイルを編集して、Noto Sans JPフォントを適用します。
import { Html, Head, Main, NextScript } from 'next/document';

const Index = () => {
  return (
    <Html>
      <Head>
        <link
          href="https://fonts.googleapis.com/css2?family=Noto+Sans+JP:wght@400;500;700&display=swap"
          rel="stylesheet"
        />
      </Head>
      <body>
        <Main />
        <NextScript />
      </body>
    </Html>
  );
};

export default Index;
“styles/globals.css"ファイルを編集して、Webサイト全体の文字がNoto Sans JPフォントになるように設定します。bodyタグのところに追加するだけです。
html, body {
  max-width: 100vw;
  overflow-x: hidden
}

body {
  padding: 0;
  margin: 0;
  font-family: 'Noto Sans JP', -apple-system, BlinkMacSystemFont, Segoe UI, Roboto, Oxygen, Ubuntu, Cantarell, Fira Sans, Droid, Sans, Helvetica Neue, sans-serif;
}

a {
  color: inherit;
  text-decoration: none;
}

@media (prefers-color-scheme: dark) {
  html {
    color-scheme: dark;
  }
}
“pages/index.tsx"ファイルのHomeコンポーネント内で、getStaticProps()で取得したページのタイトルを表示させます。
ここでは、Next.jsプロジェクトのセットアップ時に生成されたCSSモジュールを利用して、スタイルを適用させています。
import { Client } from '@notionhq/client';
import { GetStaticProps, NextPage } from 'next';
import styles from '../styles/Home.module.css';

export type Content =
  | {
      type: 'paragraph' | 'quote' | 'heading_2' | 'heading_3';
      text: string | null;
    }
  | {
      type: 'code';
      text: string | null;
      language: string | null;
    };

export type Post = {
  id: string;
  title: string | null;
  slug: string | null;
  createdTs: string | null;
  lastEditedTs: string | null;
  contents: Content[];
};

type StaticProps = {
  post: Post | null;
};

const notion = new Client({
  auth: process.env.NOTION_TOKEN,
});

export const getStaticProps: GetStaticProps<StaticProps> = async () => {
  const database = await notion.databases.query({
    database_id: process.env.NOTION_DATABASE_ID || '',
    filter: {
      and: [
        {
          property: 'Published',
          checkbox: {
            equals: true,
          },
        },
      ],
    },
    sorts: [{ timestamp: 'created_time', direction: 'descending' }],
  });

  const page = database.results[0];
  // pageはPartialPageObjectResponse型
  if (!page) {
    // page自体が存在しないのでnullとする.
    return {
      props: {
        post: null,
      },
    };
  }
  if (!('properties' in page)) {
    // pageの内容が存在しないのでnullとする.
    return {
      props: {
        post: {
          id: page.id,
          title: null,
          slug: null,
          createdTs: null,
          lastEditedTs: null,
          contents: [],
        },
      },
    };
  }
  // typeがtitleなら次の型になっている.
  // {
  //   type: 'title';
  //   title: Array<RichTextItemResponse>;
  //   id: string;
  // }
  // RichTextItemResponse型の配列titleから内容を取り出す.
  let title: string | null = null;
  if (page.properties['Name'].type === 'title') {
    title = page.properties['Name'].title[0]?.plain_text ?? null;
  }
  // slugについても同様に取り出す.
  let slug: string | null = null;
  if (page.properties['Slug'].type === 'rich_text') {
    slug = page.properties['Slug'].rich_text[0]?.plain_text ?? null;
  }

  const blocks = await notion.blocks.children.list({
    block_id: page.id,
  });
  const contents: Content[] = [];
  blocks.results.forEach( (block) => {
    // 要素blockはPartialBlockObjectResponse | BlockObjectResponse型のユニオン型であり、絞り込む.
    if (!('type' in block)) {
      // ここに来るのはblockがPartialBlockObjectResponse型のときのみ.
      // なぜなら、PartialBlockObjectResponse型にtypeプロパティがないから.
      return;
    }
    // ここに来るのはblockがBlockObjectResponse型のときのみ.
    // 以降、type値ごとに分岐させて、Content[]型のcontentsに追加する.
    switch (block.type) {
      case 'paragraph':
        contents.push({
          type: 'paragraph',
          text: block.paragraph.rich_text[0]?.plain_text ?? null,
        });
        break;
      case 'heading_2':
        contents.push({
          type: 'heading_2',
          text: block.heading_2.rich_text[0]?.plain_text ?? null,
        });
        break;
      case 'heading_3':
        contents.push({
          type: 'heading_3',
          text: block.heading_3.rich_text[0]?.plain_text ?? null,
        });
        break;
      case 'quote':
        contents.push({
          type: 'quote',
          text: block.quote.rich_text[0]?.plain_text ?? null,
        });
        break;
      case 'code':
        contents.push({
          type: 'code',
          text: block.code.rich_text[0]?.plain_text ?? null,
          language: block.code.language,
        });
    }
  });

  const post: Post = {
    id: page.id,
    title,
    slug,
    createdTs: page.created_time,
    lastEditedTs: page.last_edited_time,
    contents,
  };

  console.dir(post, { depth: null });
  return {
    props: { post },
  };
};

const Home: NextPage<StaticProps> = ({ post }) => {
  if (!post) return null;
  return (
    <div className={styles.wrapper}>
      <div className={styles.post}>
        <h1 className={styles.title}>{post.title}</h1>
      </div>
    </div>
  );
};

export default Home;
“styles/Home.modules.css"ファイルを編集して、各クラスに対応するスタイル設定を追加します。
.wrapper {
max-width: 800px;
min-height: 100vh;
margin: 0 auto;
}
.post {
padding: 8px;
margin-bottom: 16px;
}
.title {
font-size: 24px;
font-weight: 700;
margin: 16px 0;
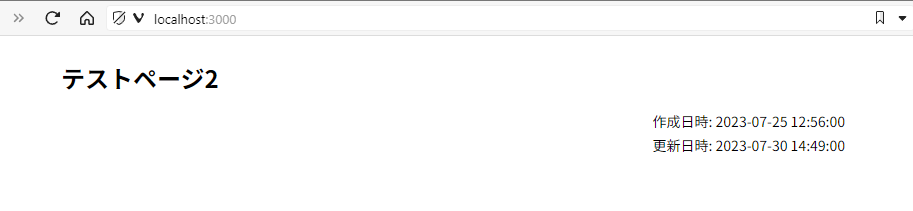
}ここまでで表示されるWebページは次の通りです。
作成日時と更新日時を表示する【P.116-】
時刻の処理をするために、dayjsライブラリをインストールします。
PS D:\ts-sample\nextjs-sample> npm install dayjs
dayjsライブラリを使ってタイムスタンプを整形して、画面に表示するようにします。
(略)
import dayjs from 'dayjs';

(略)

const Home: NextPage<StaticProps> = ({ post }) => {
  if (!post) return null;
  return (
    <div className={styles.wrapper}>
      <div className={styles.post}>
        <h1 className={styles.title}>{post.title}</h1>
        <div className={styles.timestampWrapper}>
          <div>
            <div className={styles.timestamp}>
              作成日時: {dayjs(post.createdTs).format('YYYY-MM-DD HH:mm:ss')}
            </div>
            <div className={styles.timestamp}>
              更新日時: {dayjs(post.lastEditedTs).format('YYYY-MM-DD HH:mm:ss')}
            </div>
          </div>
        </div>
      </div>
    </div>
  );
};

export default Home;
(略)

.timestampWrapper {
	display: flex;
	justify-content: flex-end;
	margin-bottom: 8px;
}

.timestamp {
	margin-bottom: 4px;
	font-size: 14px;
}
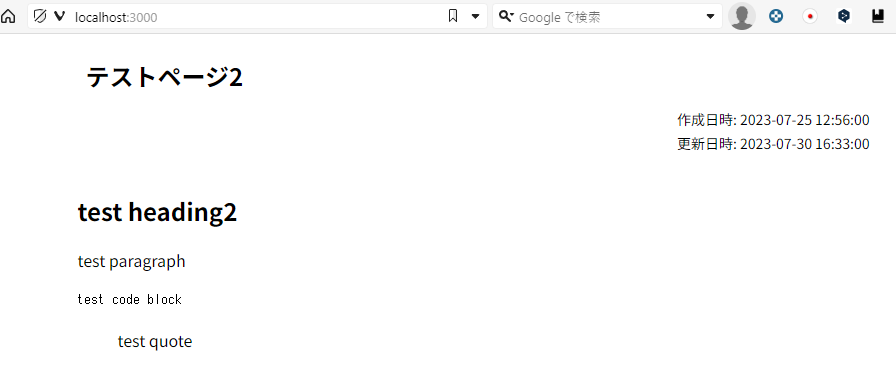
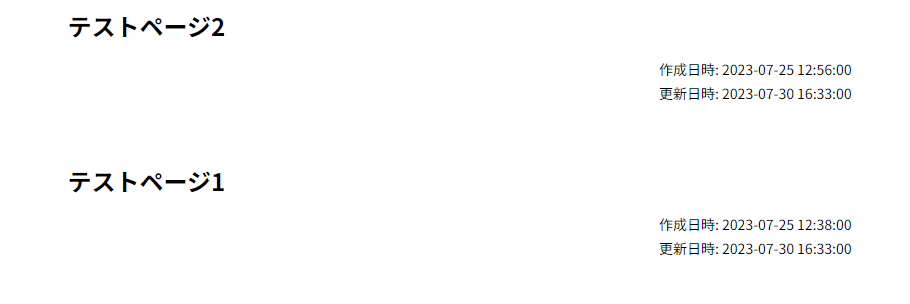
ブラウザでは次のように表示されます。
記事本文をレンダリングする【P.118】
post.contents配列の要素が、1つの段落に対応します。
ここでは、map()で取り出して、type値によって対応したJSX要素を返すようにします。
map()の使い方については、P.26で解説されています。2つの引数を持つコールバック関数をmap()の引数に与えます。ここではアロー関数でコールバック関数を定義して、map()に与えています。
P.118のコードを"pages/index.tsx"ファイルのどこに追加すべきか明示されていないため、わかりにくかもしれません。
※実はP.120を読んで追加すべきところが判明します。
コードは、postを宣言する部分とconsole.dir()の間に入れます。
(略)

  const post: Post = {
    id: page.id,
    title,
    slug,
    createdTs: page.created_time,
    lastEditedTs: page.last_edited_time,
    contents,
  };

  post.contents.map( (content, index) => {
    const key = `${post.id}_${index}`;
    switch (content.type) {
      case 'heading_2':
        return (
          <h2 key={key} className={styles.heading_2}>
            {' '}
            {content.text}{' '}
          </h2>
        );
      case 'heading_3':
        return (
          <h3 key={key} className={styles.heading_2}>
            {' '}
            {content.text}{' '}
          </h3>
        );
      case 'paragraph':
        return (
          <p key={key} className={styles.paragraph}>
            {content.text}
          </p>
        );
      case 'code':
        return (
          <pre key={key} className={styles.code}>
            <code>{content.text}</code>
          </pre>
        );
      case 'quote':
        return (
          <blockquote key={key} className={styles.blockquote}>
            {content.text}
          </blockquote>
        );
    }
  });

  console.dir(post, { depth: null });
(略)
ブラウザ側にはまだcontents配列の内容は表示されません。
VS Codeのターミナルにて、contents配列に情報が格納されていることを確認しました。
{
  id: 'xxxx',
  title: 'テストページ2',
  slug: 'testpage2',
  createdTs: '2023-07-25T03:56:00.000Z',
  lastEditedTs: '2023-07-30T07:33:00.000Z',
  contents: [
    { type: 'heading_2', text: ' test heading2' },
    { type: 'paragraph', text: 'test paragraph' },
    { type: 'code', text: 'test code block', language: 'javascript' },
    { type: 'quote', text: 'test quote' }
  ]
}
問題がなさそうなので、先のP.120のコードを追加します。コード自体は先ほど追加したコードをそのままカット&ペーストします。ただし、「{」と「}」で挟む必要があります。
これでブラウザで見出しブロックやパラグラフブロックなどの内容を表示されるようになります。
(略)

const Home: NextPage<StaticProps> = ({ post }) => {
  if (!post) return null;
  return (
    <div className={styles.wrapper}>
      <div className={styles.post}>
        <h1 className={styles.title}>{post.title}</h1>
        <div className={styles.timestampWrapper}>
          <div>
            <div className={styles.timestamp}>
              作成日時: {dayjs(post.createdTs).format('YYYY-MM-DD HH:mm:ss')}
            </div>
            <div className={styles.timestamp}>
              更新日時: {dayjs(post.lastEditedTs).format('YYYY-MM-DD HH:mm:ss')}
            </div>
          </div>
        </div>
      </div>
      <div>
        {post.contents.map( (content, index) => {
          const key = `${post.id}_${index}`;
          switch (content.type) {
            case 'heading_2':
              return (
                <h2 key={key} className={styles.heading_2}>
                  {' '}
                  {content.text}{' '}
                </h2>
              );
            case 'heading_3':
              return (
                <h3 key={key} className={styles.heading_2}>
                  {' '}
                  {content.text}{' '}
                </h3>
              );
            case 'paragraph':
              return (
                <p key={key} className={styles.paragraph}>
                  {content.text}
                </p>
              );
            case 'code':
              return (
                <pre key={key} className={styles.code}>
                  <code>{content.text}</code>
                </pre>
              );
            case 'quote':
              return (
                <blockquote key={key} className={styles.blockquote}>
                  {content.text}
                </blockquote>
              );
          }
        })}
      </div>
    </div>
  );
};

export default Home;
その後で、スタイルを変更するために、"styles/Home.modules.css"ファイルにP.119のコードを追加します。
(略)
.heading2 {
font-weight: 500;
font-size: 20px;
margin: 8px 0;
}
.heading3 {
font-weight: 500;
font-size: 18px;
margin: 8px 0;
}
.paragraph {
line-height: 24px;
}
.code {
line-height: 24px;
margin: 16px 0 !important;
}
.quote {
line-height: 24px;
font-style: italic;
color: #d1d5db;
margin: 0;
padding: 0 16px;
border-left: 2px solid #d1d5db;
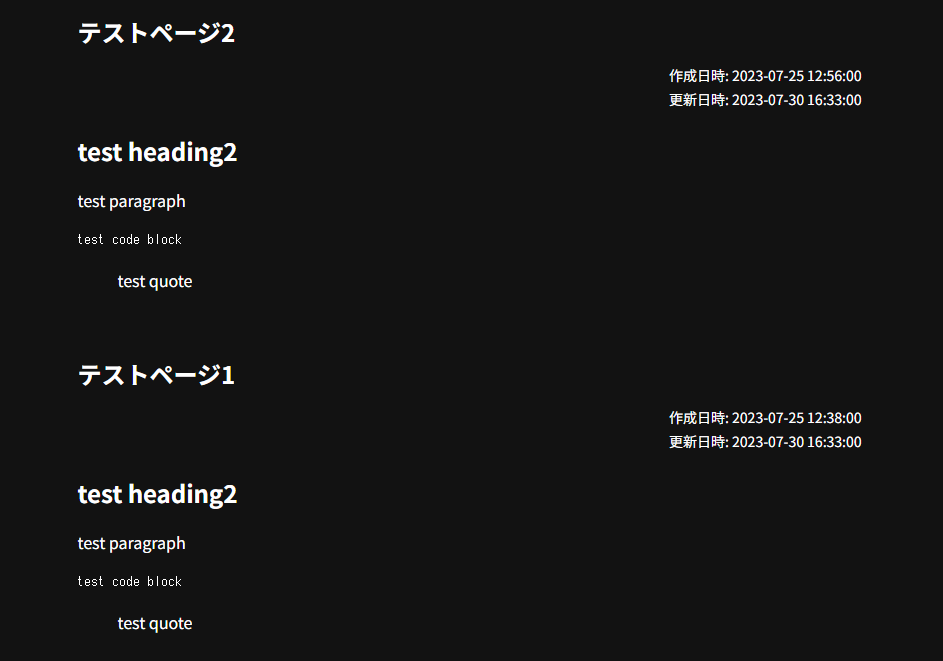
}ブラウザには次のように表示されました。
prismjsライブラリでコードブロックにシンタックスハイライトを加える【P.121-】
1:次のコマンドを実行して、prismjsライブラリをインストールします。
PS D:\ts-sample\nextjs-sample> npm install prismjs babel-plugin-prismjs
PS D:\ts-sample\nextjs-sample> npm install --save-dev @types/prismjs
2:プロジェクトのルートディレクトリに、次の内容の".babelrc"ファイルを追加します。
{
	"presets": ["next/babel"],
	"plugins": [
		[
			"prismjs",
			{
				"language": [
					"javascript",
					"css",
					"markup",
					"bash",
					"graphql",
					"json",
					"markdown",
					"python",
					"jsx",
					"tsx",
					"sql",
					"typescript",
					"yaml",
					"rust",
					"java"
				],
				"plugins": [],
				"theme": "tomorrow",
				"css": true
			}
		]
	]
}
3:それでは"pages/index.tsx"ファイルを次のように修正します。
HTMLのレンタリング後にprismjsの処理が走らせるために、useEffect()内でprism.highlightAll()を実行します。
(略)
import prism from 'prismjs';
import { useEffect } from 'react';
(略)
const Home: NextPage<StaticProps> = ({ post }) => {
useEffect( () => {
prism.highlightAll();
});
if (!post) return null;
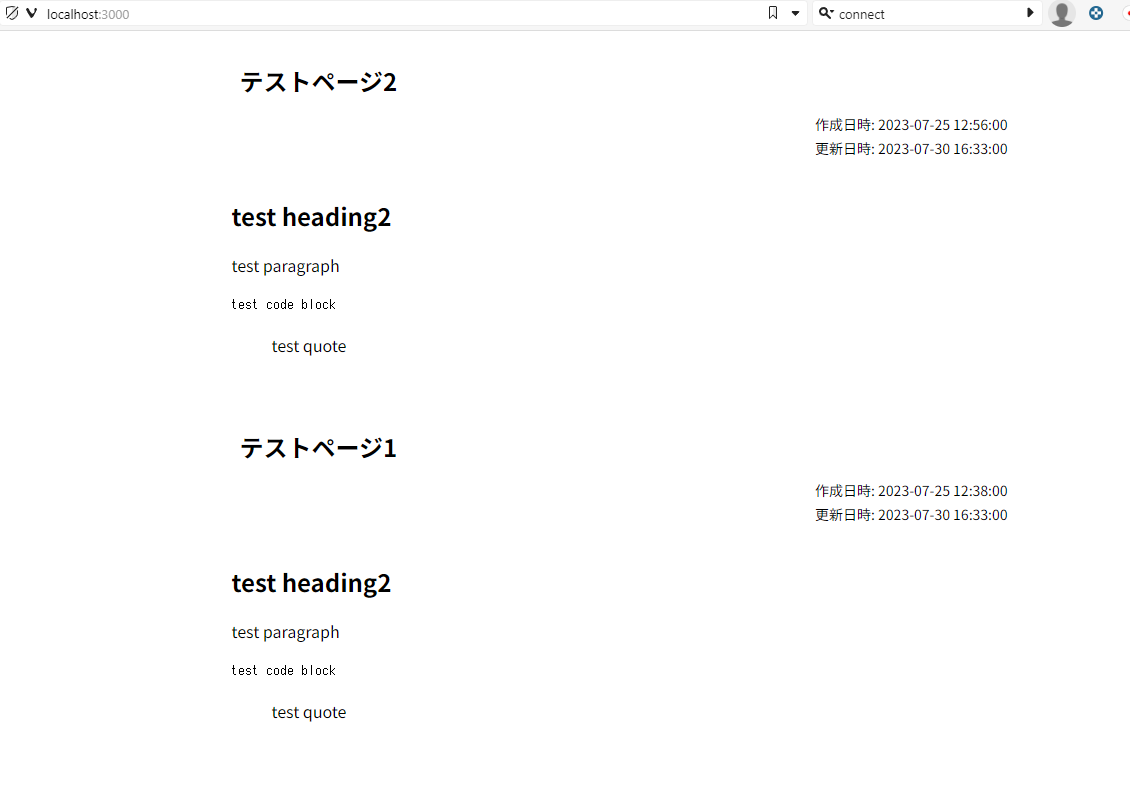
(略)複数ページに対応する【P.124】
NotionのDBには2つのページを登録しているのに、1ページの情報しか取得できていませんでした。ここでは複数ページの情報を取得して、ブラウザーでも確認できるようにします。
import { Client } from '@notionhq/client';
import { GetStaticProps, NextPage } from 'next';
import styles from '../styles/Home.module.css';
import dayjs from 'dayjs';
import prism from 'prismjs';
import { useEffect } from 'react';

export type Content =
  | {
      type: 'paragraph' | 'quote' | 'heading_2' | 'heading_3';
      text: string | null;
    }
  | {
      type: 'code';
      text: string | null;
      language: string | null;
    };

export type Post = {
  id: string;
  title: string | null;
  slug: string | null;
  createdTs: string | null;
  lastEditedTs: string | null;
  contents: Content[];
};

type StaticProps = {
  posts: Post[];
};

const notion = new Client({
  auth: process.env.NOTION_TOKEN,
});

export const getStaticProps: GetStaticProps<StaticProps> = async () => {
  const database = await notion.databases.query({
    database_id: process.env.NOTION_DATABASE_ID || '',
    filter: {
      and: [
        {
          property: 'Published',
          checkbox: {
            equals: true,
          },
        },
      ],
    },
    sorts: [{ timestamp: 'created_time', direction: 'descending' }],
  });

  const posts: Post[] = [];
  const blockResponses = await Promise.all(
    database.results.map( (page) => {
      return notion.blocks.children.list({
        block_id: page.id,
      });
    })
  );

  // database.resultsの各要素を処理するように修正した.
  database.results.forEach( (page, index) => {
    if (!('properties' in page)) {
      // pageの内容が存在しないのでnullとする.
      posts.push({
        id: page.id,
        title: null,
        slug: null,
        createdTs: null,
        lastEditedTs: null,
        contents: [],
      });
      return;
    }

    // typeがtitleなら次の型になっている.
    // {
    //   type: 'title';
    //   title: Array<RichTextItemResponse>;
    //   id: string;
    // }
    // RichTextItemResponse型の配列titleから内容を取り出す.
    let title: string | null = null;
    if (page.properties['Name'].type === 'title') {
      title = page.properties['Name'].title[0]?.plain_text ?? null;
    }
    // slugについても同様に取り出す.
    let slug: string | null = null;
    if (page.properties['Slug'].type === 'rich_text') {
      slug = page.properties['Slug'].rich_text[0]?.plain_text ?? null;
    }

    const blocks = blockResponses[index];
    const contents: Content[] = [];
    blocks.results.forEach( (block) => {
      // 要素blockはPartialBlockObjectResponse | BlockObjectResponse型のユニオン型であり、絞り込む.
      if (!('type' in block)) {
        // ここに来るのはblockがPartialBlockObjectResponse型のときのみ.
        // なぜなら、PartialBlockObjectResponse型にtypeプロパティがないから.
        return;
      }
      // ここに来るのはblockがBlockObjectResponse型のときのみ.
      // 以降、type値ごとに分岐させて、Content[]型のcontentsに追加する.
      switch (block.type) {
        case 'paragraph':
          contents.push({
            type: 'paragraph',
            text: block.paragraph.rich_text[0]?.plain_text ?? null,
          });
          break;
        case 'heading_2':
          contents.push({
            type: 'heading_2',
            text: block.heading_2.rich_text[0]?.plain_text ?? null,
          });
          break;
        case 'heading_3':
          contents.push({
            type: 'heading_3',
            text: block.heading_3.rich_text[0]?.plain_text ?? null,
          });
          break;
        case 'quote':
          contents.push({
            type: 'quote',
            text: block.quote.rich_text[0]?.plain_text ?? null,
          });
          break;
        case 'code':
          contents.push({
            type: 'code',
            text: block.code.rich_text[0]?.plain_text ?? null,
            language: block.code.language,
          });
      }
    });
    posts.push({
      id: page.id,
      title,
      slug,
      createdTs: page.created_time,
      lastEditedTs: page.last_edited_time,
      contents,
    });
  });
  return {
    props: { posts },
  };
};

const Home: NextPage<StaticProps> = ({ posts }) => {
  useEffect( () => {
    prism.highlightAll();
  }, []);

  return (
    <div className={styles.wrapper}>
      {posts.map( (post) => (
        <div className={styles.post} key={post.id}>
          <div className={styles.post}>
            <h1 className={styles.title}>{post.title}</h1>
            <div className={styles.timestampWrapper}>
              <div>
                <div className={styles.timestamp}>
                  作成日時:{' '}
                  {dayjs(post.createdTs).format('YYYY-MM-DD HH:mm:ss')}
                </div>
                <div className={styles.timestamp}>
                  更新日時:{' '}
                  {dayjs(post.lastEditedTs).format('YYYY-MM-DD HH:mm:ss')}
                </div>
              </div>
            </div>
          </div>
          <div>
            {post.contents.map( (content, index) => {
              const key = `${post.id}_${index}`;
              switch (content.type) {
                case 'heading_2':
                  return (
                    <h2 key={key} className={styles.heading_2}>
                      {' '}
                      {content.text}{' '}
                    </h2>
                  );
                case 'heading_3':
                  return (
                    <h3 key={key} className={styles.heading_2}>
                      {' '}
                      {content.text}{' '}
                    </h3>
                  );
                case 'paragraph':
                  return (
                    <p key={key} className={styles.paragraph}>
                      {content.text}
                    </p>
                  );
                case 'code':
                  return (
                    <pre key={key} className={styles.code}>
                      <code>{content.text}</code>
                    </pre>
                  );
                case 'quote':
                  return (
                    <blockquote key={key} className={styles.blockquote}>
                      {content.text}
                    </blockquote>
                  );
              }
            })}
          </div>
        </div>
      ))}
    </div>
  );
};

export default Home;
ブラウザーでは次のように表示されます。
個別ページを作成する【P.129】
Notionの各ページをそれぞれ別のURLに対応させるようにします。
1:URLイン対応するtsxファイルをプロジェクトディレクトリーに配置します。
ファイルパスは"pages/post/[slug].tsx"になります。この時点では空のファイルです。
2:"pages/index.tsx"ファイルではNotionのデータベースにアクセスしていましたが、"[slug].tsx"ファイルからもデータベースにアクセスする予定です。そこで、データベースにアクセスしてページ一覧を取得する関数getPostsを定義し、外部からも呼び出せるようにしておきます。
さらに、getPosts関数で取得したNotionページの内容(ブロック)を取得する処理も関数化しておきます。getPostContetsという関数名にしています。
次に各tsxファイルの全体コードを示します。
import { Client } from '@notionhq/client';
import { GetStaticProps, NextPage } from 'next';
import styles from '../styles/Home.module.css';
import dayjs from 'dayjs';
import prism from 'prismjs';
import { useEffect } from 'react';
import { QueryDatabaseResponse } from '@notionhq/client/build/src/api-endpoints';

export type Content =
  | {
      type: 'paragraph' | 'quote' | 'heading_2' | 'heading_3';
      text: string | null;
    }
  | {
      type: 'code';
      text: string | null;
      language: string | null;
    };

export type Post = {
  id: string;
  title: string | null;
  slug: string | null;
  createdTs: string | null;
  lastEditedTs: string | null;
  contents: Content[];
};

type StaticProps = {
  posts: Post[];
};

const notion = new Client({
  auth: process.env.NOTION_TOKEN,
});

export const getPosts = async (slug?: string) => {
  let database: QueryDatabaseResponse | undefined = undefined;
  if (slug) {
    database = await notion.databases.query({
      database_id: process.env.NOTION_DATABASE_ID || '',
      filter: {
        and: [
          {
            property: 'Slug',
            rich_text: {
              equals: slug,
            },
          },
        ],
      },
    });
  } else {
    database = await notion.databases.query({
      database_id: process.env.NOTION_DATABASE_ID || '',
      filter: {
        and: [
          {
            property: 'Published',
            checkbox: {
              equals: true,
            },
          },
        ],
      },
      sorts: [{ timestamp: 'created_time', direction: 'descending' }],
    });
  }
  if (!database) return [];

  const posts: Post[] = [];
  // database.resultsの各要素を処理するように修正した.
  database.results.forEach( (page, index) => {
    if (!('properties' in page)) {
      // pageの内容が存在しないのでnullとする.
      posts.push({
        id: page.id,
        title: null,
        slug: null,
        createdTs: null,
        lastEditedTs: null,
        contents: [],
      });
      return;
    }

    // typeがtitleなら次の型になっている.
    // {
    //   type: 'title';
    //   title: Array<RichTextItemResponse>;
    //   id: string;
    // }
    // RichTextItemResponse型の配列titleから内容を取り出す.
    let title: string | null = null;
    if (page.properties['Name'].type === 'title') {
      title = page.properties['Name'].title[0]?.plain_text ?? null;
    }
    // slugについても同様に取り出す.
    let slug: string | null = null;
    if (page.properties['Slug'].type === 'rich_text') {
      slug = page.properties['Slug'].rich_text[0]?.plain_text ?? null;
    }

    posts.push({
      id: page.id,
      title,
      slug,
      createdTs: page.created_time,
      lastEditedTs: page.last_edited_time,
      contents: [],
    });
  });
  return posts;
};

// Notionページの内容(ブロック)を返す.
export const getPostContents = async (post: Post) => {
  const blockResponses = await notion.blocks.children.list({
    block_id: post.id,
  });

  const contents: Content[] = [];
  blockResponses.results.forEach( (block) => {
    // 要素blockはPartialBlockObjectResponse | BlockObjectResponse型のユニオン型であり、絞り込む.
    if (!('type' in block)) {
      // ここに来るのはblockがPartialBlockObjectResponse型のときのみ.
      // なぜなら、PartialBlockObjectResponse型にtypeプロパティがないから.
      return;
    }
    // ここに来るのはblockがBlockObjectResponse型のときのみ.
    // 以降、type値ごとに分岐させて、Content[]型のcontentsに追加する.
    switch (block.type) {
      case 'paragraph':
        contents.push({
          type: 'paragraph',
          text: block.paragraph.rich_text[0]?.plain_text ?? null,
        });
        break;
      case 'heading_2':
        contents.push({
          type: 'heading_2',
          text: block.heading_2.rich_text[0]?.plain_text ?? null,
        });
        break;
      case 'heading_3':
        contents.push({
          type: 'heading_3',
          text: block.heading_3.rich_text[0]?.plain_text ?? null,
        });
        break;
      case 'quote':
        contents.push({
          type: 'quote',
          text: block.quote.rich_text[0]?.plain_text ?? null,
        });
        break;
      case 'code':
        contents.push({
          type: 'code',
          text: block.code.rich_text[0]?.plain_text ?? null,
          language: block.code.language,
        });
    }
  });
  return contents;
};

export const getStaticProps: GetStaticProps<StaticProps> = async () => {
  const posts = await getPosts();
  // getPostContentsはasync関数なので、Promise.all()で並列処理する.
  const contentsList = await Promise.all(
    posts.map( (post) => {
      return getPostContents(post);
    })
  );
  // ports配列の要素のcontentsプロパティを追加.
  posts.forEach( (post, index) => {
    post.contents = contentsList[index];
  });
  return {
    props: { posts },
    revalidate: 60,
  };
};

const Home: NextPage<StaticProps> = ({ posts }) => {
  useEffect( () => {
    prism.highlightAll();
  }, []);
  return (
    <div className={styles.wrapper}>
      {posts.map( (post) => (
        <div className={styles.post} key={post.id}>
          <div className={styles.post}>
            <h1 className={styles.title}>{post.title}</h1>
            <div className={styles.timestampWrapper}>
              <div>
                <div className={styles.timestamp}>
                  作成日時:{' '}
                  {dayjs(post.createdTs).format('YYYY-MM-DD HH:mm:ss')}
                </div>
                <div className={styles.timestamp}>
                  更新日時:{' '}
                  {dayjs(post.lastEditedTs).format('YYYY-MM-DD HH:mm:ss')}
                </div>
              </div>
            </div>
          </div>
          <div>
            {post.contents.map( (content, index) => {
              const key = `${post.id}_${index}`;
              switch (content.type) {
                case 'heading_2':
                  return (
                    <h2 key={key} className={styles.heading_2}>
                      {' '}
                      {content.text}{' '}
                    </h2>
                  );
                case 'heading_3':
                  return (
                    <h3 key={key} className={styles.heading_2}>
                      {' '}
                      {content.text}{' '}
                    </h3>
                  );
                case 'paragraph':
                  return (
                    <p key={key} className={styles.paragraph}>
                      {content.text}
                    </p>
                  );
                case 'code':
                  return (
                    <pre key={key} className={styles.code}>
                      <code>{content.text}</code>
                    </pre>
                  );
                case 'quote':
                  return (
                    <blockquote key={key} className={styles.blockquote}>
                      {content.text}
                    </blockquote>
                  );
              }
            })}
          </div>
        </div>
      ))}
    </div>
  );
};

export default Home;
import { GetStaticPaths } from 'next';
import { GetStaticProps } from 'next';
import { Post, getPostContents, getPosts } from '..';
import { NextPage } from 'next';

type StaticPathsParams = {
  slug: string;
};

// 戻り値は2つ(pathsとfallback)のプロパティを持つオブジェクト.
// ・paths配列の数だけ[slug]の値に対応したURLのページをレンタリングできる.
// ・fallbackはfalse or 'blocking'
// falseならpathsに含まれないURLにアクセスした場合に404ページを表示する.
// 'blocking'ならpathsに含まれないURLにアクセスした場合に、そのURLのページを生成するまでレスポンスを返さない.
export const getStaticPaths: GetStaticPaths<StaticPathsParams> = async () => {
  const posts = await getPosts();
  const paths: {
    params: { slug: string };
  }[] = [];
  // 戻り値となるオブジェクトを整形する.
  posts.forEach( (post) => {
    const slug = post.slug;
    if (slug) {
      paths.push({
        params: {
          slug,
        },
      });
    }
  });
  return { paths, fallback: 'blocking' };
};

type StaticProps = {
  post?: Post;
};

export const getStaticProps: GetStaticProps<
  StaticProps,
  StaticPathsParams
> = async ({ params, preview }) => {
  const notFoundProps = {
    props: {},
    redirect: {
      destination: '/404',
    },
  };
  if (!params) {
    return notFoundProps;
  }
  const { slug } = params;
  const posts = await getPosts(slug);
  const post = posts.shift();
  if (!post) {
    return notFoundProps;
  }
  const contents = await getPostContents(post);
  post.contents = contents;
  return {
    props: {
      post,
    },
  };
};

const PostPage: NextPage<StaticProps> = ({ post }) => {
  if (!post) return null;
  return <div>{JSON.stringify(post)}</div>;
};

export default PostPage;
3:テストとして、http://localhost:3000にアクセスします。これまで通り、複数のページがまとめて表示されます。
次に、http://localhost:3000/post/testpage1にアクセスしてみます。すると、次のようにJSON形式でページの内容(ブロック)のデータを取得できています。

トップページから個別ページに遷移できるようにする【P.137-】
Next.jsでのリンクは、next/linkモジュールのLinkコンポーネントを使って実装できます。Linkコンポーネントを使うと、シングルページアプリケーションのように擬似的なページ遷移ができます。
トップページに対応する"index.tsx"ファイルを次のように修正します。これでページのタイトルをクリックすると、個別ページに飛ぶようになります。
(略)
import Link from 'next/link';

(略)

const Home: NextPage<StaticProps> = ({ posts }) => {
  useEffect( () => {
    prism.highlightAll();
  }, []);
  return (
    <div className={styles.wrapper}>
      {posts.map( (post) => (
        <div className={styles.post} key={post.id}>
          <h1 className={styles.title}>
            <Link href={`/post/${encodeURIComponent(post.slug ?? '')}`}>
              {post.title}
            </Link>
          </h1>
          <div className={styles.timestampWrapper}>
            <div>
              <div className={styles.timestamp}>
                作成日時: {dayjs(post.createdTs).format('YYYY-MM-DD HH:mm:ss')}
              </div>
              <div className={styles.timestamp}>
                更新日時:{' '}
                {dayjs(post.lastEditedTs).format('YYYY-MM-DD HH:mm:ss')}
              </div>
            </div>
          </div>
        </div>
      ))}
    </div>
  );
};

export default Home;
個別ページのスタイリング【P.138-】
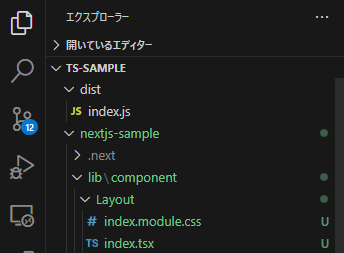
1:トップページのHomeコンポーネント内では、wrapperクラスのdivタグが大枠として存在します。こをコンポーネント化して、切り出します。
プロジェクトディレクトリーに"lib/component/Layout"ディレクトリーを作ります。その中に、次の"index.tsx"ファイルを配置します。
コード的には、切り出したwrapperクラスのdivタグが、Layoutコンポーネント側に来ます。
import { FunctionComponent, ReactNode } from 'react';
import styles from './index.module.css';

export const Layout: FunctionComponent<{ children: ReactNode }> = ({
  children,
}) => {
  return <div className={styles.wrapperr}>{children}</div>;
};
同一ディレクトリーにスタイルシートも配置します。スタイルシートの中身は、"styles/Home.module.css"ファイル内で定義したwrapper用のコードと同じです。
.wrapper {
	max-width: 800px;
	min-height: 100vh;
	margin: 0 auto;
}
“pages/index.tsx"ファイルのHomeコンポーネント内でLayoutコンポーネントを使うように修正します。
※代わりにwrapperクラスのdivタグはなくなります。
(略)
import { Layout } from '../lib/component/Layout';
(略)
const Home: NextPage<StaticProps> = ({ posts }) => {
useEffect( () => {
prism.highlightAll();
}, []);
return (
<Layout>
<div className={styles.wrapper}>
{posts.map[5]post) => (
<div className={styles.post} key={post.id}>
(略)
</div>
}
</div>
</Layout>
);
};
export default Home;
ブラウザーでトップページにアクセスして表示をテストします。
※デザインがずれている場合は、スタイルシートがうまく適用されていない可能性があります。CSS内やクラス名のスペルミスを疑ってください。
2:次は、ページの内容を表示する部分をコンポーネント化します。コンポーネント名はPostComponentとします。対応するファイルとして、"lib/component/Post/index.tsx"ファイルを作成します。
“pages/index.tsx"ファイルのコードの一部を移動してきます。
import dayjs from 'dayjs';
import Link from 'next/link';
import { FunctionComponent } from 'react';
import { Post } from '../../../pages';
import styles from './index.module.css';

export const PostComponent: FunctionComponent<{ post: Post }> = ({ post }) => {
  return (
    <div className={styles.post} key={post.id}>
      <h1 className={styles.title}>
        <Link href={`/post/${encodeURIComponent(post.slug ?? '')}`}>
          {post.title}
        </Link>
      </h1>
      <div className={styles.timestampWrapper}>
        <div>
          <div className={styles.timestamp}>
            作成日時: {dayjs(post.createdTs).format('YYYY-MM-DD HH:mm:ss')}
          </div>
          <div className={styles.timestamp}>
            更新日時: {dayjs(post.lastEditedTs).format('YYYY-MM-DD HH:mm:ss')}
          </div>
        </div>
      </div>
      <div>
        {post.contents.map( (content, index) => {
          const key = `${post.id}_${index}`;
          switch (content.type) {
            case 'heading_2':
              return (
                <h2 key={key} className={styles.heading_2}>
                  {' '}
                  {content.text}{' '}
                </h2>
              );
            case 'heading_3':
              return (
                <h3 key={key} className={styles.heading_2}>
                  {' '}
                  {content.text}{' '}
                </h3>
              );
            case 'paragraph':
              return (
                <p key={key} className={styles.paragraph}>
                  {content.text}
                </p>
              );
            case 'code':
              return (
                <pre key={key} className={styles.code}>
                  <code>{content.text}</code>
                </pre>
              );
            case 'quote':
              return (
                <blockquote key={key} className={styles.blockquote}>
                  {content.text}
                </blockquote>
              );
          }
        })}
      </div>
    </div>
  );
};
代わりに、"pages/index.tsx"ファイルのHomeコンポーネントのところがすっきりします。使わなくなったimport文なども削除しておきます。
import { Client } from '@notionhq/client';
import { GetStaticProps, NextPage } from 'next';
import prism from 'prismjs';
import { useEffect } from 'react';
import { QueryDatabaseResponse } from '@notionhq/client/build/src/api-endpoints';
import { Layout } from '../lib/component/Layout';
import { PostComponent } from '../lib/component/Post';

(略)

const Home: NextPage<StaticProps> = ({ posts }) => {
  useEffect( () => {
    prism.highlightAll();
  }, []);
  return (
    <Layout>
      {posts.map( (post) => (
        <PostComponent post={post} key={post.id} />
      ))}
    </Layout>
  );
};

export default Home;
PostComponetコンポーネントで使うスタイルシートを設定します。
“styles/Home.module.css"ファイルからwrapper以外のコードを"lib/component/Post/index.module.css"ファイルにコピーします。
.post {
	padding: 8px;
	margin-bottom: 16px;
}

.title {
	font-size: 24px;
	font-weight: 700;
	margin: 16px 0;
}

.timestampWrapper {
	display: flex;
	justify-content: flex-end;
	margin-bottom: 8px;
}

.timestamp {
	margin-bottom: 4px;
	font-size: 14px;
}


.heading2 {
	font-weight: 500;
	font-size: 20px;
	margin: 8px 0;
}

.heading3 {
	font-weight: 500;
	font-size: 18px;
	margin: 8px 0;
}

.paragraph {
	line-height: 24px;
}

.code {
	line-height: 24px;
	margin: 16px 0 !important;
}

.quote {
	line-height: 24px;
	font-style: italic;
	color: #d1d5db;
	margin: 0;
	padding: 0 16px;
	border-left: 2px solid #d1d5db;
}
3:LayoutコンポーネントとPageComponentコンポーネントを自作しました。
個別ページは"pages/post/[slug].tsx"ファイルに対応します。この中のPostPageコンポーネントでは、データをそのまま出力しているだけです。
自作したコンポーネントを活用してデータをレンタリングしてみます。
import { GetStaticPaths } from 'next';
import { GetStaticProps } from 'next';
import { Post, getPostContents, getPosts } from '..';
import { NextPage } from 'next';
import prism from 'prismjs';
import { useEffect } from 'react';
import { Layout } from '../../lib/component/Layout';
import { PostComponent } from '../../lib/component/Post';

type StaticPathsParams = {
  slug: string;
};

// 戻り値は2つ(pathsとfallback)のプロパティを持つオブジェクト.
// ・paths配列の数だけ[slug]の値に対応したURLのページをレンタリングできる.
// ・fallbackはfalse or 'blocking'
// falseならpathsに含まれないURLにアクセスした場合に404ページを表示する.
// 'blocking'ならpathsに含まれないURLにアクセスした場合に、そのURLのページを生成するまでレスポンスを返さない.
export const getStaticPaths: GetStaticPaths<StaticPathsParams> = async () => {
  const posts = await getPosts();
  const paths: {
    params: { slug: string };
  }[] = [];
  // 戻り値となるオブジェクトを整形する.
  posts.forEach( (post) => {
    const slug = post.slug;
    if (slug) {
      paths.push({
        params: {
          slug,
        },
      });
    }
  });
  return { paths, fallback: 'blocking' };
};

type StaticProps = {
  post?: Post;
};

export const getStaticProps: GetStaticProps<
  StaticProps,
  StaticPathsParams
> = async ({ params, preview }) => {
  const notFoundProps = {
    props: {},
    redirect: {
      destination: '/404',
    },
  };
  if (!params) {
    return notFoundProps;
  }
  const { slug } = params;
  const posts = await getPosts(slug);
  const post = posts.shift();
  if (!post) {
    return notFoundProps;
  }
  const contents = await getPostContents(post);
  post.contents = contents;
  return {
    props: {
      post,
    },
  };
};

const PostPage: NextPage<StaticProps> = ({ post }) => {
  useEffect( () => {
    prism.highlightAll();
  }, []);

  if (!post) return null;

  return (
    <Layout>
      <PostComponent post={post} />
    </Layout>
  );
};

export default PostPage;
ブラウザーで個別ページを開いてテストします。

書籍のP.145-158に、ハンズオンで実装したコードの全体が掲載されています。
また、公式のGitHubで公開されているソースを参照するのもよいでしょう。
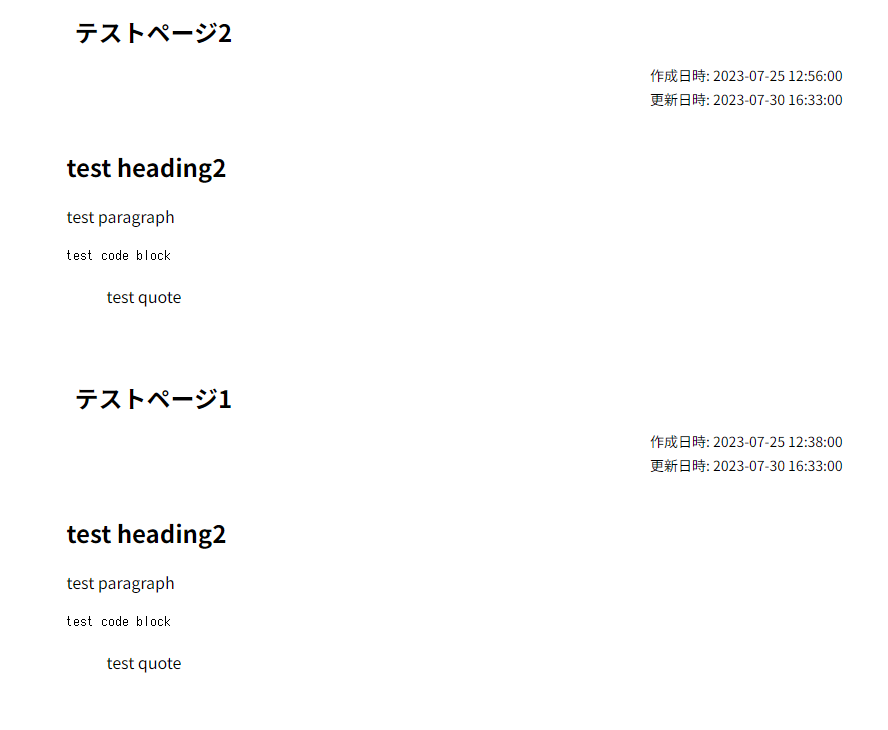
全ページで適用されるスタイルを設定する【P.157】
書籍の画像では背景色がダークであり、実験と結果とは違っていました。
各クラス用のスタイルはすべてコンポーネント用のCSSファイルに移動済みであり、"styles/globals.css"ファイルには全体的なスタイルが残されています。
P.157のコードとクラベルと若干違いがあったので、このページのコードに合わせました。
html {
  color-scheme: dark;
}

body {
  padding: 0;
  margin: 0;
  font-family: 'Noto Sans JP', -apple-system, BlinkMacSystemFont, Segoe UI, Roboto, Oxygen, Ubuntu, Cantarell, Fira Sans, Droid, Sans, Helvetica Neue, sans-serif;
}

a {
  color:inherit;
  text-decoration: none;
}

* {
  box-sizing: border-box;
}
見た目が変化しました。
ISR機能を有効にする【P.144-】
アプリケーションのページは、SSG(静的サイト生成)によってNotionのページの内容を表示します。
HTTPリクエストが来る前、すなわちアプリケーションをビルドした際にNotion APIで情報を取得してHTMLファイルを生成しています。つまり、ビルド後にNotionのページを更新しても、アプリケーションのページには反映されません。
これでは問題です。そこでISR(Incremental Static Regeneration)機能を有効にします。
ISR昨日は、HTTPリクエストが来たらビルド済みの静的なページを表示しながら、裏側で再レンダリングします。そして、再レンダリングが完了したら、新しく生成されたページを表示するのです。
ISR機能を有効にするには、getStaticPropsの戻り値にrevalidateという項目を追加します。
最初のHTTPリクエストが届いてから、指定の秒数の間は、ビルド時に生成された内容を表示します。指定の秒数が経過した後で、次のHTTPリクエストが届いたら、まず最初のビルドの内容を表示しますが、裏では再度SSGを実行します。SSGが完了すると、次のHTTPリクエストからは新しい内容が表示されます。
これまで、npm run devコマンドを用いていました。この開発サーバーの動作では、getStaticPropsがリクエストごとに実行されてしまい、ISRの動作を確認できません。そこで、npm run buildしてから、npm run startで本番モードで立ち上げます。これでISRの動作を確認できます。
Vercelへのデプロイ【P.159-】
書籍ではVercelへのデプロイ法が紹介されています。
GitHubリポジトリにプロジェクトファイルを登録したり、Vecelにアカウントを作ったりする必要があるので、試さずに読むだけにしました。
4章:Next.13の新機能を活用した写真検索アプリを作成する
3章ではNext.13とApp Routerの概要について説明しています。
4章では応用編として、これらの機能を活用した写真検索アプリを作成します。App Router機能を使うことで、サーバーサイドとクライアントサイドの処理をシームレスに統合できます。
プロジェクトを作成する【P.178-】
VS Codeのターミナルで次を実行して、Next.jsのプロジェクトを作成します。
PS D:\ts-sample> npx create-next-app@latest nextjs-handson2 --app --tailwind
(聞かれる内容はすべてデフォルトのまま[Enter]キーで進める)
※今回のハンズオンでは、スタイリングのためにTailwind CSSというライブラリを用います。
テンプレートを実行してみます。
PS D:\ts-sample> cd .\nextjs-handson2\
PS D:\ts-sample\nextjs-handson2> npm run dev
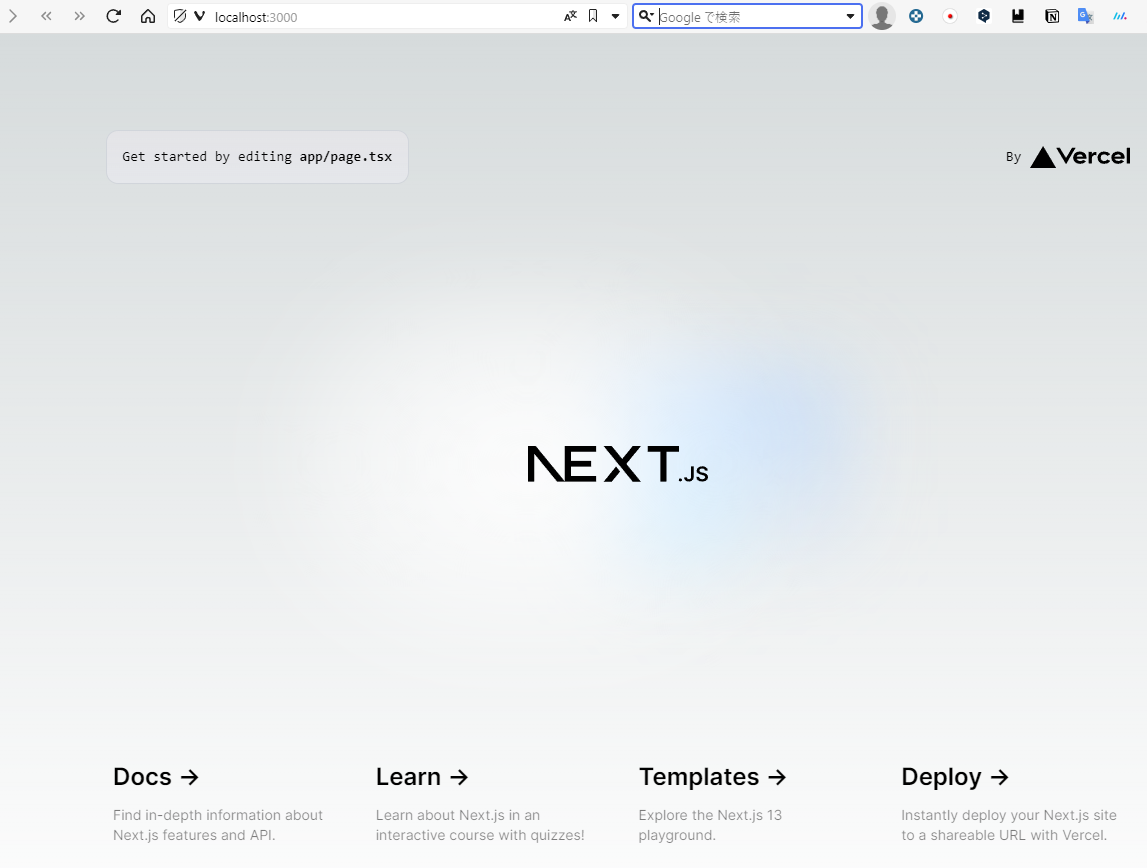
サーバーが起動したら、ブラウザーでhttp://localhost:3000にアクセスします。
Next.jsのロゴが表示されているので成功です。
App Router機能を試す【P.180】
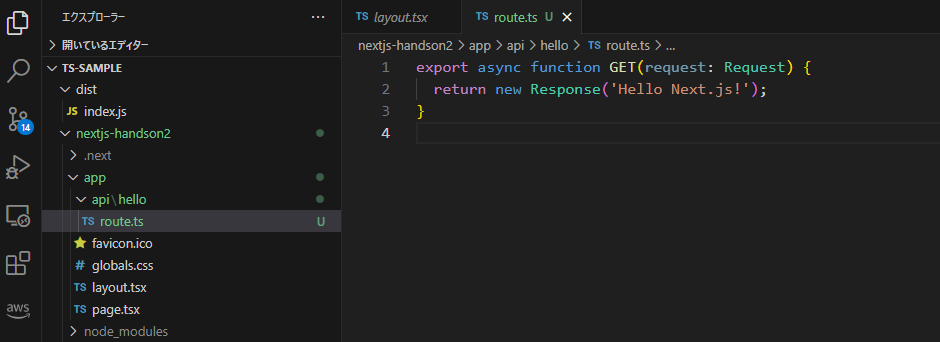
書籍では"app/api/hello"ディレクトリーに"route.ts"ファイルが配置されていると記載がありますが、作成したプロジェクトにはありませんでした。当然ながらその状態で、ブラウザーでhttp://localhost:3000/api/helloにアクセスしてもエラーになります。
そこで手動で"app/api/hello/route.ts"ファイルを作成しました。
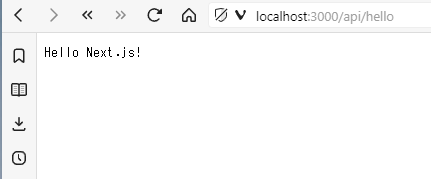
export async function GET(request: Request) {
  return new Response('Hello Next.js!');
}
ブラウザーでhttp://localhost:3000/api/helloにアクセスして、メッセージを表示できたところまで確認しました。
“pages/api"ディレクトリに配置されたファイルは、APIルートとして処理されます。
※APIルートの解説については、P.78に記載があります。
一方、Next.js 13のApp Router機能を利用するには、従来のpagesディレクトリではなくappディレクトリにコードを配置します。
※pagesディレクトリに配置したコードは従来のNext.jsと同様に動作します。App Router特別するために、Pages Routerと呼びます。
Unsplash APIを利用するために準備する【P.180-】
Unsplashは無料で利用できる写真ストックサービスです。

UnsplashはAPIを提供しています。
今回ハンズオンで作るサンプルではUnsplash APIを用います。
1:Unsplashの開発者アカウントを登録します。
https://unsplash.com/ja/joinからアカウントを作成できます。
届いたメールアドレスのリンクにアクセスすることで、作成が完了します。
2:Unsplash側に Unsplash APIを利用するアプリケーションを登録します。
https://unsplash.com/oauth/applicationsにアクセスして、「New Application」を押します。
ガイドラインに同意して、[Accept terms]ボタンを押します。
Application nameとDescription(空欄はNGだったため)は"nextjs-handson2″とします。
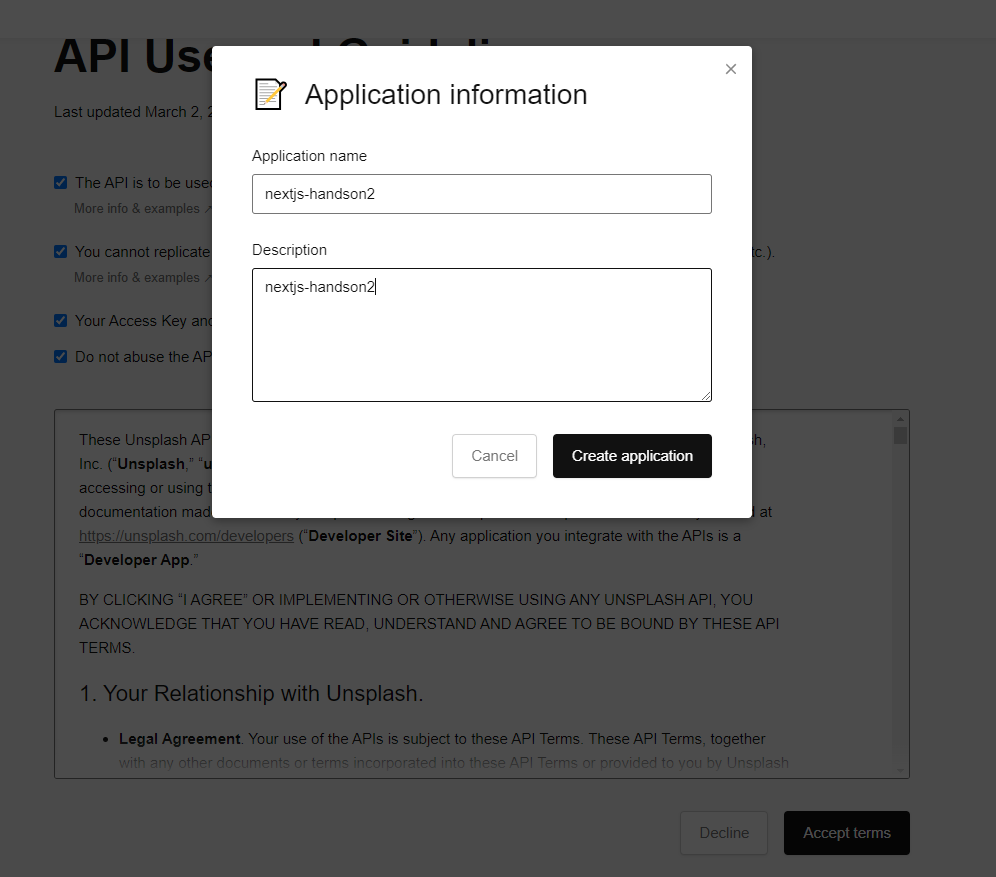
[Create application]ボタンを押します。
3:アプリケーションが作成されたら、詳細画面が表示されます。スクロールすると、Keysという項目があります。ここのAccess KeyがAPIを利用するときに使うための情報になります。
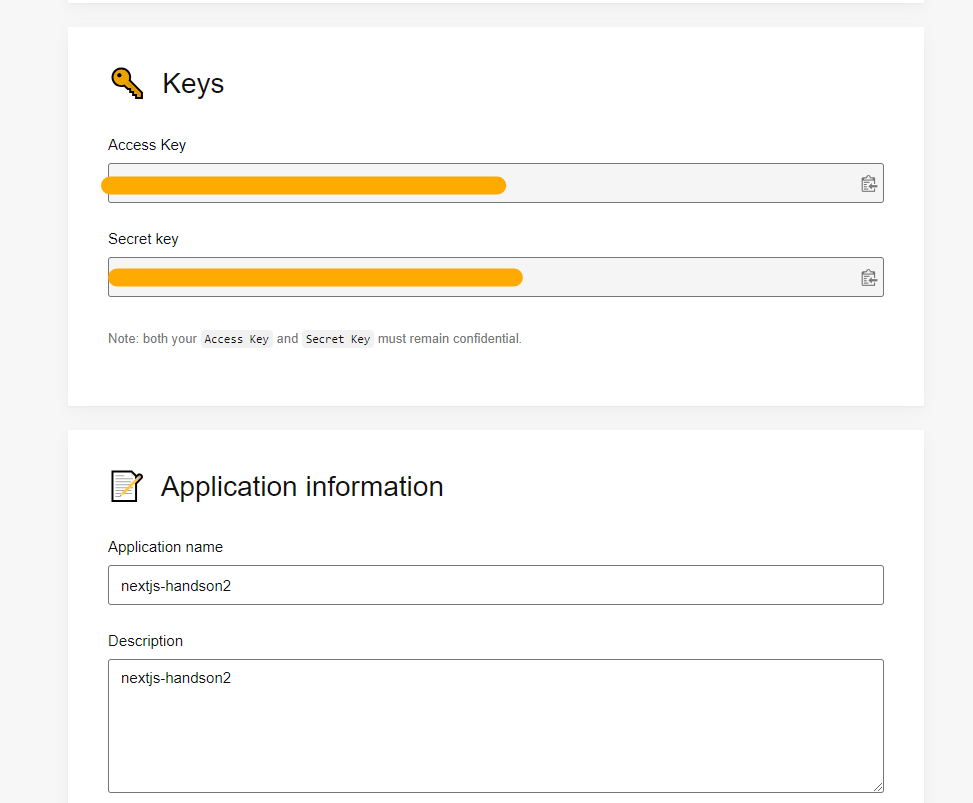
4:Next.jsプロジェクト直下に".env.local"ファイルを作成し、内容を次のようにします。ここで先ほどのAccess Keyを入力します。
UNSPLASH_API_ACESS_KEY="xxxx"Tailwind CSS向けに設定する【P.182-183】
1:Tailwind CSSの設定ファイルである"tailwind.config.js"ファイルを修正します。
/** @type {import('tailwindcss').Config} */
module.exports = {
  content: [
    './pages/**/*.{js,ts,jsx,tsx,mdx}',
    './app/**/*.{js,ts,jsx,tsx,mdx}',
    './lib/**/*.{js,ts,jsx,tsx,mdx}',
  ],
  theme: {
    // themeの内容は今回不要なので削除.
  },
  plugins: [],
};
2:"app/global.css"ファイルに次のコードが含まれていることを確認します。
このコードにより、Tailwind CSSのスタイルシートがアプリケーションに含まれ、各スタイルが有効になります。
@tailwind base;
@tailwind components;
@tailwind utilities;
“app/layout.tsx"ファイルを見ると、"globals.css"ファイルをインポートしています。これにより、アプリケーション全体にTailwind CSSが有効になります。

3:VS Codeの拡張機能であるTailwind CSS IntelliSenseをインストールします。
ユーティリティークラスがサジェストされたり、クラス名に対応するスタイルを確認できたりします。
React Iconsライブラリを登録する【P.183】
1:VS CodeのターミナルからReact Iconsライブラリをインストールします。
PS D:\ts-sample\nextjs-handson2> npm install react-icons

プロジェクトの不要なコードをカットする【P.184-】
ハンズオンの開発に入る前に見通しがよくなるように、create-next-appで生成されたテンプレートから不要な部分を削除します。
1:"app/pages.tsx"ファイルは次の空のコンポーネントにします。
import Image from 'next/image';

const Home = () => {
  return <div></div>;
};

export default Home;
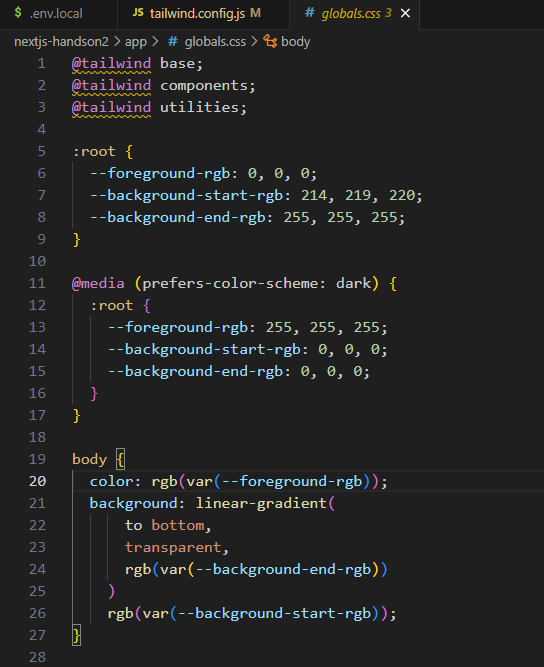
2:"app/globals.css"ファイルには、Tailwind CSSのインポートと最低限のスタイルのコードだけを残します。
@tailwind base;
@tailwind components;
@tailwind utilities;

* {
  box-sizing: border-box;
  padding: 0;
  margin: 0;
}

html {
  color-scheme: dark;
}

body {
  max-width: 100vw;
  overflow-x: hidden;
}

a {
  color: inherit;
  text-decoration: none;
}
3:"app/api/hello"ディレクトリを削除します。
4:"next.config.js"ファイルを次のように修正します。
これで外部にあるUnsplashドメインから取得した画像を扱えます。
/** @type {import('next').NextConfig} */
const nextConfig = {
  experimental: {
    appDir: true,
  },
  images: {
    remotePatterns: [{ protocol: 'https', hostname: '**.unsplash.com' }],
  },
};

module.exports = nextConfig;
Unsplash APIから写真を取得する【P.187-】
import Image from 'next/image';

type Photo = {
  id: string;
  created_at: string;
  width: number;
  height: number;
  color: string;
  description: string;
  urls: {
    raw: string;
    full: string;
    regular: string;
    small: string;
    thumb: string;
  };
  links: {
    self: string;
    html: string;
    download: string;
  };
};

const getRandomPhotos = async (): Promise<Photo[]> => {
  const params = new URLSearchParams();
  params.append('client_id', process.env.UNSPLASH_API_ACESS_KEY ?? '');
  params.append('count', '32');
  const response = await fetch(
    `https://api.unsplash.com/photos/random?${params.toString()}`,
    { method: 'GET', cache: 'no-cache' }
  );
  return response.json();
};

const Home = async () => {
  const randomPhotos = await getRandomPhotos();
  return (
    <div>
      {randomPhotos.map( (photo) => (
        <Image
          key={photo.id}
          src={photo.urls.small}
          width={400}
          height={photo.height * (400 / photo.width)}
          alt={photo.description}
        />
      ))}
    </div>
  );
};

export default Home;
上記のコードでは、ランダムな画像を取得するために次のUnsplash APIを利用しています。
GET /photos/random

getRandomPhotos()関数内でこのAPIを使っています。この関数の戻り値は、Photo型のオブジェクトの配列です。
“cache: 'no-cache'"とすることで、レスポンスをキャッシュせずに、ページを読み込む度にHTTPリクエストを送信するようにしています。結果的に毎回新しい画像を取得できます。
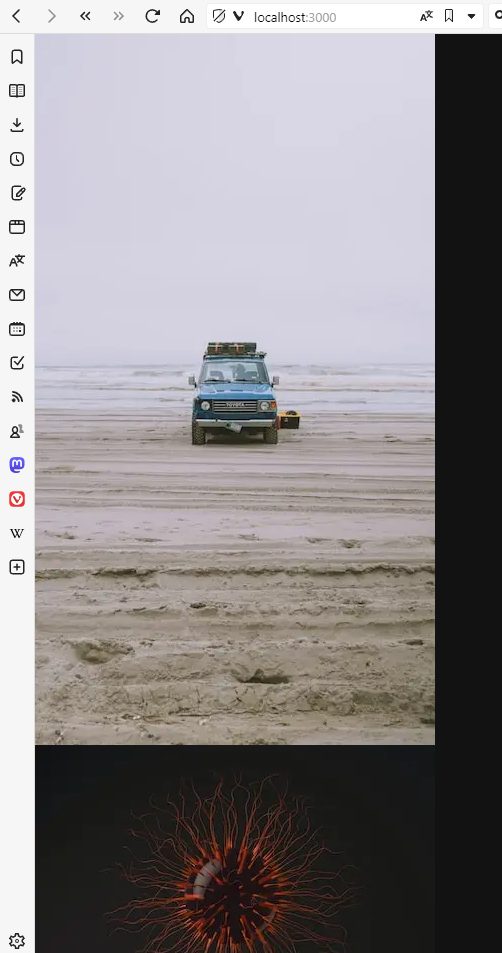
ブラウザーでhttp://localhost:3000にアクセスすると、画像が縦に一覧表示されます。
リロードすると別の画像に置き換わります。
Tailwind CSSによる3列グリッド表示【P.191-】
(略)
const Home = async () => {
const randomPhotos = await getRandomPhotos();
return (
<div className="grid grid-cols-3 gap-4 w-[1200px] mx-auto">
{[0, 1, 2].map[6]columnIndex) => (
<div key={columnIndex}>
{randomPhotos.map((photo, photoIndex) => {
if (photoIndex % 3 === columnIndex) {
return (
… Continue reading}
</div>
);
};
export default Home;
※return直後のソース表示がおかしいので、以下の画像を参照ください。
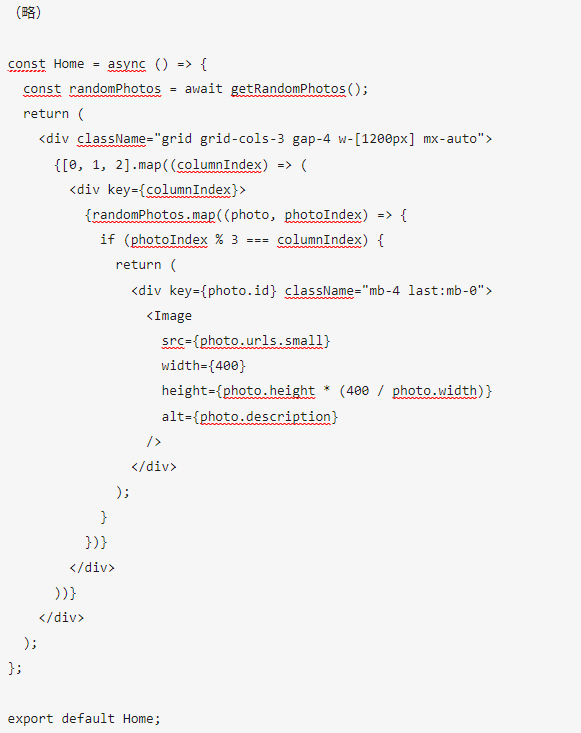
“w-[1200px] mx-auto"と指定することで、幅1,200px、中央揃えになります。このmx-autoは、"margin-left: auto; margin-right: auto;"と同等です。
“mb-4″を指定することで、列内での写真の間に間隔が空きます。

アプリケーションの外枠を実装する【P.194-】
import './globals.css';
import type { Metadata } from 'next';
import { Inter } from 'next/font/google';
import { Suspense } from 'react';

const inter = Inter({ subsets: ['latin'], display: 'swap' });

export const metadata: Metadata = {
  title: 'Create Next App',
  description: 'Generated by create next app',
};

export default function RootLayout({
  children,
}: {
  children: React.ReactNode;
}) {
  return (
    <html lang="ja" className={inter.className}>
      <body>
        <header
          className={`h-16 bg-transparent backdrop-blur-md flex fixed w-full px-6`}
        >
          <div className={`h-auto my-auto font-bold text-5xl tracking-tighter`}>
            Search Image
          </div>
        </header>
        <main className={`pt-20 pb-8 bg-gray-950 min-h-screen`}>
          <Suspense fallback={'loading...'}> {children}</Suspense>
        </main>
      </body>
    </html>
  );
}
検索機能を追加する【P.198-】
ルートハンドラーを利用して、ユーザーの入力値がNext.jsサーバーが処理して、Unsplash APIの写真検索のエンドポイントを呼び出すようにします。
1:"lib/type.ts"ファイルを作成します。Photo型は"app/page.tsx"ファイル内から移動してきました。PhotoSearchResponse型はUnsplash APIでの写真検索のレスポンスの型になります。
export type Photo = {
  id: string;
  created_at: string;
  width: number;
  height: number;
  color: string;
  description: string;
  urls: {
    raw: string;
    full: string;
    regular: string;
    small: string;
    thumb: string;
  };
  links: {
    self: string;
    html: string;
    download: string;
  };
};

export type PhotoSearchResponse = {
  total: number;
  total_pages: number;
  results: Photo[];
};
2:"lib/unsplash.ts"ファイルを作成して、この中にUnsplash APIを呼び出す関数をまとめておきます。
getRandomPhotos()関数は、"app/page.tsx"ファイルから移動してきました。
import 'server-only';
import { Photo, PhotoSearchResponse } from './type';

// ランダムな写真を取得する.
export const getRandomPhotos = async (): Promise<Photo[]> => {
  const params = new URLSearchParams();
  params.append('client_id', process.env.UNSPLASH_API_ACESS_KEY ?? '');
  params.append('count', '32');
  const response = await fetch(
    `https://api.unsplash.com/photos/random?${params.toString()}`,
    {
      method: 'GET',
      next: { revalidate: 60 * 30 }, // 従来のNext.jsのISRと同じ挙動.
    }
  );
  return response.json();
};

// 画像を検索する.
export const searchPhotos = async (
  query: string
): Promise<PhotoSearchResponse> => {
  const params = new URLSearchParams();
  params.append('client_id', process.env.UNSPLASH_API_ACESS_KEY ?? '');
  params.append('query', query);
  params.append('per_page', '32');
  const response = await fetch(
    `https://api.unsplash.com/search/photos?${params.toString()}`,
    {
      method: 'GET',
      next: { revalidate: 60 * 30 }, // 実際についてのISRの挙動.
    }
  );
  return response.json();
};
3:"app/api/search/route.ts"ファイルを作成して、ルートハンドラーを実装します。
import { searchPhotos } from '@/lib/unsplash';

export async function POST(request: Request) {
  // query値が存在するか不明なので、ひとまずunknown型と定義する.
  const { query }: { query: unknown } = await request.json();
  if (!query || typeof query !== 'string') {
    // queryがstring型でない場合はリクエストが不正と判断し、ステータスコード400のレスポンスを返す.
    const response = new Response('no query', { status: 400 });
    return response;
  }

  // queryがstring型であるときのみ、画像を検索する.
  const searchPhotoResponse = await searchPhotos(query);
  return new Response(JSON.stringify(searchPhotoResponse), {
    status: 200,
    headers: {
      'Content-Type': 'application/json',
    },
  });
}
4:このルートハンドラーを呼び出すSearchコンポーネントを実装します。コンポーネントは"lib/component/Search.tsx"ファイルで定義します。
'use client';

import { Photo, PhotoSearchResponse } from '@/lib/type';
import { FunctionComponent, useState, useTransition } from 'react';
import { VscSearch } from 'react-icons/vsc';

export const Search: FunctionComponent = () => {
  const [query, setQuery] = useState<string | null>(null);
  const [searchedPhotos, setSearchPhotos] = useState<Photo[] | null>(null);

  return (
    <div>
      <div className="my-8 flex justify-center">
        <input
          type="text"
          className="w-96 mr-4 p-2 bg-gray-700"
          value={query ?? ''}
          onChange={(e) => setQuery(e.target.value)}
        />
        <button
          className="bg-gray-700 py-2 px-4"
          onClick={async () => {
            const response = await fetch(`http://localhost:3000/api/search`, {
              method: 'POST',
              body: JSON.stringify({ query }),
              headers: {
                'Content-Type': 'application/json',
              },
            });
            const json: PhotoSearchResponse = await response.json();
            console.log(json);
            setSearchPhotos(json.results);
          }}
        >
          <VscSearch /> {/* 検索実行ボタンを表現するアイコン */}
        </button>
      </div>
    </div>
  );
};
5:"app/page.tsx"ファイルでSearchコンポーネントをレンタリングします。
import { Search } from '@/lib/component/Search';
import { getRandomPhotos } from '@/lib/unsplash';

const Home = async () => {
  const randomPhotos = await getRandomPhotos();
  return (
    <div>
      <Search />
    </div>
  );
};

export default Home;
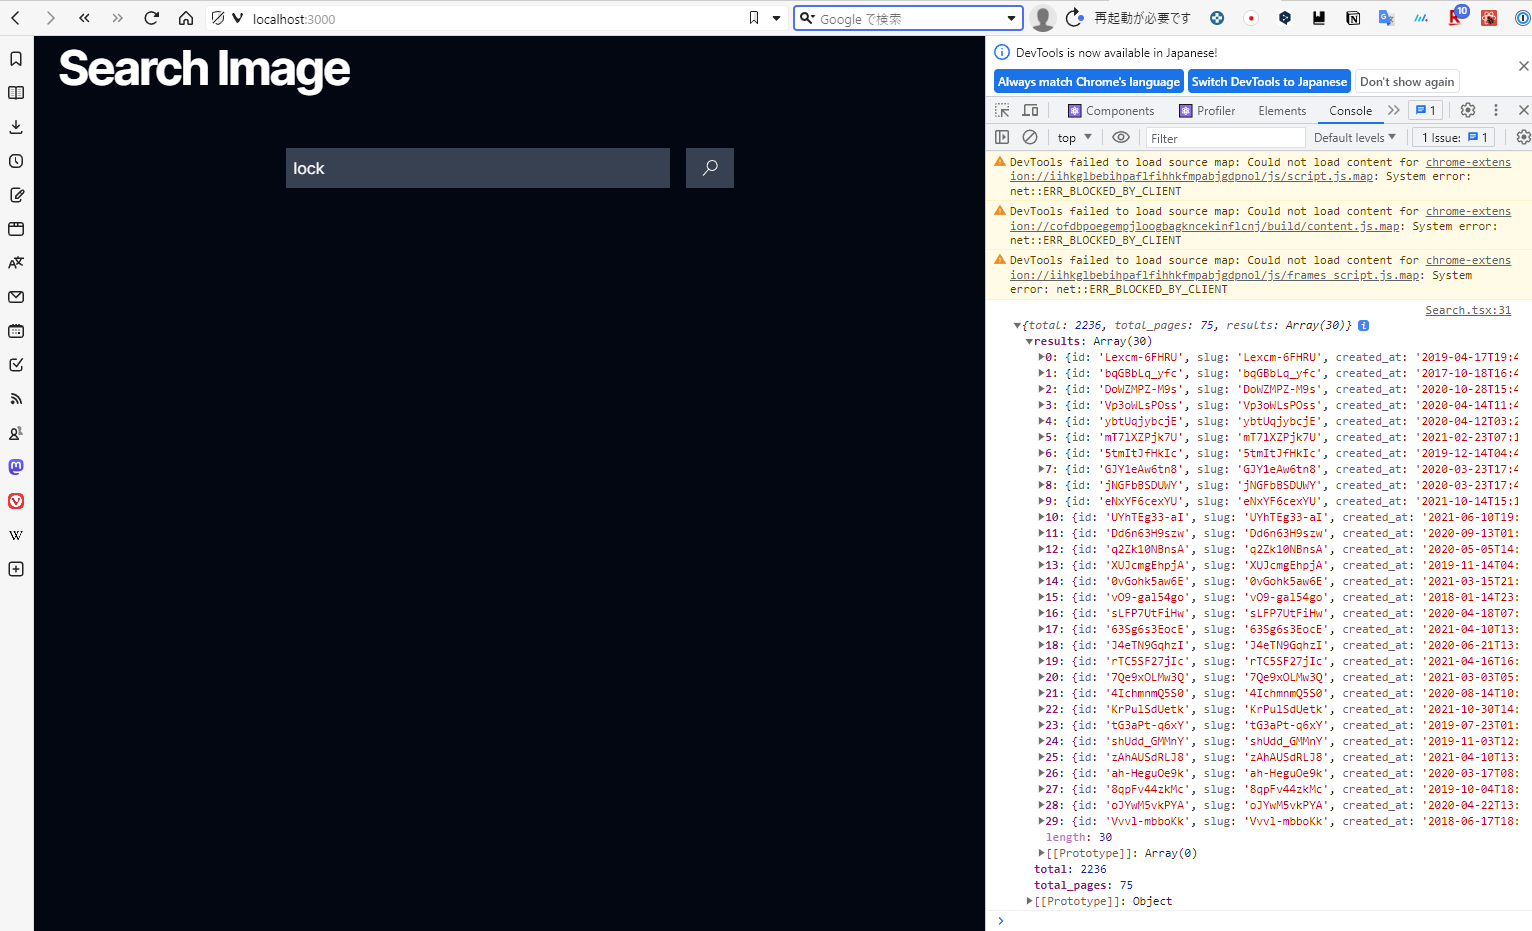
6:ブラウザーでhttp://localhost:3000にアクセスします。
画面に検索入力欄が表示されます。
適当なキーワードを入力してアイコンを押します。すると開発ツールのコンソールに検索結果が表示されます。
※画面にはまだ写真は表示されません。表示のための処理を実装していないためです。
検索結果を一覧表示する【P.204-】
1:写真一覧を表示するPhotoListコンポーネントを実装します。"lib/component/PhotoList.tsx"ファイルになります。
'use client';
import { Photo } from '@/lib/type';
import Image from 'next/image';
import { FunctionComponent } from 'react';
export const PhotoList: FunctionComponent<{ photos: Photo[] }> = ({
photos,
}) => {
return (
<div className="grid grid-cols-3 gap-4 w-[1200px] mx-auto">
{[0, 1, 2].map[7]columnIndex) => (
<div key={columnIndex}>
{photos.map((photo, photoIndex) => {
if (photoIndex % 3 === columnIndex) {
return (
… Continue reading}
</div>
);
};
※return直後のソース表示がおかしいので、以下の画像を参照ください。
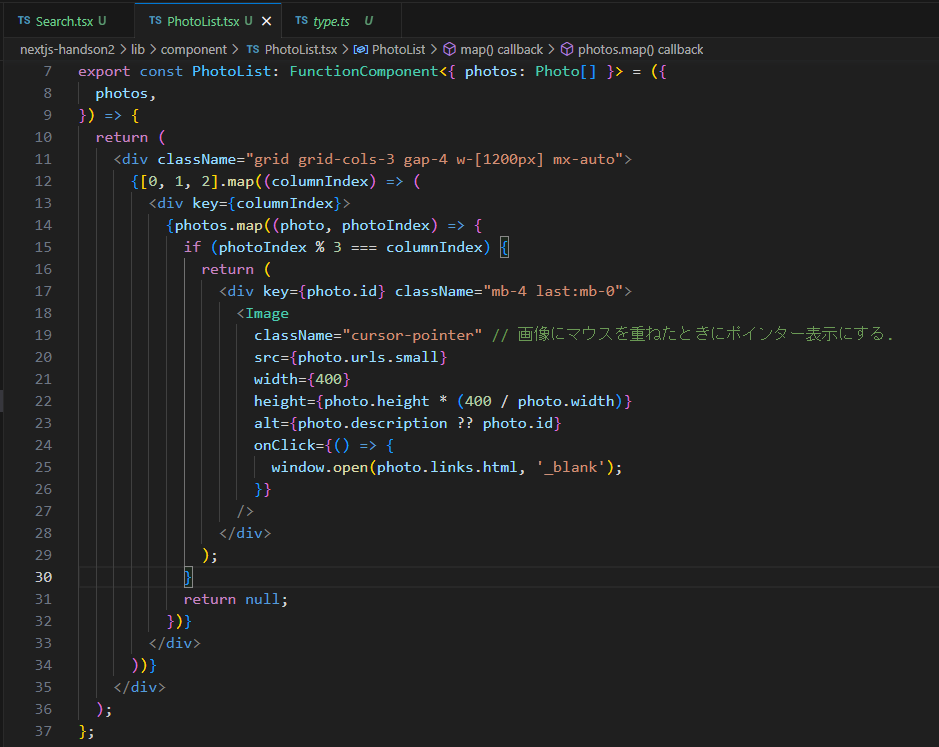
なお、ブラウザーの開発者ツールのコンソールに"Image is missing required “alt" property. Please add Alternative Text to describe the image for screen readers and search engines."というエラーメッセージが多発しましたので、altのところを若干修正しました。
2:検察中にローディング表示するために、Loadingコンポーネントを作成します。"lib/component/Loading.tsx"ファイルになります。
'use client';

import { FunctionComponent } from 'react';
import { VscLoading } from 'react-icons/vsc';

export const Loading: FunctionComponent = () => {
  return (
    <div className="h-96 flex justify-center">
      <VscLoading
        className={`animate-spin text-gray-400 text-4xl h-auto my-auto`}
      />
    </div>
  );
};
animate-spinは要素を回転させるクラスです。
3:Searchコンポーネント内にPhotoLoistコンポーネントを組み込みます。
“lib/component/Search.tsx"ファイルを編集します。
'use client';

import { Photo, PhotoSearchResponse } from '@/lib/type';
import { FunctionComponent, useState, useTransition } from 'react';
import { VscSearch } from 'react-icons/vsc';
import { Loading } from './Loading';
import { PhotoList } from './PhotoList';

const PhotoListWrapper: FunctionComponent<{
  loading: boolean;
  searchedPhotos: Photo[] | null;
  randomPhotos: Photo[];
}> = ({ loading, searchedPhotos, randomPhotos }) => {
  if (loading) {
    return <Loading />;
  }
  if (searchedPhotos) {
    return <PhotoList photos={searchedPhotos} />;
  }
  return <PhotoList photos={randomPhotos} />;
};

export const Search: FunctionComponent<{
  randomPhotos: Photo[];
}> = ({ randomPhotos }) => {
  const [query, setQuery] = useState<string | null>(null);
  const [searching, setSearching] = useState(false);
  const [searchedPhotos, setSearchPhotos] = useState<Photo[] | null>(null);
  const [loading, startTransition] = useTransition();

  return (
    <div>
      <div className="my-8 flex justify-center">
        <input
          type="text"
          className="w-96 mr-4 p-2 bg-gray-700"
          value={query ?? ''}
          onChange={(e) => setQuery(e.target.value)}
        />
        <button
          className="bg-gray-700 py-2 px-4"
          onClick={async () => {
            setSearching(true);
            const response = await fetch(`http://localhost:3000/api/search`, {
              method: 'POST',
              body: JSON.stringify({ query }),
              headers: {
                'Content-Type': 'application/json',
              },
            });
            const json: PhotoSearchResponse = await response.json();
            //console.log(json);
            startTransition( () => {
              setSearchPhotos(json.results);
            });
            setSearching(false);
          }}
        >
          <VscSearch /> {/* 検索実行ボタンを表現するアイコン */}
        </button>
      </div>
      <PhotoListWrapper
        loading={searching || loading}
        searchedPhotos={searchedPhotos}
        randomPhotos={randomPhotos}
      />
    </div>
  );
};
4:"app/page.tsx"ファイルからSearchコンポーネントを呼び出しますが、呼び出し方が以前から変わったので修正します。
import { Search } from '@/lib/component/Search';
import { getRandomPhotos } from '@/lib/unsplash';

const Home = async () => {
  const randomPhotos = await getRandomPhotos();
  return (
    <div>
      <Search randomPhotos={randomPhotos} />
    </div>
  );
};

export default Home;
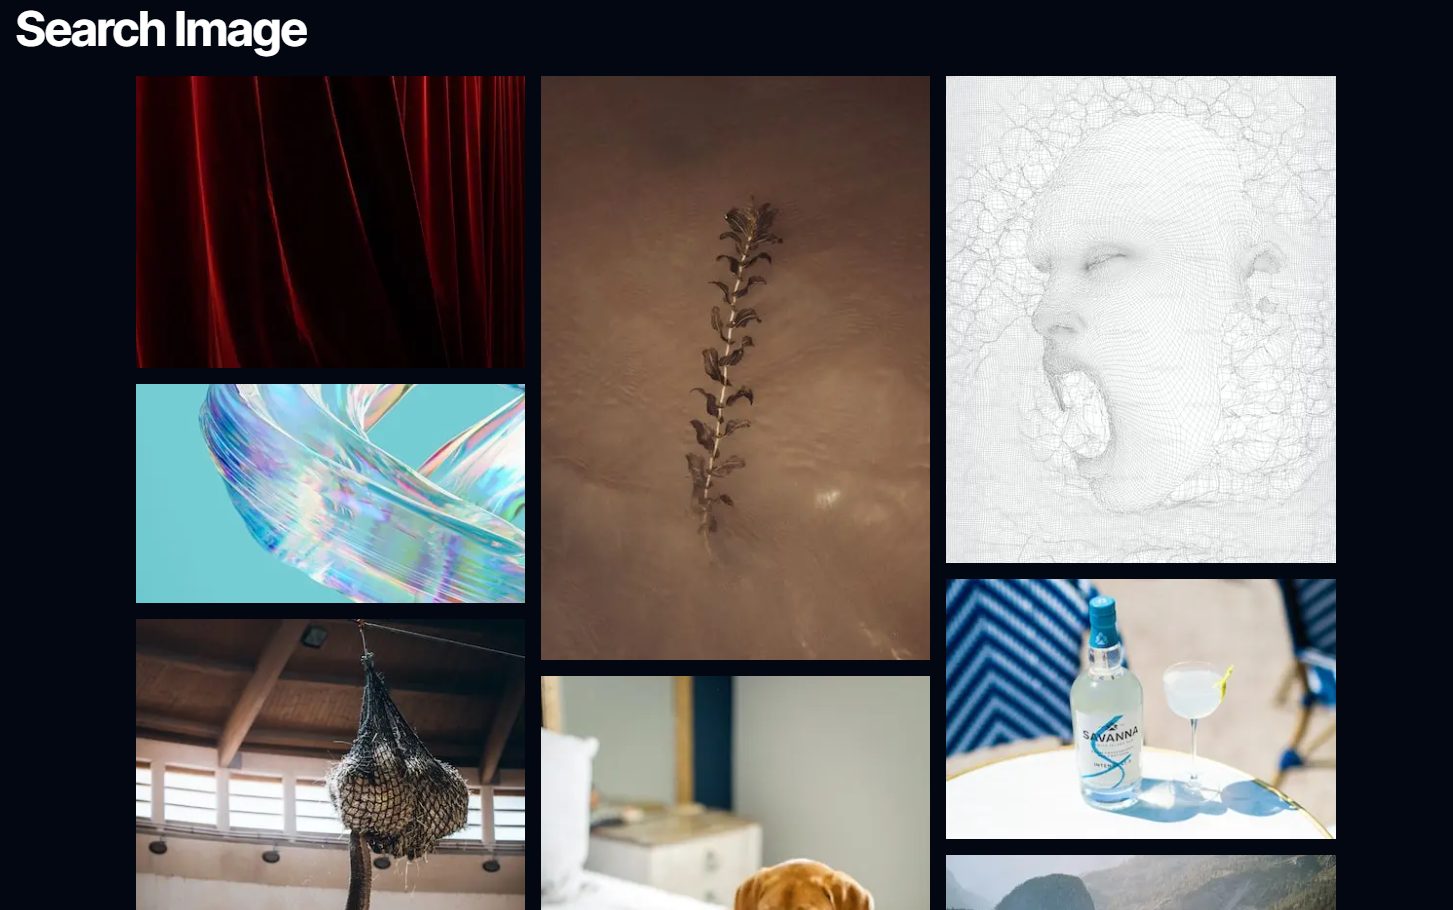
5:ブラウザーでhttp://localhost:3000にアクセスしてテストします。初期画面ではランダムに画像が一覧表示されます。
入力欄にキーワードを入力して検索ボタンを押すと、検索中のぐるぐるが表示され、検索が完了すると画像が一覧表示されます。
※現時点では[Enter]キーでは検索が走りません。

6:クライアント側では正常に動作しているように見えますが、まだ細かい修正が残っています。
サーバーコンポーネントであるHomeの処理中のローディング表示を実装します。
すでにローディング表示用のLoadingコンポーネントはあるので、これを用いることにします。
“app/layout.tsx"ファイル内のRootLayout()関数を修正します。「<Suspense fallback={'loading…’}>」を「<Suspense fallback={<Loading />}>」に変更します。
(略)
import { Loading } from '@/lib/component/Loading';

(略)

export default function RootLayout({
  children,
}: {
  children: React.ReactNode;
}) {
  return (
    <html lang="ja" className={inter.className}>
      <body>
(略)
        <main className={`pt-20 pb-8 bg-gray-950 min-h-screen`}>
          <Suspense fallback={<Loading />}>{children}</Suspense>
        </main>
      </body>
    </html>
  );
}
7:検索処理中のエラーをハンドリングします。
“lib/component/Search.tsx"ファイルのSearchコンポーネントを若干修正します。
try~catch~finallyに注目してください。
(略)

export const Search: FunctionComponent<{
  randomPhotos: Photo[];
}> = ({ randomPhotos }) => {
(略)
  return (
    <div>
      <div className="my-8 flex justify-center">
(略)
        <button
          className="bg-gray-700 py-2 px-4"
          onClick={async () => {
            try {
              setSearching(true);
              const response = await fetch(`http://localhost:3000/api/search`, {
                method: 'POST',
                body: JSON.stringify({ query }),
                headers: {
                  'Content-Type': 'application/json',
                },
              });
              // APIの呼び出し結果が失敗したら、例外を発生.
              if (!response.ok) {
                throw response;
              }

              const json: PhotoSearchResponse = await response.json();
              //console.log(json);
              startTransition( () => {
                setSearchPhotos(json.results);
              });
            } catch (error) {
              console.error(error);
              alert('検索中にエラーが発生しました');
              setSearchPhotos([]);
            } finally {
              setSearching(false);
            }
          }}
        >
          <VscSearch /> {/* 検索実行ボタンを表現するアイコン */}
        </button>
      </div>
(略)
    </div>
  );
};
エラーが発生した際の挙動を確認するために、一時的に"app/api/search/route.ts"ファイルのルートハンドラーを次のように変更します。これでリクエストに対して常にエラーを返すようになります。
export async function POST(request: Request) {
  const { query }: { query: unknown } = await request.json();

  return new Response(JSON.stringify({ message: 'server error' }), {
    status: 500,
    headers: {
      'Content-Type': 'application/json',
    },
  });
}
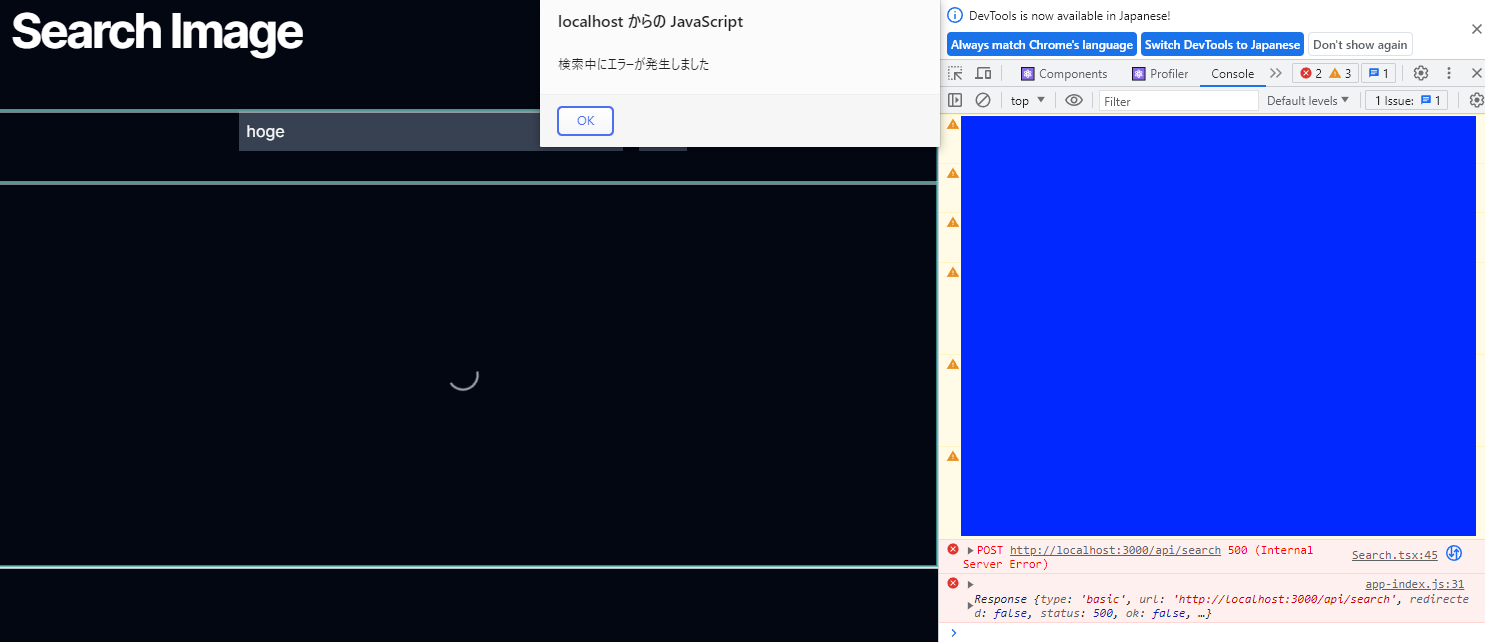
テスト後は元に戻してください。
8:App Routerのエラーハンドリング機能を利用して、サーバーコンポーネントのエラーハンドリングを実装します。
次の"app/error.tsx"ファイルを作成します。
'use client';

import { FunctionComponent, useEffect } from 'react';
import { VscRefresh } from 'react-icons/vsc';

const Error: FunctionComponent<{ error: Error; reset: () => void }> = ({
  error,
  reset,
}) => {
  useEffect( () => {
    console.error(error);
  }, [error]);
  return (
    <div className="w-60 mx-auto py-12">
      <div className="text-2xl font-bold mb-4">エラーが発生しました.</div>
      <div className="text-center">
        <button
          className="bg-gray-700 py-2 px-4 text-2xl"
          onClick={() => reset()}
        >
          <VscRefresh />
        </button>
      </div>
    </div>
  );
};

export default Error;
テストするには、一時的に"app/page.tsx"ファイルを次のようにします。
const Home = async () => {
  throw Error('test error');
};
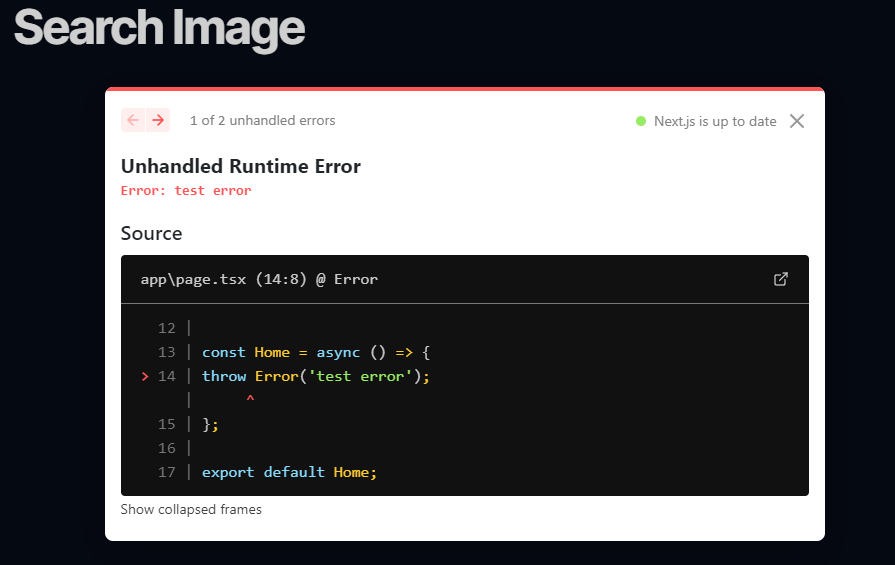
テストが終わったら元に戻します。
以上で完成になります。
おわりに
References
| ↑1 | 「テストページ1」と「テストページ2」というページを作成して、ドラッグする形でテーブルに追加したわけではありません。こうやってしまうと、後でデータベースからブロックを取得する際に手間取ります。 |
|---|---|
| ↑2 | 後述しますが、バージョン2.2.3に固定しないと書籍のサンプルコードが動きません。 |
| ↑3 | うまくいかなければ、パッケージをアンインストールしてから、バージョン固定でインストールしてみてください。VS Codeの再起動をお忘れなく。 |
| ↑4 | テストページ1内に別のページがリンクされているわけではありません。 |
| ↑5 | post) => ( <div className={styles.post} key={post.id}> (略) </div> |
| ↑6 | columnIndex) => ( <div key={columnIndex}> {randomPhotos.map((photo, photoIndex) => { if (photoIndex % 3 === columnIndex) { return ( <div key={photo.id} className="mb-4 last:mb-0"> <Image src={photo.urls.small} width={400} height={photo.height * (400 / photo.width)} alt={photo.description} /> </div> ); } })} </div> |
| ↑7 | columnIndex) => ( <div key={columnIndex}> {photos.map((photo, photoIndex) => { if (photoIndex % 3 === columnIndex) { return ( <div key={photo.id} className="mb-4 last:mb-0"> <Image className="cursor-pointer" // 画像にマウスを重ねたときにポインター表示にする. src={photo.urls.small} width={400} height={photo.height * (400 / photo.width)} //alt={photo.description} alt={photo.description ?? photo.id} onClick={() => { window.open(photo.links.html, '_blank'); }} /> </div> ); } return null; })} </div> |